Category: UTV Gear

  • What Does a Failing Can-Am X3 Drive Belt Sound Like?

    What Does a Failing Can-Am X3 Drive Belt Sound Like?

    One of the most common noises you may hear is a high-pitched squealing or screeching sound, especially when accelerating or shifting gears. This sound is usually caused by the belt slipping on the clutch or pulley, due to worn or damaged surfaces.

    Whats the best CamAm belt

    Buy The Right CanAm Belt with our guide

    As an avid Can-Am X3 rider, you rely on your UTV to provide you with an exhilarating and safe off-road experience. However, even the best equipment can experience wear and tear over time, especially if you push your X3 to the limits. One of the most critical components of your X3 is the drive belt, which transfers the power from the engine to the transmission and wheels. If your drive belt is failing, you may experience a variety of symptoms, including strange noises, performance issues, and potential damages. In this article, we will discuss what a failing Can-Am Maverick X3 drive belt sounds like, and how to diagnose and fix the issue.

    Symptoms of a Failing Can-Am X3 Drive Belt

    Before we dive into the specific sounds of a failing drive belt, let’s first review some common symptoms that may indicate an issue with your belt:

    • Reduced acceleration and top speed
    • Difficulty shifting gears or engaging the clutch
    • Burning smell or smoke from the engine or exhaust
    • Visible wear or damage on the belt or clutch components
    • Unusual vibrations or jerking movements while driving
    • Loud squealing, screeching, or grinding noises

    If you experience any of these symptoms, you should inspect your drive belt and related components immediately. Ignoring the issue can lead to further damages and costly repairs.

    What a Failing Can-Am X3 Drive Belt Sounds Like

    Now, let’s focus on the sounds of a failing drive belt. One of the most common noises you may hear is a high-pitched squealing or screeching sound, especially when accelerating or shifting gears. This sound is usually caused by the belt slipping on the clutch or pulley, due to worn or damaged surfaces. The slipping can also generate heat, which can further damage the belt and other components. If you continue to drive with a slipping belt, you may also hear a grinding or rattling sound, which indicates that the belt is shredding or breaking apart.

    Another sound you may hear from a failing drive belt is a loud popping or snapping sound, similar to a gunshot. This sound is usually caused by the belt breaking under high stress or tension, such as during a sudden acceleration or high-speed maneuver. A broken belt can cause significant damage to the engine, transmission, and other parts, and can even cause a loss of control or accident.

    How to Diagnose and Fix a Failing Can-Am X3 Drive Belt

    If you suspect that your drive belt is failing, you should stop driving immediately and inspect the belt and related components. Here are some steps you can take to diagnose and fix the issue:

    1. Check the belt for wear and damage, such as cracks, fraying, or glazing. Replace the belt if it shows any signs of wear, even if it hasn’t failed yet.
    2. Check the clutch components for wear and damage, such as worn or damaged sheaves, rollers, or bushings. Replace or repair any damaged parts.
    3. Check the belt tension and alignment, using a belt tension gauge and alignment tool. Adjust the tension and alignment as needed, following the manufacturer’s specifications.
    4. Check the air intake and exhaust system for any obstructions or damages that may cause overheating or excessive strain on the belt. Clear any obstructions and repair any damages.
    5. Test drive the X3 and listen for any abnormal noises or performance issues. If the issue persists, consult a professional mechanic or dealer for further diagnosis and repair.

    By following these steps and maintaining your drive belt and related components regularly, you can ensure a safe and reliable off-road experience with your Can-Am X3. Don’t let a failing drive belt ruin your ride

    Related Questions About Can-Am X3 Drive Belts

    Can I Replace a Can-Am Drive Belt Myself?

    Yes, you can it ain’t rocket surgery. You can swap out a Can-Am drive belt yourself. No need to fork over your hard-earned cash to a mechanic. Just grab your tools and get to work.

    How Do I Know My Can-Am X3 CVT Belt Is Worn?

    One of the most common injuries that X3 and riders face is a worn-out drive belt. You check for glassy sides of the belts. Also, sluggish acceleration or jumping suddenly can be a sign of a worn belt

    How Long do Can-Am X3 drive belts last?

    When it comes to the Can-Am X3, one question that always seems to be on people’s minds is just how long that drive belt can hold out. Will it last you for hundreds of miles of trail riding, or is it more likely to give out on you just when you’re starting to hit your stride?

    Why do X3 belts break?

    X3 belt breakage can be attributed to several reasons, including overloading, harsh riding conditions, poor maintenance, or manufacturing defects. Overloading the vehicle or carrying excessive weight can strain the belt, causing it to fail. Similarly, riding in harsh conditions like extreme heat or dust can accelerate belt wear and reduce its lifespan. Lack of maintenance, such as not keeping the belt clean or ignoring signs of wear, can also lead to belt breakage. In rare cases, manufacturing defects may cause premature belt failure.

    What does a failing drive belt sound like?

    X3 belt breakage is a problem that can have several culprits. It could be due to overloading the vehicle with too much weight or putting it through the wringer in harsh riding conditions. Riding in extreme heat or thick clouds of dust can speed up the wear and tear on the belt, causing it to fail sooner. Neglecting to keep the belt clean or ignoring warning signs of wear and tear can also lead to breakage. And, in some rare instances, defects in the manufacturing process may cause the belt to fail before its time.

    How do you break in a new X3 belt?

    If you want to keep that X3 of yours runnin’ smooth and strong, you gotta give that belt the break-in it deserves. Don’t go slammin’ down the pedal and expect everything to work like a charm. No, sir. Take it easy for the first 5 to 10 miles, keep it in low gear if you got it, and vary them speeds. If you ain’t got low gear, take it moderate for 50 miles. And don’t forget, it ain’t just about the miles. Keep them engine RPMs low and steady, and you’ll be good to go.

    Why do my belts keep ripping?

    Why do my Can-Am drive belts keep ripping? Well, it could be due to overloading the vehicle or carrying too much weight, harsh riding conditions such as extreme heat or dust, poor maintenance, or even manufacturing defects. Take good care of your belt and avoid straining it, and you’ll have fewer problems.

    How much does it cost to get a drive belt replaced?

    If you’re handy enough, you can replace your X3 drive belt for less than two hundred bucks. Just grab a new belt for around 150 and some tools, if you don’t already have some, for 30 bucks, and you’re good to go.

    Should you wash a Can-Am CVT belt?

    Washing a new drive belt before installation is a hotly debated topic. But if you insist on giving it a bath, use warm, soapy water and let it air dry before you slap it on.

    Are Can-Am X3 belts directional?

    New belts don’t give a damn about direction, but used ones sure do. Directional arrows on some belts are just a reminder to put it back on the same way if you ever take it off. To prolong your belt’s life, it’s wise to always run it in the same direction.

    Can you drive with a worn Can-Am drive belt?

    Can you drive with a worn Can-Am drive belt? Well, you can, but it’s like walking around with a ticking time bomb in your pocket. You never know when it’s going to go off and leave you stranded in the middle of nowhere. So, if you value your time and sanity, it’s best to replace that worn belt before it’s too late.

    What happens if you don’t change your Can-Am drive belt?

    Well, friend, if you don’t change your Can-Am drive belt, you’ll eventually find yourself stranded in the middle of nowhere with a busted belt and a sour mood. A worn-out belt can break unexpectedly, leaving you high and dry on the trail or in the field. Not to mention, a damaged belt can cause other issues with your vehicle’s performance, leading to costly repairs down the road. So, don’t be a fool – keep that drive belt fresh and enjoy your ride without any unnecessary headaches.

    Will a broken Can-Am drive belt destroy my engine?

    No, it won’t destroy your engine. The rev limiter will kick in and you may get a light on your dash. Just shut her down and clean out the old drive belt and replace it with a new belt. Disconnect the battery to clear the dash light then reconnect it and get on with your day.

    Can you spray wd40 on X3 belt?

    Don’t do that WD40 is a lubricant and your UTVs drive belt works with friction applied to the belt. A lubricant reduces friction and would defeat the purpose of the belt.

  • Can You Drive with a Worn Can-Am X3 Drive Belt?

    Can You Drive with a Worn Can-Am X3 Drive Belt?

    Can you drive with a worn Can-Am X3 drive belt? 

    Technically, yes, you can. However, doing so is akin to casually strolling around with a ticking time bomb in your pocket. The uncertainty of when it might explode is a constant concern, potentially leaving you stranded in an inconvenient location, possibly far from any assistance.

    A worn Can-Am drive belt can manifest in various ways, such as reduced vehicle performance, unusual noises, or even sudden breakdowns. These symptoms can escalate quickly, turning a leisurely ride into a stressful situation. Moreover, a worn belt can cause additional damage to other components of your vehicle, leading to more extensive repairs and higher costs.

    Whats the best CamAm belt

    See Our Reccomendation for the best CanAm CVT Belt

    Belt Replacement is highly recommended before it reaches the point of failure

    Therefore, if you value your time, peace of mind, and the overall health of your Can-Am Maverick, it’s highly recommended to replace a worn belt before it reaches the point of failure. Regular maintenance and inspections can help identify wear and tear early, allowing you to address the issue proactively.

    Remember, belt maintenance is always better than reactive repairs.

     It not only saves you time and money but also ensures that your adventures on your Can-Am vehicle remain uninterrupted and enjoyable. So, don’t wait for that worn belt to give out; replace it in due time and enjoy a smooth, worry-free ride.

    Related Questions About Can-Am X3 Drive Belts

    Can I Replace a Can-Am Drive Belt Myself?

    Yes, you can it ain’t rocket surgery. You can swap out a Can-Am drive belt yourself. No need to fork over your hard-earned cash to a mechanic. Just grab your tools and get to work.

    How Do I Know My Can-Am X3 CVT Belt Is Worn?

    One of the most common injuries that Maverick X3 riders face is a worn-out drive belt. You check for glassy sides of the belts. Also, sluggish acceleration or jumping suddenly can be a sign of a worn belt

    How Long do Can-Am X3 drive belts last?

    When it comes to the Can-Am X3, one question that always seems to be on people’s minds is just how long that drive belt can hold out. Will it last you for hundreds of miles of trail riding, or is it more likely to give out on you just when you’re starting to hit your stride?

    Why do X3 belts break?

    X3 belt breakage can be attributed to several reasons, including overloading, harsh riding conditions, poor maintenance, or manufacturing defects. Overloading the vehicle or carrying excessive weight can strain the belt, causing it to fail. Similarly, riding in harsh conditions like extreme heat or dust can accelerate belt wear and reduce its lifespan. Lack of maintenance, such as not keeping the belt clean or ignoring signs of wear, can also lead to belt breakage. In rare cases, manufacturing defects may cause premature belt failure.

    What does a failing drive belt sound like?

    X3 belt breakage is a problem that can have several culprits. It could be due to overloading the vehicle with too much weight or putting it through the wringer in harsh riding conditions. Riding in extreme heat or thick clouds of dust can speed up the wear and tear on the belt, causing it to fail sooner. Neglecting to keep the belt clean or ignoring warning signs of wear and tear can also lead to breakage. And, in some rare instances, defects in the manufacturing process may cause the belt to fail before its time.

    How do you break in a new X3 belt?

    If you want to keep that X3 of yours runnin’ smooth and strong, you gotta give that belt the break-in it deserves. Don’t go slammin’ down the pedal and expect everything to work like a charm. No, sir. Take it easy for the first 5 to 10 miles, keep it in low gear if you got it, and vary them speeds. If you ain’t got low gear, take it moderate for 50 miles. And don’t forget, it ain’t just about the miles. Keep them engine RPMs low and steady, and you’ll be good to go.

    Why do my belts keep ripping?

    Why do my Can-Am drive belts keep ripping? Well, it could be due to overloading the vehicle or carrying too much weight, harsh riding conditions such as extreme heat or dust, poor maintenance, or even manufacturing defects. Take good care of your belt and avoid straining it, and you’ll have fewer problems.

    How much does it cost to get a drive belt replaced?

    If you’re handy enough, you can replace your X3 drive belt for less than two hundred bucks. Just grab a new belt for around 150 and some tools, if you don’t already have some, for 30 bucks, and you’re good to go.

    Should you wash a Can-Am CVT belt?

    Washing a new drive belt before installation is a hotly debated topic. But if you insist on giving it a bath, use warm, soapy water and let it air dry before you slap it on.

    Are Can-Am X3 belts directional?

    New belts don’t give a damn about direction, but used ones sure do. Directional arrows on some belts are just a reminder to put it back on the same way if you ever take it off. To prolong your belt’s life, it’s wise to always run it in the same direction.

    Can you drive with a worn Can-Am drive belt?

    Can you drive with a worn Can-Am drive belt? Well, you can, but it’s like walking around with a ticking time bomb in your pocket. You never know when it’s going to go off and leave you stranded in the middle of nowhere. So, if you value your time and sanity, it’s best to replace that worn belt before it’s too late.

    What happens if you don’t change your Can-Am drive belt?

    Well, friend, if you don’t change your Can-Am drive belt, you’ll eventually find yourself stranded in the middle of nowhere with a busted belt and a sour mood. A worn-out belt can break unexpectedly, leaving you high and dry on the trail or in the field. Not to mention, a damaged belt can cause other issues with your vehicle’s performance, leading to costly repairs down the road. So, don’t be a fool – keep that drive belt fresh and enjoy your ride without any unnecessary headaches.

    Will a broken Can-Am drive belt destroy my engine?

    No, it won’t destroy your engine. The rev limiter will kick in and you may get a light on your dash. Just shut her down and clean out the old drive belt and replace it with a new belt. Disconnect the battery to clear the dash light then reconnect it and get on with your day.

    Can you spray wd40 on X3 belt?

    Don’t do that WD40 is a lubricant and your UTVs drive belt works with friction applied to the belt. A lubricant reduces friction and would defeat the purpose of the belt.
  • Storage Ideas for Your Polaris RZR 

    Every Polaris RZR or UTV owner knows how challenging it is to store all the UTV essential items needed for a fun and safe ride. From emergency kits, tools, and water jugs – you need space! To make sure your outdoor experience isn’t hampered by clutter, here are some useful storage ideas that will help you stay organized while on the trail.

    Polaris RZR Bed Storage Ideas

    Polaris RZR Rear Storage Box

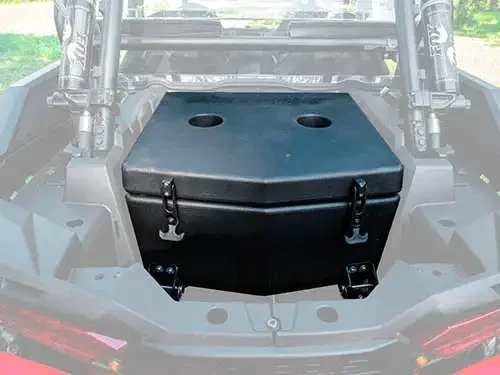
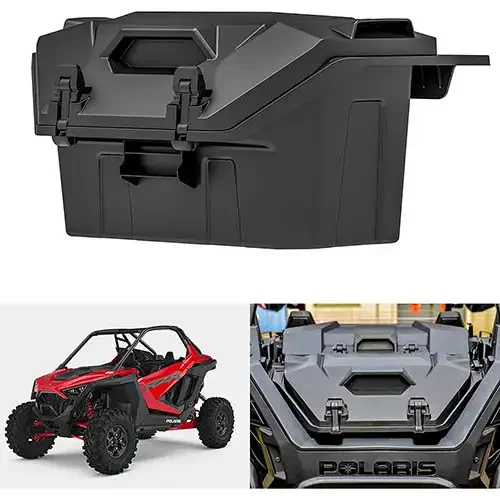
    Accessorize your Polaris RZR side by side with a storage box, designed to mount on the inside bed of your vehicle. Constructed from long-lasting materials such as plastic or metal and specially crafted to withstand the knocks and bumps of off-road adventures, these boxes add extra storage space without compromising style. Adding a storage box to your RZR can be one of the best decisions you make. Many even come with locking mechanisms for added security, so you and your belongings are safe during transit or off-road adventures. Not only is it convenient but also increases the usability and versatility of your vehicle – what more could you ask for?

    UTV Storage UTV Gear, Tips & Tricks

    Polaris RZR Bed Storage on Amazon (Check prices on my Amazon affiliate link)

    Polaris RZR Rear Bed Storage Bag

    Carry more on your next off-road adventure with durable and flexible rear bed UTV side by side storage bags for Polaris RZR vehicles. Specifically designed to attach to the back of the vehicle, these bags are made from sturdy materials such as nylon or canvas that can endure any challenging condition you may encounter while off-roading. Take all your gear, tools, and other items along without worrying about them getting damaged during transit! Not only do rear bed bags for RZRs offer more storage space- they also help to protect the back of your vehicle from dings and scratches!

    Side by side storage bags

    Polaris Rear Bed Bags (Check prices on my Amazon affiliate link)

    Polaris RZR Cargo Boxes

    The Polaris RZR, also known as a side-by-side or SxS, can be further enhanced with UTV cargo boxes. These practical accessories are typically attached to the back of your vehicle – either on its bed or rack system – and provide weatherproof compartments for safekeeping of essential items such as tools and gear. Ultimately, they offer you an efficient way to maximize storage space while being able to enjoy your adventure worry-free!

    On your UTV, there is a wide selection of cargo boxes to choose from that can fit any type of storage needs. Whether you opt for the durable hard-sided box crafted out of plastic or aluminum, or something more flexible like soft-sided bags and roll cages with adjustable capacity – all these options will provide adequate protection. And when not in use, they are easily removable without leaving behind clutter!

    For the safe and secure installation of your UTV cargo box on your Polaris RZR, be sure to adhere to all manufacturer instructions. This may include attaching brackets directly onto the frame or installing a specifically designed rack system for optimal support. Furthermore, pay close attention when mounting and balancing the box in order ensure an even weight distribution during any driving activity.

    Transform your Polaris RZR adventure with a UTV cargo box! This accessory offers an effortless and secure way to store gear, tools and other items while traversing the trails. With a UTV cargo box you’ll have the peace of mind knowing that all your equipment is safe & sound.

    Polaris Coolers

    The Polaris RZR coolers are one of the top must-have accessories for your side by sides. Whether you are out on scorching July trails or winter excursions, these coolers will ensure that all of your drinks and snacks remain chilled to keep up with those long rides. Not only can it be used as a cooler but also as an extra storage box in case you need some more space! Easily mount them onto the back of any RZR to enjoy convenient access while on the trail! RZR coolers are crafted with resilient materials like plastic and metal, ensuring that your beverages remain ice cold for longer periods of time. Plus, these coolers come equipped with defenses to protect your items while you’re on the move – locking mechanisms keep everything safe. Make sure you bring a RZR cooler along when heading out in your vehicle; it will be an essential companion on any journey!

    Outfitting your Polaris RZR with a UTV cooler allows you to bring along extra storage and supplies on the trail. Not only will they provide secure transport of food and beverages, but their temperature-controlled insulation can keep items cold for extended excursions – giving you peace of mind during long journeys!

    utv cooler

    Polaris RZR Coolers on Amazon (Check prices on my Amazon affiliate link)

    Other storage for Polaris RZR

    Polaris RZR between seat storage

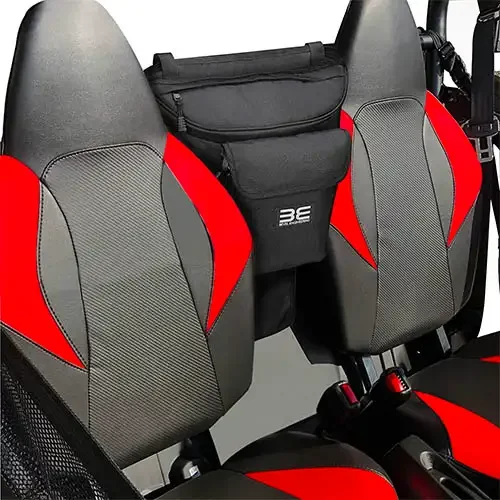
    Are you looking for extra storage options in your UTV? Don’t fret – there are plenty of ways to increase the available space. One great solution is installing Polaris RZR between seat storage bags, which offer maximum convenience and accessibility. These bags fit easily onto your side by side vehicle’s seats and provide ample room for all your belongings! Add convenience and practicality to your Polaris vehicle with a durable seat bag. Constructed of robust nylon or canvas fabric, these bags come fully-equipped with pockets and compartments that allow you to easily organize accessories like tools, clothing items, snacks and more. Plus, its reflective accents increase visibility while on the road – making it an ideal addition for every driver’s needs!

    utv between the seat storage

    Polaris RZR Between Seat Storage Bags (Check prices on my Amazon affiliate link)

    Polaris RZR Door Bags

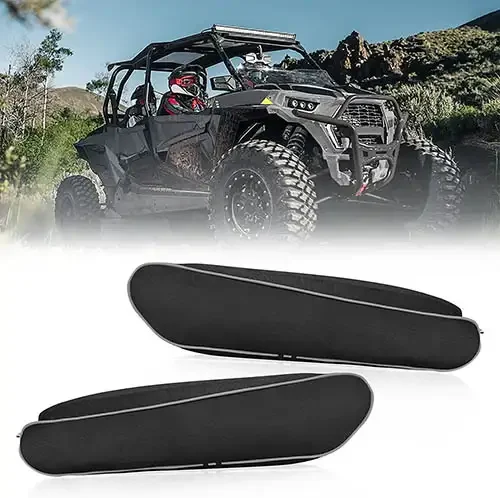
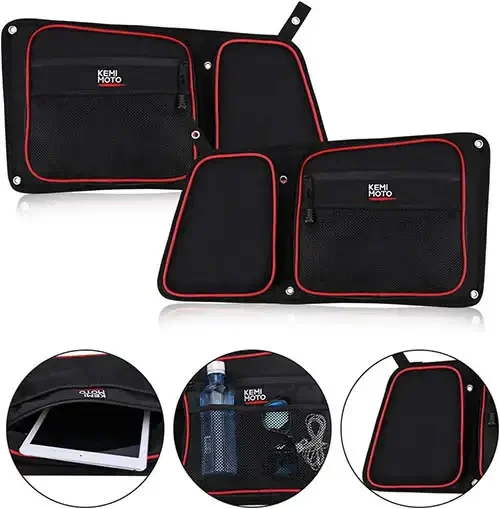
    If you’re seeking to enhance the storage capacity of your RZR without removing any panels or making modifications, then door bags are an ideal choice for you. Strapped securely onto your doors with velcro straps, these compartments provide a convenient way to store necessary items like tools and water bottles that cannot fit inside the vehicle itself. Polaris RZR door bags are an invaluable accessory for your side by side. Not only do they provide ample storage space, but their pockets and compartments make it easy to keep small items organized while the reflective accents increase visibility in low light settings. Furthermore, these bags protect your vehicle’s doors from scratches and dings – a perfect way to preserve the aesthetic of your ride! With all that said, you can’t go wrong adding a Polaris RZR door bag to your vehicle.

    RZR door bags

    Polaris RZR Door Bags (Check prices on my Amazon affiliate link)

    Overhead Bags

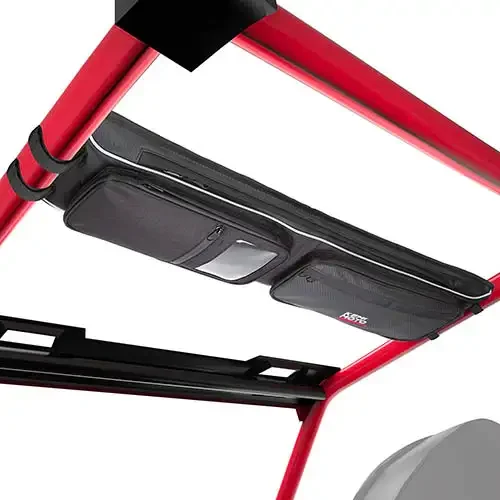
    Does your RZR require additional storage? Look no further than the overhead RZR storage bags that attach to the roll cage of your side-by-side vehicle. This convenient and efficient gear solution has become a popular choice amongst offroaders who need easy access to their supplies while keeping them out of sight when not necessary. With extra space for tools, parts, and other items—overhead bags are sure to help you stay organized on dual sport adventures! An overhead bag for a RZR doesn’t just add to your vehicle’s storage, it can also help you stay organized with compartments and pockets. And if the stars align in your favor, there might even be reflective accents that will up its visibility! Furthermore, this versatile accessory helps free up space inside the cab of your ride so you’ll have enough room for all of life’s adventures. All things considered, adding an overhead bag for a RZR is bound to make driving more comfortable and efficient.

    Overhead utv bag storage

    Polaris RZR Overhead Bags (Check prices on my Amazon affiliate link)

    Final Thoughts on UTV Storage For Your Polaris RZR

    Investing in extra storage for your Polaris RZR brings a host of advantages. Here are just some of the benefits you’ll gain from enhancing your ride’s capacity:

    1. Enjoy the convenience of taking all the gear and equipment you need for your ride on an ATV without having to sacrifice anything or turn back! With additional storage space, you will be able to stay out longer and have a stress-free adventure – knowing that no matter what comes up, you’re prepared. Plus, it’s always more enjoyable when everything is there at your fingertips.
    2. Tidy up and maximize your storage options with the addition of some organizational solutions to your RZR. Finding what you need when you’re out on the trails will become easier, as well as having an overall tidier ride that won’t be bogged down by messiness or chaos. Invest in a few more storage systems today and experience less stress while adventuring tomorrow!
    3. With UTV cargo boxes and roof-mounted storage solutions, you can feel secure in the knowledge that your belongings are protected from potential theft or damage due to inclement weather. Not only does this create a safer ride for yourself but it also allows for peace of mind knowing that whatever gear has been stowed away is securely stored.
    4. Add storage to your RZR and immediately expand its use! Imagine having a cooler on hand for an outdoor picnic, or utilizing a cargo box for transporting tools. You’ve just opened the door of possibilities; now you can do more with your RZR than ever before. Go ahead, enjoy all that this vehicle has to offer – from leisurely activities to work endeavors – no matter where life takes you!

    Investing in storage for your Polaris RZR will make your rides more effortless, arranged, and secure – not to mention versatile. That way you can have a blast on all the escapades and adventures that await!

  • How do you use snatch block for a UTV winch?

    If you own a UTV equipped with a winch, knowing how to effectively use a snatch block can greatly enhance your recovery capability. A snatch block is a versatile pulley-like device that can change the direction of the winch cable, enabling you to create various rigging configurations. Let’s explore different ways you can use a snatch block with your UTV winch for efficient recoveries.


    snatch block

    Shop Snatch Blocks on Amazon


    1. Single Line Pull: For maximum pulling power, attach the snatch block to an anchor point away from the vehicle. This setup creates a straight-line pull, maximizing the force applied to the stuck vehicle.
    2. Redirect: When recovering a vehicle from an angle or around obstacles, attaching the snatch block to a fixed anchor point allows you to change the direction of the pull. Feed the winch cable through the snatch block, redirecting the force accordingly.
    3. Offset Anchoring: In situations where there are no suitable anchor points in a straight line with the stuck vehicle, the snatch block comes to the rescue. By using it to redirect the cable, you can create a pulling angle and recover the vehicle effectively.
    4. Securing a Winch Facing Downhill: When your UTV is on a slope facing downhill, using a snatch block enables you to change the direction of the pull. This adjustment makes the winching process safer and more efficient.
    5. Mechanical Advantage: One of the most significant advantages of a snatch block is its ability to increase the pulling power by creating a double line rigging. This setup effectively doubles the pulling capacity of your winch while reducing the load on the winch motor.

    These methods provide you with additional flexibility and mechanical advantage during recoveries. However, it’s essential to ensure you are familiar with your UTV’s winch system and follow proper safety precautions. Always refer to your winch manufacturer’s instructions for specific guidance on using a snatch block with your particular model.

    How to attach a snatch pulley block to a UTV

    We understand the importance of having the right recovery gear for your off-road adventures. A snatch block is an essential tool that should be part of your recovery gear kit. In this comprehensive guide, we will explain what a snatch block is, why you should use it, and how to use it effectively to enhance your winching capabilities.

    Ever wonder how to install a UTV winch?

    Learn what size winch to use for your UTV

    Understanding the Snatch Block

    A snatch block is a heavy-duty pulley that plays a vital role in reducing the load on your winch while you pull. It acts as a mechanical advantage, allowing you to increase your winch’s pulling capacity and giving you greater flexibility in different recovery scenarios. Whether you are dealing with tricky angles or challenging terrains, a snatch block can be a game-changer.

    The Benefits of Using a Snatch Block

    1. Enhanced Winch Capacity: By incorporating a snatch block into your winching setup, you can effectively double your winch’s pulling capacity. This is particularly useful when you encounter demanding recovery situations that require more power than your winch alone can provide.
    2. Expanded Pulling Options: Unlike relying solely on your winch, a snatch block offers you a wide range of pulling options. It enables you to pull from various angles instead of being limited to a straight-ahead pull. This versatility proves invaluable when faced with obstacles or when you need to navigate through challenging off-road conditions.

    Mastering the Use of a Snatch Block

    To make the most of your snatch block, it is essential to familiarize yourself with its proper usage. Follow these steps to ensure you are well-prepared when the need for recovery arises:

    1. Threading the Winch Cable: Start by threading your winch cable through the snatch block’s pulley, ensuring a secure and proper fit. This step sets the foundation for a successful recovery operation.
    2. Attaching the Snatch Block: Use sturdy hooks to attach the snatch block to the anchor loops on your vehicle. This ensures that the snatch block is firmly secured and ready for action.
    3. Reconnecting the Winch: After attaching the snatch block, reattach your winch to the tow ring on your vehicle. Ensure a tight and secure connection to maintain stability during the recovery process.
    4. Testing and Familiarizing: Before encountering an actual recovery situation, take the time to test your snatch block with different weights, ensuring that you never exceed its rated capacity. Experiment with various angles to understand how the snatch block performs in real-life scenarios.

    snatch block

    Check out our recommended snatch blocks


    UTV Winch

    Checkout the best-reviewed UTV winches on Amazon


    By incorporating a snatch block into your UTV winching operations, you can effectively tackle challenging recovery scenarios and maximize the capabilities of your winch system. Remember to prioritize safety and proper technique to ensure successful recoveries.

  • Can I Replace a Polaris Drive Belt Myself

    Can I Replace a Polaris Drive Belt Myself

    Before replacing your belt, see our Best Polaris RZR Belt guide to choose the right one.

    Yes, you can it ain’t rocket surgery. You can swap out a Polaris drive belt yourself. No need to fork over your hard-earned cash to a mechanic. Just grab your tools and get to work.

    Now, before you dive in, you gotta know what you’re looking for. How do you know when it’s time to replace that belt? Well, first off, keep an eye on the wear and tear. If it’s starting to crack or fray or has glassing it’s time to swap it out.

    Buy the right belt with our buying guide on finding your Polaris RZR belt

    How To Replace The Drive Belt On Your Polaris RZR

    Materials:

    Whats the best RZR belt UTV Gear, Tips & Tricks

    Instructions:

    1. Use the Tusk flex drive clutch cover removal tool to get into hard-to-reach places. If you don’t have this tool, use a 5/16 inch socket.
    2. Remove the bolt from the bracket to get the air duct out of the way.
    3. Take out all the screws in the clutch cover and remove it.
    4. Use the drive belt removal tool to separate the clutch sheaves and loosen the tension on the belt.
    5. Grab the belt from the bottom and work it off the driven clutch.
    6. Rotate the clutch to help pop the belt off and move it around the primary clutch.
    7. Install the new belt the same way the old one was installed.
    8. Inspect the old belt by comparing it to a new belt. Look for uneven wear, frayed cords, visible damage, glazing, or hourglassing.
    9. Clean the clutches by removing any pieces or cords stuck on them.
    10. Use compressed air to clean off the dust on the clutches, wear a dust mask, and do this outside.
    11. Inspect the clutch sheaves for damage or glazing by running your fingernail across them. If you feel any deep grooves, replace the clutch. If you see a shiny or dark surface on the sheaves, use scotch brite to clean them up.
    12. Wipe everything down with a rag.

    Note: scuff up the clutch sheaves to avoid running a new belt on a glazed surface. Belt lifespan depends on how the machine is driven, so avoid high heat and install a belt temperature sensor if needed.

    Conclusion

    So there you have it, amigo. Don’t be afraid to take on this drive belt inspection and replacement yourself. You’ll save some cash and feel like a real grease monkey in the process. And when it comes to Polaris off-road vehicles like the RZR, this drive belt replacement process is pretty much the same.

    Related Questions About Polaris RZR Drive Belts

    How Do I Know My Polaris RZR CVT Belt Is Worn?

    One of the most common injuries that RZR riders face is a worn-out drive belt. You check for glassy sides of the belts. Also, sluggish acceleration or jumping suddenly can be a sign of a worn belt

    How Long do Polaris RZR drive belts last?

    When it comes to the Polaris RZR, one question that always seems to be on people’s minds is just how long that drive belt can hold out. Will it last you for hundreds of miles of trail riding, or is it more likely to give out on you just when you’re starting to hit your stride?

  • Should you wash a Polaris CVT belt? Yes and Here’s How.

    Are you an avid UTV enthusiast who wants to ensure that your ride performs at its best but you wonder Should You Wash A Polaris CVT Belt? As a UTV owner, it’s essential to understand the importance of regular maintenance and cleaning, especially when it comes to the CVT drive belt. We dive into the essential task of cleaning the CVT drive belt to optimize performance and prolong its lifespan.

    Why Cleaning Your UTV’s CVT Drive Belt Matters

    The CVT drive belt plays a critical role in transferring power from the engine to the wheels of your UTV, enabling it to conquer various terrains. Over time, however, dirt, dust, and debris can accumulate between the layers of the drive belt, leading to decreased performance and potential belt failure. To avoid such issues, regular cleaning is necessary to maintain your UTV’s performance and prevent premature wear.

    After washing, make sure you’re using a quality belt—our RZR belt recommendations show which brands last longest.

    Step-by-Step Guide to Cleaning Your UTV’s CVT Drive Belt

    Step 1: Gather the Required Tools to clean your UTV drive belt

    Before getting started, make sure you have the necessary tools at hand. You’ll need a soft-bristle brush, a cleaning solution specifically designed for CVT belts, and a clean cloth. These tools will aid in effectively removing dirt and debris without causing any damage to the belt.

    Step 2: Remove the CVT Drive Belt Cover

    Begin by locating the CVT drive belt cover, usually situated near the engine compartment. Carefully remove the cover, ensuring not to misplace any screws or fasteners. This cover acts as a protective shield, guarding the belt against debris and contaminants.

    Can you wash a cvt belt UTV Gear, Tips & Tricks

    Step 3: Brush Off Loose Dirt and Debris

    With the CVT drive belt exposed, take the soft-bristle brush and gently brush off any loose dirt and debris from the surface of the belt. Ensure that you cover all areas of the belt, paying close attention to the crevices where debris tends to accumulate.

    Step 4: Apply the Cleaning Solution

    Next, it’s time to apply the CVT drive belt cleaner to the belt. Use the cleaning solution as directed, spraying it evenly and thoroughly across the entire belt. This step helps dissolve and loosen stubborn dirt and grime, preparing the belt for thorough cleaning.

    Step 5: Wipe Away Residue

    Take a clean cloth and gently wipe the drive belt to remove any remaining dirt or residue. Exercise caution not to apply excessive pressure or scrub too harshly, as this could potentially damage the belt. Ensure you wipe all sections of the belt until it appears clean and free from residue.

    Step 6: Visual Inspection for Wear or Damage to your CVT belt

    Once you are satisfied with the cleanliness of the drive belt, visually inspect it for any signs of wear or damage. Look out for cracks, fraying, or other visible issues that might indicate the need for a belt replacement. Addressing such problems promptly can prevent more extensive damage in the future.

    Step 7: Reinstall the CVT Drive Belt Cover

    Finally, carefully reinstall the CVT drive belt cover, ensuring it is securely in place. This cover serves as a protective barrier, shielding the belt from external contaminants and extending its overall lifespan. Take your time to fasten all the screws or fasteners correctly to maintain a tight and secure fit.

    Washing a RZR Belt

    Conclusion: Maintain Performance and Prolong Lifespan

    Regularly cleaning your UTV’s CVT drive belt is a crucial maintenance task that should not be overlooked. By following the step-by-step process outlined in this guide, you can effectively remove dirt, dust, and debris from the belt, ensuring optimal performance and longevity.

    Remember, a clean CVT drive belt translates to improved power transfer and enhanced UTV performance. It reduces the risk of belt failure and extends the lifespan of this critical component. Incorporate this cleaning routine into your UTV maintenance schedule to keep your ride running smoothly and conquer any terrain with ease.

    Are Polaris RZR belts directional?

    New belts don’t give a damn about direction, but used ones sure do. Directional arrows on some belts are just a reminder to put it back on the same way if you ever take it off. To prolong your belt’s life, it’s wise to always run it in the same direction.

  • Are Polaris RZR belts directional?

    Are Polaris RZR Belts Directional?

    Are Polaris RZR Belts Directional? Contrary to some beliefs, Polaris RZR belts are not directional. However, it’s recommended to install them with the label lettering facing the user for consistency. If a belt is removed and reinstalled during future maintenance, it should be reinstalled in the same direction to match the belt wear profile with the corresponding sheave profile.

    If you’re upgrading belts, read our Best RZR Belt Guide before installation.

    Whats the best RZR belt

    Learn what is the best Polaris belt?

    Conclusion

    In conclusion, while Polaris RZR belts are not directional, proper installation and maintenance are crucial for optimal vehicle performance. By following the guidelines provided in this article, you can ensure a longer lifespan for your belt and a smoother ride on your Polaris RZR.

    Remember, when it comes to maintaining your off-road vehicle, regular check-ups and timely replacements of parts like the drive belt can go a long way in ensuring a great riding experience.

    Related Questions About Polaris RZR Drive Belts

    Should you wash a Polaris CVT belt?

    Washing a new drive belt before installation is a hotly debated topic. But if you insist on giving it a bath, use warm, soapy water and let it air dry before you slap it on.

    Can you drive with a worn Polaris drive belt?

    Can you drive with a worn Polaris drive belt? Well, you can, but it’s like walking around with a ticking time bomb in your pocket. You never know when it’s going to go off and leave you stranded in the middle of nowhere. So, if you value your time and sanity, it’s best to replace that worn belt before it’s too late.

    Read more

  • Do you balance UTV Tires?

    Do you balance UTV tires?

    So you just bought a set of new UTV tires and you were wondering Do you balance UTV Tires? UTV tires can be balanced and the main reason you need to balance UTV tires is due to the high speeds and large acceleration/deceleration of your UTV. Most UTVs have a relatively high center of gravity, which means that if the front wheels are out of balance, it will be very noticeable. You may notice your steering wheel vibrating and making noise when you drive over rough roads or bumps.

    See out full roundup of the best UTV tires

    Learn more How long can I drive on unbalanced UTV Tires?

    Learn more What is the best UTV air compressor?

    What Is UTV Tire Balancing?

    Tire balancing is the process of adjusting a tire’s weight distribution so that it rotates smoothly on the rim of a wheel. The goal of this process is to ensure that a tire runs true and doesn’t wobble or become damaged over time.

    Tires spin at high speeds and can put out a lot of torque, so if one side of a tire carries more weight than another, it will tend to pull in that direction. This causes vibrations that can cause damage over time, especially if the imbalance goes unnoticed for too long.

    Balancing UTV tires UTV Gear, Tips & Tricks

    Why do you need to balance UTV tires?

    When you’re driving your UTV at 30+ mph, suddenly slowing down for a corner or avoiding an object will give your tires tremendous force that may twist the center area of your tire. An unbalanced tire can also cause premature wearing on one side as well as poor handling.

    Unbalanced SXS tires might be difficult to drive on. You’ll even feel the vibrations through the steering wheel as they begin to transfer continuously. The rim or tire’s faults are what are to blame for these vibrations.

    #1 The first consideration is how you plan to use these UTV tires.

    Or, to put it another way, what kinds of roads or trails will you be using? If you usually go on trails or paved roads, tire balancing is advised. Vibrations along the way won’t be pleasant because you may feel even the smallest shift in your car while driving on smooth roads.

    Trail riding can present the most challenging situations because it presents both speed and rough terrain. Sometimes you may be clipping along at 30 mph and then hit the brakes to cut a sharp corner. This puts tremendous stress on your tires and can lead to failure and unbalancing.

    UTV tire balancing beads UTV Gear, Tips & Tricks

    The alternate possibility is that you’re going to be driving in mud, or while rock climbing. If so, you’ll be restricted to driving at low speeds and spared the difficulties brought on by unbalanced UTV tires. We would still recommend balancing your tires even at lower speed just because let’s say you hit some mud at a slow speed and it cakes on the wheel. If your tire is balanced as you pick up speed the mud will fling off due to centrifugal force. If your UTV tires are not balanced as you pick up speed the mud will settle towards that unbalanced area and cause a wobble sometimes violently until it finally let’s go from the tire.

    #2 How fast are you driving your UTV?

    Secondly, consider the riding speed you are accustomed to. Unbalanced tires can be particularly dangerous if you frequently travel at speeds higher than 25 mph.

    A UTV that is shaking and vibrating while you are hitting the gas at 30 mph can present a dangerous situation. Not something that you want to experience so balancing those tires becomes a priority really quick. You can put off the balancing process if you generally go at or below 30 mph but who really wants to go slow all the time?

    Side by side blog
    Cool view on hard ride UTV in muddy water

    #3 General wear and tear on your UTV

    Keeping your tires in balance will help prolong the life of your wheel bearings. So if something as easy and simple as a tire balance can save you the headache of wheel bearing replacement why not do it? It can also save you future trouble with your axles.

    Can you balance UTV tires at home?

    Yes, balancing UTV tires at home is an easy DIY project you can do at home. There are two methods we recommend for balancing your UTV tires at home, ceramic balancing beads and wheel weights.

    Option #1 UTV Tire balancing beads

    For the easiest wheel balancing method, you can use wheel balancing beads. These beads are made from either stainless steel or hard ceramic material that keeps them from cracking and turning to dust in the tire. As you drive and the wheel speed increases the beads are dispersed due to centrifugal force and they self-balance the wheel giving you a smooth ride.

    Things to Consider About Tire Beads:

    Choosing tire balance beads can be a bit difficult. However, here is a list of factors you should consider when picking the right choice for your SxS.

    Material

    There are many different kinds of beads used in the production of tires. We recommend ceramic beads. There are stainless steel and plastic. However, steel can damage the tire lining and plastic beads can clump together because of moisture.

    This is why we would go with ceramic beads such as the Counteract Wheel Balancing Beads

    [affiliatable id=’181370′]

    ir?t=amzwebstore01 20&language=en US&l=li3&o=1&a=B01G144B2G UTV Gear, Tips & TricksFor around $30 bucks you can take care of your UTV tire balancing.

    Steel and plastic are two other common materials for beads, but each has its own set of pros and cons. For example, steel beads last longer than plastic beads but can damage the inner lining of a tire. Plastic beads absorb moisture and clump together if they get wet. Ceramic beads are durable and don’t break easily; however, they can crack in extremely hot or cold weather. The best kind of bead is tempered glass or ceramic because it lasts longer and won’t crack in extreme temperatures.

    UTV wheel balancing bead size

    Be careful of the bead size when purchasing tire balancing beads. They are mostly in 3 sizes. Go with a larger size bead that will fit through your valve stem if that is how you are installing them. However, don’t go too small as you don’t want them to clog your air valve.

    #2 UTV Wheel balancing weights

    Wheel balancing weights are also a great solution for balancing a UTV tire at home. In addition, you will need a wheel balancing bubble level tool. You simply place the mounted tire and wheel on the bubble level and place weights around the wheel to achieve the correct balance.

    Wheel weights are placed on the inside of the wheel with a self-adhesive and are pretty good to stay in place. But considering the abuse, we put our side by side through on a ride they sometimes can come off. We like to go with the ceramic beads just so we don’t have to worry about it when riding.

    No schema found.

    FreeTec Heavy Duty Portable Hubs Wheel Balancer

    CKAuto 1/4oz, 0.25oz, Black, Adhesive Stick on Wheel Weights

    Takeaway

    So in conclusion yes you do balance your UTV tires. It will ease the wear and tear on components like wheel bearings and axles while giving you a smoother ride on pavement and trails. It’s something you can do yourself with the right tools and know-how.

    Have you ever asked yourself why are UTV tires small in the front?


    As an Amazon Associate, I earn from qualifying purchases.

  • How to Install a Winch on Your UTV: UTV Winch Basics

    Introduction

    Installing a winch on your Utility Terrain Vehicle (UTV) or All-Terrain Vehicle (ATV) is a crucial step in preparing for off-road adventures. A winch is the ultimate pulling device and lifting device. This guide provides a comprehensive overview of the installation process, ensuring you can set up your winch safely and effectively.

    Types of Winches

    There are various types of winches available, each with specific uses. From manual hand winches to electric winches, the choice depends on your specific needs and the nature of your off-road activities.

    Also, learn about what size winch do you need for your UTV?

    Our UTV Winch recommendations

    Good

    MotoAlliance UTV/ATV 3000lb Winch

    Better

    SuperATV 4500 lb Winch for UTV

    Best

    SuperATV 4500 lb Winch for UTV

    It’s not possible for us to cover every winch install on every UTV.  Here’s a step by set guide we have developed to help you grapple with installation.

    Check out our article on Do you need a snatch block?

    Preparing for Installation

    Before starting the installation process, gather all necessary tools and materials. Safety is paramount, so ensure you’re taking precaution such as wearing appropriate protection gear and working in a safe environment.

    1. Removing Necessary Parts of the UTV

    The first step involves removing certain parts of the UTV to make space for the winch. This usually includes parts of the front plastic and any existing mounting plates.

    2. Mounting the Winch Plate

    The winch plate, or bracket, is the base on which the winch sits. Attach this to the front of your UTV, ensuring it’s securely fixed and stable.

    3. Install a winch to the Winch Plate

    Next, attach the winch to the winch plate. Make sure it’s securely bolted and stable before moving on to the next step.

    4. Installing the Roller System Assembly

    The roller assembly guides the winch cable and prevents it from wearing out. Attach this to the winch, ensuring the winch rope runs smoothly through it.

    5. Running the Electricals and Setting Up the Remote Switch

    Finally, complete the circuit and run the electrical wiring from the winch to the side by side battery power source, and set up the remote control switch. This allows you to operate the winch safely from a distance.

    Using the UTV Winch

    Once installed, it’s important to know how to use your winch safely and effectively. This includes understanding its limitations and how to operate it in different scenarios or conditions.

    Common Mistakes to Avoid

    Avoid common errors often made when installing, repairing, and using a winch. These include incorrect wiring, improper use of the remote switch, and neglecting regular maintenance of the line.

    Testing the Winch

    After installation, test the winch to ensure it works properly. This includes checking the remote switch operation, instruments, retraction and extension, and the force of the winch pull.  Be sure to check for any catch in the examination of the winch rope extension or retraction.

    Maintenance and Care for the Winch

    Regular inspection and cleaning are essential to keep your winch in good working order. Also, know when it’s time to consider a swap of the winch or any of its components. such as the roller mechanism, and cord.

    Conclusion

    Installing a winch on your SxS is a valuable investment in safety and convenience for off-road activities. By following this guide, you can ensure a successful installation and many years of reliable service from your winch. Stay safe and enjoy your off-road adventures!

  • The Best Off-Road Air Compressors for UTV Tires

    Off-roading with your UTV is an exhilarating experience, but it also requires the right equipment. One of the most essential tools for any UTV owner is a reliable, compact, and powerful air compressor. Whether you’re dealing with a flat tire or adjusting tire pressure for different terrains, a high-quality air compressor can make all the difference. In this comprehensive guide, we’ll explore some of the best off-road small air compressors available in the market.

    [affiliatable id=’186734′]

    [affiliatable id=’186733′]

    Why You Need a Good Portable Air Compressor for Your UTV

    An air compressor is more than just a tool; it’s an investment in your off-roading adventures. It allows you to inflate your UTV tires quickly and efficiently, ensuring optimal performance and safety on any terrain. A good air compressor should be portable, easy to use, and capable of delivering the right amount of pressure (PSI) to inflate your UTV tires properly.

    Check out the VIAIR 400P Off-road air compressor on Amazon: Power in a Portable Package

    q? encoding=UTF8&ASIN=B000X9B32M&Format= SL250 &ID=AsinImage&MarketPlace=US&ServiceVersion=20070822&WS=1&tag=sxs best utv air compressor 20&language=en US UTV Gear, Tips & Tricksir?t=sxs best utv air compressor 20&language=en US&l=li3&o=1&a=B000X9B32M UTV Gear, Tips & Tricks

    The VIAIR 400P is a portable air compressor that doesn’t compromise on power. Despite its compact size, it boasts a high PSI and a 2.3 CFM rating, making it capable of inflating large UTV tires up to 35″ with ease. It’s lightweight, easy to maintain, and comes with a durable carrying case, making it a convenient tool to carry on your off-road adventures.

    Click to check out the Smittybilt 2781 Small Air Compressor on Amazon: Balancing Quality and Affordability

    q? encoding=UTF8&ASIN=B004K25GMG&Format= SL250 &ID=AsinImage&MarketPlace=US&ServiceVersion=20070822&WS=1&tag=sxs best utv air compressor 20&language=en US UTV Gear, Tips & Tricksir?t=sxs best utv air compressor 20&language=en US&l=li3&o=1&a=B004K25GMG UTV Gear, Tips & Tricks

    The Smittybilt 2781 air compressor offers a balance between quality and affordability. It has a high CFM rating and a decent duty cycle, making it ideal for off-roading. It’s also equipped with an automatic thermal cut-off switch, preventing overheating and ensuring a long lifespan.

    Click to check out the Slime Tire Inflator on Amazon: 12v Air Compressor in a Compact and Efficient Package

    q? encoding=UTF8&ASIN=B005Z8HAUK&Format= SL250 &ID=AsinImage&MarketPlace=US&ServiceVersion=20070822&WS=1&tag=sxs best utv air compressor 20&language=en US UTV Gear, Tips & Tricksir?t=sxs best utv air compressor 20&language=en US&l=li3&o=1&a=B005Z8HAUK UTV Gear, Tips & Tricks

    The Slime Tire Inflator is a small air compressor that packs a punch. Despite its compact size, it can deliver up to 150 PSI, making it perfect for inflating UTV tires. It’s also equipped with a pressure gauge and an inflation tip kit, ensuring accurate and efficient inflation.

    Click to check out the AstroAI Air Compressor for Your UTV on Amazon

    q? encoding=UTF8&ASIN=B07QR4Q42L&Format= SL250 &ID=AsinImage&MarketPlace=US&ServiceVersion=20070822&WS=1&tag=sxs best utv air compressor 20&language=en US UTV Gear, Tips & Tricksir?t=sxs best utv air compressor 20&language=en US&l=li3&o=1&a=B07QR4Q42L UTV Gear, Tips & Tricks

    When it comes to durability and performance, the AstroAI air compressor stands out. This compact yet powerful device is built to withstand the rough terrains and harsh conditions that come with off-roading. It offers a 100 PSI, ensuring quick and efficient tire inflation. The AstroAI air compressor also features programmable inflation, providing an extra layer of protection during use.

    Understanding PSI and CFM in Air Compressors

    When choosing an air compressor, it’s important to understand the terms PSI (pounds per square inch) and CFM (cubic feet per minute). PSI refers to the amount of pressure the compressor can deliver, while CFM measures the volume of air the compressor can deliver per minute. A good air compressor should offer a high PSI and CFM rating for quick and efficient tire inflation.

    Choose a High Duty Cycle For The Best Small Air Compressor

    The duty cycle of an air compressor refers to how long it can run before it needs a cool-down period. A high duty cycle means the compressor can run longer and recover faster, reducing the time it takes to inflate your UTV tires.

    In conclusion, a good air compressor is an essential tool for any off-roading enthusiast. Whether you choose the ARB air compressor, the VIAIR 400P, the Smittybilt 2781, or the Slime Tire Inflator, you’re investing in a tool that will enhance your off-roading experience and ensure your safety on the trails. Remember, the best air compressor for you is one that meets your specific

    Key Factors When Looking for the Best Off-Road Air Compressors for UTV Tires

    Portability: A Key Factor for Choosing an Off-Roading Air Pump

    When it comes to off-roading, portability is a key factor. The best off-road air compressor for your UTV should be lightweight and compact, allowing for easy transportation. Models with a carrying handle or a carrying case come in handy, providing added convenience. Remember, space in your UTV is precious, and a small air compressor that doesn’t compromise on power is an excellent choice.

    Power Source: 12 Volt Air Compressor and Battery Powered Too

    The power source of your air compressor can significantly impact its performance and usability. Most portable air compressors are either electric, running on 12V DC from your vehicle’s battery, or battery-powered. Electric models are generally lighter, quieter, and perfect for inflating UTV tires but what if your battery is dead?  That’s where it’s a great idea to have a portable air compressor with two sources of power battery or dc.  

    Pressure (PSI): Ensure Efficient Tire Inflation when Buying an Air Pump

    Pressure, measured in Pounds per Square Inch (PSI), is a critical factor when choosing an air compressor. For inflating UTV tires, a compressor with a PSI rating of at least 150 is typically sufficient. This ensures that your tires can be inflated quickly, getting you back on the trail in no time. Always check the tire pressure requirements of your UTV to choose the best air compressor that meets your needs.

    Airflow (CFM): The Faster, The Better

    Airflow, measured in Cubic Feet per Minute (CFM), is another crucial factor to consider. A higher CFM rating means the compressor can inflate tires faster, saving you valuable time during your off-roading adventures. Look for an air compressor with a high CFM rating for quick and efficient tire inflation.

    Duty Cycle: Longer Run Time, Shorter Cool Down

    The duty cycle of an air compressor refers to how long it can run before it needs to cool down. A higher duty cycle is better, as it means you can use the compressor for longer periods, inflating all four tires without needing a break. This is especially important when you’re out on the trail and need to inflate your tires quickly.

    Durability: Buying an Air Compressor for Overland Tough Conditions

    Durability is a must when choosing an air compressor for off-roading. Look for a compressor that is built to withstand tough conditions, especially if you plan to use it for off-roading. Features to look for include a robust construction, a moisture and dust-resistant design, and a motor that is protected against overheating. A durable air compressor is an investment that will serve you well on many off-roading adventures.

    Accessories: Enhancing UTV Air Compressor Usability and Convenience

    Some air compressors come with useful accessories, such as a hose, various inflation nozzles, a pressure gauge, and even a built-in LED light for nighttime use. These accessories can enhance the usability and convenience of the air compressor, making your off-roading experience smoother and more enjoyable.

    Price: Balancing Cost and Quality When You Need an Air Compressor

    Portable air compressors can vary widely in price. It’s important to determine your budget beforehand and consider what features and specifications are most important to you. While it might be tempting to go for the cheapest option, remember that quality and reliability are crucial. It’s better to invest in a slightly more expensive model that is reliable and durable than to save a few bucks on a model that might fail when you need it most.

    Frequently Asked Questions: The Best Off-Road Air Compressors for UTV Tires

    What is an off-road air compressor?

    An off-road air compressor is a portable air compressor that is specifically designed to inflate tires on UTVs used for off-road adventures. These compressors are often smaller in size and can usually handle rough terrain and overland conditions.

    Why do I need an off-road air compressor for my UTV?

    When you’re off-roading, your tire pressure needs to be adjusted based on the terrain you’re driving on. An off-road air compressor allows you to easily inflate or deflate your UTV tires to the proper pressure. This can improve handling, traction, and overall performance while you’re off-roading.

    What is the best air compressor for UTV tires?

    There are several great options for off-road air compressors. Some of the best off-road air compressors include the Viair 400P, Smittybilt 2781, and ARB CKMTP12. The Viair 400P is a popular choice because of its fast inflation times and high PSI (up to 150 PSI). However, the Smittybilt 2781 and ARB CKMTP12 are also great choices that offer a duty cycle of 100% and can handle larger tires.

    What should I look for when buying an air compressor for UTV tires?

    When buying an air compressor for UTV tires, there are several factors to consider. You’ll want to look at the PSI rating, air flow rate, and duty cycle to make sure the compressor can handle your needs. You’ll also want to consider the size and weight of the compressor, as well as any included power cord or air hose. Finally, look for any

    Don’t forget to check our recommended guides of great gear.

    What is the Best UTV Gun Rack?

    What are the Best UTV Rock Crawling tires?

    What are the best UTV cleaning products?

    What’s the best UTV tie-down strap?

    What are the best UTV Rock Lights?

    What are the best UTV side mirrors?