As an Amazon Associate we earn from qualifying purchases. This post contains affiliate links, and we may earn a commission at no extra cost to you.
Are you an avid UTV enthusiast who wants to ensure that your ride performs at its best but you wonder Should You Wash A Polaris CVT Belt? As a UTV owner, it’s essential to understand the importance of regular maintenance and cleaning, especially when it comes to the CVT drive belt. We dive into the essential task of cleaning the CVT drive belt to improve performance and prolong its lifespan.
Why Cleaning Your UTV’s CVT Drive Belt Matters
The CVT drive belt plays a critical role in transferring power from the engine to the wheels of your UTV, enabling it to conquer various terrains. Over time, however, dirt, dust, and debris can accumulate between the layers of the drive belt, leading to decreased performance and potential belt failure. To avoid such issues, regular cleaning is necessary to maintain your UTV’s performance and prevent premature wear.
After washing, make sure you’re using a quality belt—our RZR belt recommendations show which brands last longest.
Step-by-Step Guide to Cleaning Your UTV’s CVT Drive Belt
Step 1: Gather the Required Tools to clean your UTV drive belt
Before getting started, make sure you have the necessary tools at hand. You’ll need a soft-bristle brush, a cleaning solution specifically designed for CVT belts, and a clean cloth. These tools will aid in effectively removing dirt and debris without causing any damage to the belt.
Step 2: Remove the CVT Drive Belt Cover
Begin by locating the CVT drive belt cover, usually situated near the engine compartment. Carefully remove the cover, ensuring not to misplace any screws or fasteners. This cover acts as a protective shield, guarding the belt against debris and contaminants.
Step 3: Brush Off Loose Dirt and Debris
With the CVT drive belt exposed, take the soft-bristle brush and gently brush off any loose dirt and debris from the surface of the belt. Ensure that you cover all areas of the belt, paying close attention to the crevices where debris tends to accumulate.
Step 4: Apply the Cleaning Solution
Next, it’s time to apply the CVT drive belt cleaner to the belt. Use the cleaning solution as directed, spraying it evenly and thoroughly across the entire belt. This step helps dissolve and loosen stubborn dirt and grime, preparing the belt for thorough cleaning.
Step 5: Wipe Away Residue
Take a clean cloth and gently wipe the drive belt to remove any remaining dirt or residue. Exercise caution not to apply excessive pressure or scrub too harshly, as this could potentially damage the belt. Ensure you wipe all sections of the belt until it appears clean and free from residue.
Step 6: Visual Inspection for Wear or Damage to your CVT belt
Once you are satisfied with the cleanliness of the drive belt, visually inspect it for any signs of wear or damage. Look out for cracks, fraying, or other visible issues that might indicate the need for a belt replacement. Addressing such problems promptly can prevent more extensive damage in the future.
Step 7: Reinstall the CVT Drive Belt Cover
Finally, carefully reinstall the CVT drive belt cover, ensuring it is securely in place. This cover serves as a protective barrier, shielding the belt from external contaminants and extending its overall lifespan. Take your time to fasten all the screws or fasteners correctly to maintain a tight and secure fit.
Conclusion: Maintain Performance and Prolong Lifespan
Regularly cleaning your UTV’s CVT drive belt is a crucial maintenance task that should not be overlooked. By following the step-by-step process outlined in this guide, you can effectively remove dirt, dust, and debris from the belt, ensuring optimal performance and longevity.
Remember, a clean CVT drive belt translates to improved power transfer and enhanced UTV performance. It reduces the risk of belt failure and extends the lifespan of this critical component. Incorporate this cleaning routine into your UTV maintenance schedule to keep your ride running smoothly and conquer any terrain with ease.
Are Polaris RZR belts directional?
New belts don’t give a damn about direction, but used ones sure do. Directional arrows on some belts are just a reminder to put it back on the same way if you ever take it off. To prolong your belt’s life, it’s wise to always run it in the same direction.
If you’re shopping for a replacement, this is the belt we point people to for RZR CVTs.
OUR PICK
Hunterworks CVT Drive Belt for 2014-2023 Polaris RZR XP 1000 (All Models) XP4, HL, Trail, Sport, Ultimate, Premium
Fits: 2014-2023 Polaris RZR XP 1000 (All Models) Does NOT Fit 2024. 2024 has new clutch set up (Part Number HW
Engineered for Toughness and Strength: Hunterworks drive belts are meticulously engineered for improved belt g
Proprietary construction: With the latest and greatest manufacturing process out there, we ensure Hunterworks
As an Amazon Associate we earn from qualifying purchases. This post contains affiliate links, and we may earn a commission at no extra cost to you.
No. Polaris RZR belts aren’t directional, meaning a new belt will work correctly no matter which way you install it. There’s no arrow, no “this side up,” no wrong way to put a fresh belt in.
So why do people ask?
Because the advice you’ll hear from most mechanics and belt makers is to still install it consistently, label facing you, and if you ever pull the same belt back out, put it back in the same orientation it came out in. That’s not because the belt only works one way. It’s because a belt that’s already run for a few hundred miles has a wear pattern baked into it. Keep it running the same direction and you’re not fighting that wear. Flip a used belt around and you can shorten what’s left of its life.
The short version
New belt: install it either way, it’s not directional. Used belt you’re reinstalling: put it back exactly how it came out. That’s the whole rule.
Shopping for a replacement
If you’re at the point of asking this question because you’re about to swap belts, check our Best Polaris RZR Belt guide before you buy. And if you’re not sure your current belt is even worth reinstalling, read driving on a worn RZR belt first.
If you’re shopping for a replacement, this is the belt we point people to for RZR CVTs.
OUR PICK
Hunterworks CVT Drive Belt for 2014-2023 Polaris RZR XP 1000 (All Models) XP4, HL, Trail, Sport, Ultimate, Premium
Fits: 2014-2023 Polaris RZR XP 1000 (All Models) Does NOT Fit 2024. 2024 has new clutch set up (Part Number HW
Engineered for Toughness and Strength: Hunterworks drive belts are meticulously engineered for improved belt g
Proprietary construction: With the latest and greatest manufacturing process out there, we ensure Hunterworks
So you just bought a set of new UTV tires and you were wondering Do you balance UTV Tires? UTV tires can be balanced and the main reason you need to balance UTV tires is due to the high speeds and large acceleration/deceleration of your UTV. Most UTVs have a relatively high center of gravity, which means that if the front wheels are out of balance, it will be very noticeable. You may notice your steering wheel vibrating and making noise when you drive over rough roads or bumps.
As an Amazon Associate we earn from qualifying purchases. This post contains affiliate links, and we may earn a commission at no extra cost to you.
Tire balancing is the process of adjusting a tire’s weight distribution so that it rotates smoothly on the rim of a wheel. The goal of this process is to ensure that a tire runs true and doesn’t wobble or become damaged over time.
Tires spin at high speeds and can put out a lot of torque, so if one side of a tire carries more weight than another, it will tend to pull in that direction. This causes vibrations that can cause damage over time, especially if the imbalance goes unnoticed for too long.
Why do you need to balance UTV tires?
When you’re driving your UTV at 30+ mph, suddenly slowing down for a corner or avoiding an object will give your tires tremendous force that may twist the center area of your tire. An unbalanced tire can also cause premature wearing on one side as well as poor handling.
Unbalanced SXS tires might be difficult to drive on. You’ll even feel the vibrations through the steering wheel as they begin to transfer continuously. The rim or tire’s faults are what are to blame for these vibrations.
#1 The first consideration is how you plan to use these UTV tires.
Or, to put it another way, what kinds of roads or trails will you be using? If you usually go on trails or paved roads, tire balancing is advised. Vibrations along the way won’t be pleasant because you may feel even the smallest shift in your car while driving on smooth roads.
Trail riding can present the most challenging situations because it presents both speed and rough terrain. Sometimes you may be clipping along at 30 mph and then hit the brakes to cut a sharp corner. This puts tremendous stress on your tires and can lead to failure and unbalancing.
The alternate possibility is that you’re going to be driving in mud, or while rock climbing. If so, you’ll be restricted to driving at low speeds and spared the difficulties brought on by unbalanced UTV tires. We would still recommend balancing your tires even at lower speed just because let’s say you hit some mud at a slow speed and it cakes on the wheel. If your tire is balanced as you pick up speed the mud will fling off due to centrifugal force. If your UTV tires are not balanced as you pick up speed the mud will settle towards that unbalanced area and cause a wobble sometimes violently until it finally let’s go from the tire.
#2 How fast are you driving your UTV?
Secondly, consider the riding speed you are accustomed to. Unbalanced tires can be particularly dangerous if you frequently travel at speeds higher than 25 mph.
A UTV that is shaking and vibrating while you are hitting the gas at 30 mph can present a dangerous situation. Not something that you want to experience so balancing those tires becomes a priority really quick. You can put off the balancing process if you generally go at or below 30 mph but who really wants to go slow all the time?
Keeping your tires in balance will help prolong the life of your wheel bearings. So if something as easy and simple as a tire balance can save you the headache of wheel bearing replacement why not do it? It can also save you future trouble with your axles.
Can you balance UTV tires at home?
Yes, balancing UTV tires at home is an easy DIY project you can do at home. There are two methods we recommend for balancing your UTV tires at home, ceramic balancing beads and wheel weights.
Option #1 UTV Tire balancing beads
For the easiest wheel balancing method, you can use wheel balancing beads. These beads are made from either stainless steel or hard ceramic material that keeps them from cracking and turning to dust in the tire. As you drive and the wheel speed increases the beads are dispersed due to centrifugal force and they self-balance the wheel giving you a smooth ride.
Things to Consider About Tire Beads:
Choosing tire balance beads can be a bit difficult. However, here is a list of factors you should consider when picking the right choice for your SxS.
Material
There are many different kinds of beads used in the production of tires. We recommend ceramic beads. There are stainless steel and plastic. However, steel can damage the tire lining and plastic beads can clump together because of moisture.
This is why we would go with ceramic beads such as the Counteract Wheel Balancing Beads
[affiliatable id=’181370′]
Check the current price on Amazon and you can take care of your UTV tire balancing without breaking the bank.
Steel and plastic are two other common materials for beads, but each has its own set of pros and cons. For example, steel beads last longer than plastic beads but can damage the inner lining of a tire. Plastic beads absorb moisture and clump together if they get wet. Ceramic beads are durable and don’t break easily; however, they can crack in extremely hot or cold weather. The best kind of bead is tempered glass or ceramic because it lasts longer and won’t crack in extreme temperatures.
UTV wheel balancing bead size
Be careful of the bead size when purchasing tire balancing beads. They are mostly in 3 sizes. Go with a larger size bead that will fit through your valve stem if that is how you are installing them. However, don’t go too small as you don’t want them to clog your air valve.
#2 UTV Wheel balancing weights
Wheel balancing weights are also a great solution for balancing a UTV tire at home. In addition, you will need a wheel balancing bubble level tool. You simply place the mounted tire and wheel on the bubble level and place weights around the wheel to achieve the correct balance.
Wheel weights are placed on the inside of the wheel with a self-adhesive and are pretty good to stay in place. But considering the abuse, we put our side by side through on a ride they sometimes can come off. We like to go with the ceramic beads just so we don’t have to worry about it when riding.
No schema found.
FreeTec Heavy Duty Portable Hubs Wheel Balancer
CKAuto 1/4oz, 0.25oz, Black, Adhesive Stick on Wheel Weights
Takeaway
So yes, you do balance your UTV tires. It will ease the wear and tear on components like wheel bearings and axles while giving you a smoother ride on pavement and trails. It’s something you can do yourself with the right tools and know-how.
As an Amazon Associate we earn from qualifying purchases. This post contains affiliate links, and we may earn a commission at no extra cost to you.
Introduction
Installing a winch on your Utility Terrain Vehicle (UTV) or All-Terrain Vehicle (ATV) is a crucial step in preparing for off-road adventures. A winch is the ultimate pulling device and lifting device. This guide provides a overview of the installation process, ensuring you can set up your winch safely and effectively.
Types of Winches
There are various types of winches available, each with specific uses. From manual hand winches to electric winches, the choice depends on your specific needs and the nature of your off-road activities.
Before starting the installation process, gather all necessary tools and materials. Safety is useful, so ensure you’re taking precaution such as wearing appropriate protection gear and working in a safe environment.
1. Removing Necessary Parts of the UTV
The first step involves removing certain parts of the UTV to make space for the winch. This usually includes parts of the front plastic and any existing mounting plates.
2. Mounting the Winch Plate
The winch plate, or bracket, is the base on which the winch sits. Attach this to the front of your UTV, ensuring it’s securely fixed and stable.
3. Install a winch to the Winch Plate
Next, attach the winch to the winch plate. Make sure it’s securely bolted and stable before moving on to the next step.
4. Installing the Roller System Assembly
The roller assembly guides the winch cable and prevents it from wearing out. Attach this to the winch, ensuring the winch rope runs smoothly through it.
5. Running the Electricals and Setting Up the Remote Switch
Finally, complete the circuit and run the electrical wiring from the winch to the side by side battery power source, and set up the remote control switch. This allows you to operate the winch safely from a distance.
Using the UTV Winch
Once installed, it’s important to know how to use your winch safely and effectively. This includes understanding its limitations and how to operate it in different scenarios or conditions.
Common Mistakes to Avoid
Avoid common errors often made when installing, repairing, and using a winch. These include incorrect wiring, improper use of the remote switch, and neglecting regular maintenance of the line.
Testing the Winch
After installation, test the winch to ensure it works properly. This includes checking the remote switch operation, instruments, retraction and extension, and the force of the winch pull. Be sure to check for any catch in the examination of the winch rope extension or retraction.
Maintenance and Care for the Winch
Regular inspection and cleaning are essential to keep your winch in good working order. Also, know when it’s time to consider a swap of the winch or any of its components. such as the roller mechanism, and cord.
Conclusion
Installing a winch on your SxS is a valuable investment in safety and convenience for off-road activities. By following this guide, you can ensure a successful installation and many years of reliable service from your winch. Stay safe and enjoy your off-road adventures!
Looking to add a winch instead of just learning how one works? This is a solid 4500 lb option built for UTVs.
OUR PICK
Kolpin 4500# Winch – Synthetic Rope – 25-9455
Includes heavy-duty wiring, quick connect harness, battery leads, premium handlebar mount controls and mountin
Ergonomic dial for free spooling-to-clutch engagement; Includes Remote
Ergonomic dial for free spooling-to-clutch engagement
As an Amazon Associate we earn from qualifying purchases. This post contains affiliate links, and we may earn a commission at no extra cost to you.
Off-roading with your UTV is an exhilarating experience, but it also requires the right equipment. One of the most essential tools for any UTV owner is a reliable, compact, and powerful air compressor. Whether you’re dealing with a flat tire or adjusting tire pressure for different terrains, a high-quality air compressor can make all the difference. In this guide, we’ll explore some of the best off-road small air compressors available in the market.
Why You Need a Good Portable Air Compressor for Your UTV
An air compressor is more than just a tool; it’s an investment in your off-roading adventures. It allows you to inflate your UTV tires quickly and efficiently, ensuring optimal performance and safety on any terrain. A good air compressor should be portable, easy to use, and capable of delivering the right amount of pressure (PSI) to inflate your UTV tires properly.
The VIAIR 400P is a portable air compressor that doesn’t compromise on power. Despite its compact size, it boasts a high PSI and a 2.3 CFM rating, making it capable of inflating large UTV tires up to 35″ with ease. It’s lightweight, easy to maintain, and comes with a durable carrying case, making it a convenient tool to carry on your off-road adventures.
Smittybilt 2781 Small Air Compressor
MOST COMPACT
SmittyBilt AIR COMPRESSOR
Auto-thermal cutoff switch – protects motor against damage
Maximum continuous cycle time (duty cycle) – 40 minutes at 40 psi at 75 degrees Fahrenheit
Maximum airflow – 72 liters per minute. Quick release 24 foot coil hose
The Smittybilt 2781 air compressor offers a balance between quality and affordability. It has a high CFM rating and a decent duty cycle, making it ideal for off-roading. It’s also equipped with an automatic thermal cut-off switch, preventing overheating and ensuring a long lifespan.
Slime 40083 Tire Inflator
ALSO GREAT
Slime 40083 Tire Inflator
2 minute inflation time from flat to full for standard tires, with Inflate-Right Technology (auto shut-off at
Clear View LED digital display (0-99 psi) and a big, bright LED light
Dual piston motor for maximum inflation (perfect for larger sized tires!)
The Slime Tire Inflator is a small air compressor that packs a punch. Despite its compact size, it can deliver up to 150 PSI, making it perfect for inflating UTV tires. It’s also equipped with a pressure gauge and an inflation tip kit, ensuring accurate and efficient inflation.
When it comes to durability and performance, the AstroAI air compressor stands out. This compact yet powerful device is built to withstand the rough terrains and harsh conditions that come with off-roading. It offers a 100 PSI, ensuring quick and efficient tire inflation. The AstroAI air compressor also features programmable inflation, providing an extra layer of protection during use.
Understanding PSI and CFM in Air Compressors
When choosing an air compressor, it’s important to understand the terms PSI (pounds per square inch) and CFM (cubic feet per minute). PSI refers to the amount of pressure the compressor can deliver, while CFM measures the volume of air the compressor can deliver per minute. A good air compressor should offer a high PSI and CFM rating for quick and efficient tire inflation.
Choose a High Duty Cycle For The Best Small Air Compressor
The duty cycle of an air compressor refers to how long it can run before it needs a cool-down period. A high duty cycle means the compressor can run longer and recover faster, reducing the time it takes to inflate your UTV tires.
A good air compressor is an essential tool for any off-roading enthusiast. Whether you choose the ARB air compressor, the VIAIR 400P, the Smittybilt 2781, or the Slime Tire Inflator, you’re investing in a tool that will enhance your off-roading experience and ensure your safety on the trails. Remember, the best air compressor for you is one that meets your specific
Key Factors When Looking for the Best Off-Road Air Compressors for UTV Tires
Portability: A Key Factor for Choosing an Off-Roading Air Pump
When it comes to off-roading, portability is a key factor. The best off-road air compressor for your UTV should be lightweight and compact, allowing for easy transportation. Models with a carrying handle or a carrying case come in handy, providing added convenience. Remember, space in your UTV is precious, and a small air compressor that doesn’t compromise on power is an excellent choice.
Power Source: 12 Volt Air Compressor and Battery Powered Too
The power source of your air compressor can significantly impact its performance and usability. Most portable air compressors are either electric, running on 12V DC from your vehicle’s battery, or battery-powered. Electric models are generally lighter, quieter, and perfect for inflating UTV tires but what if your battery is dead? That’s where it’s a great idea to have a portable air compressor with two sources of power battery or dc.
Pressure (PSI): Ensure Efficient Tire Inflation when Buying an Air Pump
Pressure, measured in Pounds per Square Inch (PSI), is a critical factor when choosing an air compressor. For inflating UTV tires, a compressor with a PSI rating of at least 150 is typically sufficient. This ensures that your tires can be inflated quickly, getting you back on the trail in no time. Always check the tire pressure requirements of your UTV to choose the best air compressor that meets your needs.
Airflow (CFM): The Faster, The Better
Airflow, measured in Cubic Feet per Minute (CFM), is another crucial factor to consider. A higher CFM rating means the compressor can inflate tires faster, saving you valuable time during your off-roading adventures. Look for an air compressor with a high CFM rating for quick and efficient tire inflation.
Duty Cycle: Longer Run Time, Shorter Cool Down
The duty cycle of an air compressor refers to how long it can run before it needs to cool down. A higher duty cycle is better, as it means you can use the compressor for longer periods, inflating all four tires without needing a break. This is especially important when you’re out on the trail and need to inflate your tires quickly.
Durability: Buying an Air Compressor for Overland Tough Conditions
Durability is a must when choosing an air compressor for off-roading. Look for a compressor that is built to withstand tough conditions, especially if you plan to use it for off-roading. Features to look for include a construction, a moisture and dust-resistant design, and a motor that is protected against overheating. A durable air compressor is an investment that will serve you well on many off-roading adventures.
Accessories: Enhancing UTV Air Compressor Usability and Convenience
Some air compressors come with useful accessories, such as a hose, various inflation nozzles, a pressure gauge, and even a built-in LED light for nighttime use. These accessories can enhance the usability and convenience of the air compressor, making your off-roading experience smoother and more enjoyable.
Price: Balancing Cost and Quality When You Need an Air Compressor
Portable air compressors can vary widely in price. It’s important to determine your budget beforehand and consider what features and specifications are most important to you. While it might be tempting to go for the cheapest option, remember that quality and reliability are crucial. It’s better to invest in a slightly more expensive model that is reliable and durable than to save a few bucks on a model that might fail when you need it most.
Frequently Asked Questions: The Best Off-Road Air Compressors for UTV Tires
What is an off-road air compressor?
An off-road air compressor is a portable air compressor that is specifically designed to inflate tires on UTVs used for off-road adventures. These compressors are often smaller in size and can usually handle rough terrain and overland conditions.
Why do I need an off-road air compressor for my UTV?
When you’re off-roading, your tire pressure needs to be adjusted based on the terrain you’re driving on. An off-road air compressor allows you to easily inflate or deflate your UTV tires to the proper pressure. This can improve handling, traction, and overall performance while you’re off-roading.
What is the best air compressor for UTV tires?
There are several great options for off-road air compressors. Some of the best off-road air compressors include the Viair 400P, Smittybilt 2781, and ARB CKMTP12. The Viair 400P is a popular choice because of its fast inflation times and high PSI (up to 150 PSI). However, the Smittybilt 2781 and ARB CKMTP12 are also great choices that offer a duty cycle of 100% and can handle larger tires.
What should I look for when buying an air compressor for UTV tires?
When buying an air compressor for UTV tires, there are several factors to consider. You’ll want to look at the PSI rating, air flow rate, and duty cycle to make sure the compressor can handle your needs. You’ll also want to consider the size and weight of the compressor, as well as any included power cord or air hose. Finally, look for any
Don’t forget to check our recommended guides of great gear.
As an Amazon Associate we earn from qualifying purchases. This post contains affiliate links, and we may earn a commission at no extra cost to you.
After all the time, research and comparing that you did in finding the perfect ATV, maintenance and especially preventive maintenance should be utmost in your mind. What pressure you should be running in your ATV tires? Did you know that different terrains require different tire pressure? Do you know PSI stands for the amount of force or Pounds per Square Inch?
Mud is mud, right? Wrong, at least when it comes to tire pressure of off road vehicles. From sandy, soupy mud to thick red clay, your tire pressure will need to change. The same with running over rocks or sand dunes.
Check the Air Pressure
Check the air pressure in all tires before each ride. However, there are many opinions about the exact tire pressure needed. Some considerations include: type of vehicle, size of the ATV, weight of people on the ATV, and of course the ground to be covered. But one idea remains the same, airing down (reducing tire pressure). One of the key tips is airing down to help in mud and most for off-road driving. But airing down in the mud could turn the other direction because airing down will help you gain traction when traction is hard to find in seemingly bottomless mud. On the other hand, reducing the tire pressure in hard bottom mud can sometimes reduce the traction. A tire that is aired up to a higher pressure will not ride smoothly and may damage the tire itself. Another thing to consider is that reducing air pressure allows hidden dangers in the mud topotentially damage your tires. Reducing the air pressure could mean that your tires will provide better traction over the barriers, as the tire conforms. So it’s an owner’s call based on the owner’s manual for that particular ATV and experience in particular situations than anything else.
Recommendations for Air Pressure
Printed on the sidewall of the tire is a specific number stating the air pressure that is recommended by the manufacturer of the ATV. The maximum recommended pressure is usually the number on the sidewall and is straight from the tire manufacturer. Damage to the cords can happen by exceeding this pressure. Also, tire can potentially rupture, causing injury.
There are the air pressure recommendations by the ATV manufacturer and suggestions for different terrains that you may be traveling. But again it is depending upon possible loads and the way you use the machine. This safeguards that the tire will last longer and the best traction will be achieved. If there is too much pressure, then the center of the tire will be the only place making contact with the trail. This will create reduced traction and premature wear. However, not enough air in the tire and you wear out the sidewall which can end in a punctured tire. Too low air pressure can allow the tire sidewall to flex too much also causing punctures. When a tire has too little pressure, this allows the sidewall to move too much pinching the tire between rocks, sticks and other debris on the trail. This will tear a hole in the sidewall, an expensive fix. Always check the ATV’s owner’s manual. You can also contact your local ATV dealer for manuals. The dealer should be able to give you the suggested air pressure information from the manufacturer.
Always start out with the ATV recommended tire pressure by the manufacturer. The only reason you should have a higher pressure is if you are carrying heavy loads every day. If you increase the pressure of the tire when you are carrying a heavy load, you need to be sure to return it to the recommended tire pressure when the load is finished.
Even Tire Pressure
The pressure should be the same on each axle. If the ATV owner’s manual suggests the rear tires need a certain amount, then both left and right rear wheels should be the same pounds of pressure. The same goes for the front tires, make pressure of both the tires equal. On the front wheels, you need to be exact because if the tires are aired differently the vehicle could handle unpredictably. Also, a professional tire gauge is always needed in your tool box. Sometimes cheaper is not always better when it comes to your safety. Most dealers or auto parts stores will have these.
Specific Recommendations
If you are prepared for camping all weekend and have all your gear on board, you may want to run 8 to 9 PSI. For rocky terrain, usually 3 to 4 PSI is suggested. The same 3 to 4 for snow or sand. For areas that are more hard packed, and you are running at higher speeds, 7 to 8 PSI is the recommendation. Most reference 5 to 6 PSI for normal trail riding.
As stated before, always reference your owner’s manual. With all the different styles, weights, and designs of ATVs, a general assumption may not work for your particular machine. Proper pressure works hand-in-hand with the rest of your tire setup — see whether you should balance your UTV tires and why UTV tires are smaller in the front, or consider a dedicated off-road air compressor for topping off pressure on the trail.
A dedicated gauge makes this easier to get right every time. Here’s the one we recommend.
OUR PICK
Tire Pressure Gauge – (0-60 PSI) Heavy Duty, Certified ANSI Accurate with Large 2 Inch Easy to Read Glow Dial, Low – High Air Pressure Gauge. Tire Gauge for Car and Trucks Tires by Vondior
HIGH PERFORMANCE LOW MAINTENANCE – Your car is one of your partners in life. Making sure it performs at its be
SAFETY FIRST – Driving your family, friends or simply carpooling is a big responsibility. Protecting your pass
SAVE YOUR GAS MONEY AND THE ENVIRONMENT – A beneficial situation for all mankind. When tires are not properly
As an Amazon Associate we earn from qualifying purchases. This post contains affiliate links, and we may earn a commission at no extra cost to you.
Breaking in a new drive belt for your Can-Am X3 side by side utv is crucial if you want to get the best performance and longest life out of it. You can also break in any spare belts you have lying around. Trust me, you don’t want to skip this step or you’ll be sorry later.
Buy the right belt with our Can-Am UTV drive belt buying guide
Now, breaking in a belt isn’t just about putting in a set number of miles and avoiding high engine RPMs. It’s about flexing the belt in the correct direction so that it wears and mates to the proper angle of the sheaves and friction. This wear needs to happen under low load and temperature because belts run hotter when first installed and are more sensitive to high loads until they break in.
So, to break in a belt properly, you need to use low gear (if available) while varying speeds and avoiding wide open throttle for 5 to 10 miles. If no low gear is available, vary at moderate speeds while avoiding wide open throttle for 50 miles. The goal of break-in is to achieve a high number of flex cycles under low load while maintaining low temperatures.
Now, even with a proper break-in, it’s still possible to damage a belt with excessive heat or spin-burn. Spin-burn or hourglassing is a result of not using low gear when tires are stuck in mud or sand or when loading or unloading your vehicle. An engine misfire often indicates belt slippage because of spin-burn. So, inspect your belt for hourglassing, jerky or hesitant drive-away or acceleration, loose cords, missing cogs, cracks, abrasions, thin spots or excessive wear. Compare belt measurements with a new drive belt, and replace if necessary.
If you do need to replace your belt, We recommend the Can-Am OEM UTV drive belts, which are designed and tested specifically for their off-road vehicles. Always clean any debris from the PVT intake and outlet ducts and from the clutch, clutch covers, and engine compartments if a belt fails. Verify the clutch rollers are tight and rolling smoothly and the weights are not notched or loose. Ensure the seal on the clutch cover is in good shape, not twisted or torn, and installed correctly.
And finally, if you accidentally ingest water into the PVT system, use the following instructions to dry it out before operating:
Position the vehicle on a level surface. Place the transmission in PARK.
Remove the drain plug from the outer clutch cover. Allow the water to drain completely. Reinstall the drain plug.
Start the engine.
Apply varying throttle for 10 to 15 seconds (we suggest 5-6,000 RPM) to expel the moisture and air-dry the belt and clutches. Do not hold the throttle wide open for more than 5 seconds.
Allow the engine RPM to settle to idle speed and then shift the transmission to low range.
Test for belt slippage. If the belt slips, repeat the process. Your vehicle requires service as soon as possible. See your authorized Can-Am Dealer.
So, there you have it. Take care of your belt and it’ll take care of you. Don’t be a fool and skip the break-in or you’ll be singing the blues later on.
Related Questions About Can-Am X3 Drive Belts
Can I Replace a Can-Am Drive Belt Myself?
Yes, you can it ain’t rocket surgery. You can swap out a Can-Am drive belt yourself. No need to fork over your hard-earned cash to a mechanic. Just grab your tools and get to work.
How Do I Know My Can-Am X3 CVT Belt Is Worn?
One of the most common injuries that X3 and riders face is a worn-out drive belt. You check for glassy sides of the belts. Also, sluggish acceleration or jumping suddenly can be a sign of a worn belt
How Long do Can-Am X3 drive belts last?
When it comes to the Can-Am X3, one question that always seems to be on people’s minds is just how long that drive belt can hold out. Will it last you for hundreds of miles of trail riding, or is it more likely to give out on you just when you’re starting to hit your stride?
Why do X3 belts break?
X3 belt breakage can be attributed to several reasons, including overloading, harsh riding conditions, poor maintenance, or manufacturing defects. Overloading the vehicle or carrying excessive weight can strain the belt, causing it to fail. Similarly, riding in harsh conditions like extreme heat or dust can accelerate belt wear and reduce its lifespan. Lack of maintenance, such as not keeping the belt clean or ignoring signs of wear, can also lead to belt breakage. In rare cases, manufacturing defects may cause premature belt failure.
X3 belt breakage is a problem that can have several culprits. It could be due to overloading the vehicle with too much weight or putting it through the wringer in harsh riding conditions. Riding in extreme heat or thick clouds of dust can speed up the wear and tear on the belt, causing it to fail sooner. Neglecting to keep the belt clean or ignoring warning signs of wear and tear can also lead to breakage. And, in some rare instances, defects in the manufacturing process may cause the belt to fail before its time.
How do you break in a new X3 belt?
If you want to keep that X3 of yours runnin’ smooth and strong, you gotta give that belt the break-in it deserves. Don’t go slammin’ down the pedal and expect everything to work like a charm. No, sir. Take it easy for the first 5 to 10 miles, keep it in low gear if you got it, and vary them speeds. If you ain’t got low gear, take it moderate for 50 miles. And don’t forget, it ain’t just about the miles. Keep them engine RPMs low and steady, and you’ll be good to go.
Why do my Can-Am drive belts keep ripping? Well, it could be due to overloading the vehicle or carrying too much weight, harsh riding conditions such as extreme heat or dust, poor maintenance, or even manufacturing defects. Take good care of your belt and avoid straining it, and you’ll have fewer problems.
How much does it cost to get a drive belt replaced?
If you’re handy enough, you can replace your X3 drive belt for less than two hundred bucks. Just grab a new belt for around 150 and some tools, if you don’t already have some, for 30 bucks, and you’re good to go.
Should you wash a Can-Am CVT belt?
Washing a new drive belt before installation is a hotly debated topic. But if you insist on giving it a bath, use warm, soapy water and let it air dry before you slap it on.
Are Can-Am Maverick belts directional?
New belts don’t give a damn about direction, but used ones sure do. Directional arrows on some belts are just a reminder to put it back on the same way if you ever take it off. To prolong your belt’s life, it’s wise to always run it in the same direction.
Can you drive with a worn Can-Am drive belt?
Can you drive with a worn Can-Am drive belt? Well, you can, but it’s like walking around with a ticking time bomb in your pocket. You never know when it’s going to go off and leave you stranded in the middle of nowhere. So, if you value your time and sanity, it’s best to replace that worn belt before it’s too late.
What happens if you don’t change your Can-Am drive belt?
Well, friend, if you don’t change your Can-Am drive belt, you’ll eventually find yourself stranded in the middle of nowhere with a busted belt and a sour mood. A worn-out belt can break unexpectedly, leaving you high and dry on the trail or in the field. Not to mention, a damaged belt can cause other issues with your vehicle’s performance, leading to costly repairs down the road. So, don’t be a fool – keep that drive belt fresh and enjoy your ride without any unnecessary headaches.
Will a broken Can-Am drive belt destroy my engine?
No, it won’t destroy your engine. The rev limiter will kick in and you may get a light on your dash. Just shut her down and clean out the old drive belt and replace it with a new belt. Disconnect the battery to clear the dash light then reconnect it and get on with your day.
Can you spray wd40 on X3 belt?
Don’t do that WD40 is a lubricant and your UTVs drive belt works with friction applied to the belt. A lubricant reduces friction and would defeat the purpose of the belt.
If you’re shopping for a replacement, this is the belt we point people to for the X3’s CVT.
OUR PICK
GBoost Worlds Best Belt – CanAm X3, Defender
Highest shock load rating to date being able to withstand the power of the 400hp machines
Latest bottom cog design for greater rotational efficiency at full shift
Aramid Fiber cord, versus polyester, wraps over bottom cogs for increased bottom cog strength
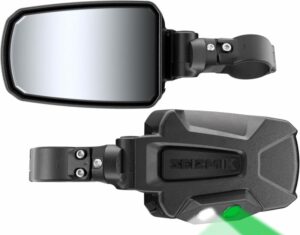
Check your cage tube before you order. Seizmik sells this mirror in separate 1.75 inch and 2 inch versions and they are not interchangeable. Measure the round tube you are clamping to, not the roll cage at its widest point.
The Pursuit Series Side View Mirrors with Dual Mode LED Night Vision are designed for various size UTVs, specifically Polaris Pro-Fit and Can-Am Profiled models. These mirrors feature a cast aluminum construction and are equipped with dual-color LEDs for night vision. The green LED mode provides better visual acuity in low light conditions, while the white LED mode offers bright illumination when needed. The mirrors have a convex surface, providing a wide viewing range and image stability. They are made with heavy-duty steel and aluminum and have a low-profile design to minimize interference with other attachments. The mirrors also have shatter-resistant safety glass for maximum safety. These mirrors are compatible with Polaris Pro-Fit and Can-Am Profiled ROPS (rollover protection system).
The Pursuit Series Side View Mirrors with Dual Mode LED Night Vision has received positive reviews from customers on Amazon. The product has an average rating of 4.8 out of 5 stars. Overall, customers are pleased with the Pursuit Series Side View Mirrors with Dual Mode LED Night Vision. They appreciate the product’s quality, functionality, and ease of installation. Some minor issues, such as missing parts or cosmetic imperfections, were mentioned in a few reviews, but they did not significantly affect the overall positive feedback for the product.
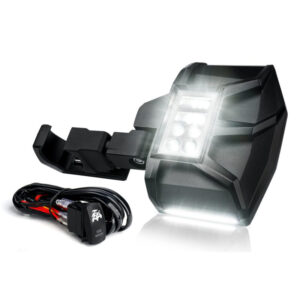
The Lupar UTV LED Side Mirror with Puddle Light is a high-quality side mirror designed specifically for side-by-side vehicles such as Polaris RZR, Pioneer, Can-Am, Kawasaki Teryx, Yamaha Rhino, and Wolverine and others. It is made of durable aluminum alloy material and features a clear lens with a built-in puddle light. The mirror has a unique appearance and adjustable bracket support, allowing for personalized off-road style.
One of the standout features of this mirror is its powerful lighting combination. It integrates LED spotlights and puddle lights to provide effective lighting and enhance safety during off-road adventures. The spotlights consist of 64 LED chips, while the puddle lights use COB LED lamp beads. These high-intensity LED chips offer clear visibility and help improve road conditions.
The mirror is designed with an explosion-proof mirror and a blue anti-dazzle color tone, providing a clear vision effect and effective UV protection. The mirror’s design allows for easy rear visibility and enhances off-road safety.
The adjustable clamp supports a 1.55″-2″ round roll cage, and the mirror’s bracket design is compatible with most windshields, making it convenient to use.
The Lupar UTV LED Side Mirror with Puddle Light has received positive reviews from customers. It currently holds a rating of 4.9 out of 5 stars based on 17 global ratings.
Customers appreciate the mirror’s high-quality construction, with the aluminum alloy material ensuring durability and stability. They find the powerful lighting combination of spotlights and puddle lights to be effective and enhance visibility during nighttime or off-road rides.
The clear lens and anti-dazzle color tone of the mirror receive positive feedback for providing a clear rear view and protecting against glare. Customers also find the mirror’s unique design appealing and mention that it adds a personalized touch to their side-by-side vehicles.
The mirror’s easy installation process and compatibility with different vehicle models are praised by customers. They appreciate the included wiring harness and rocker switch, which make the installation convenient.
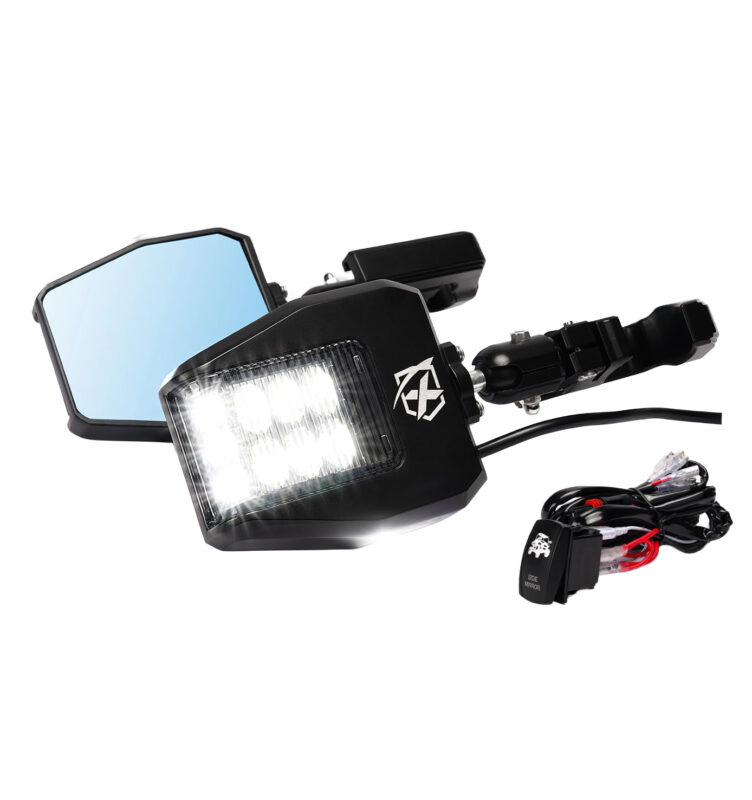
The Xprite UTV Side View Mirrors are made of aluminium and come with integrated LED spot lights and smoke lenses. They are designed to be compatible with 1.75″-2″ roll cage bars and can be used on various UTV models including Pioneer, Polaris RZR, Can Am X3, Kawasaki Teryx Mule, Yamaha Rhino, and Wolverine and others.
The mirrors are made with a heavy-duty aluminium alloy housing that can withstand extreme punishment. They feature blue tinted anti-glare lenses that provide a clear high-definition view day and night without distortion. Each side mirror has 9 high-powered LEDs that provide high-intensity illumination to boost visibility on the trail, without blinding other drivers. The package includes a wiring harness and rocker switch for easy installation.
These side view mirrors are designed to be sturdy and durable, with adjustable C-clamp mounting brackets that are corrosion-resistant. They offer a larger and wider viewing range to improve safety and awareness during off-roading adventures. The mirrors also come with rubber vibration isolators to keep the image clear and prevent sliding. They have position tension adjustment bolts to keep the mirror in place at the desired angle. The adjustable aluminum brackets can fit roll bars with a diameter of 1.75″ to 2″. The design of the mirrors is compatible with most windshields.
The product has received positive customer reviews, with an average rating of 4.6 out of 5 stars from 1,155 ratings. Customers have praised the quality, brightness of the LED lights, and improved visibility provided by these mirrors. Some customers have also mentioned that the mirrors are easy to install.
Kemimoto UTV side mirror with lights
Budget Pick
KEMIMOTO LED Side Mirrors, 1.6 to 2 inch Roll Bars
LED spot light plus amber turn signal in one housing
Break-away arms, so a tree branch folds them instead of snapping them
Shatter-resistant glass and the widest clamp range here, 1.6 to 2 inches
Cheapest of the four, and the housings are plastic rather than billet aluminium
The Kemimoto UTV Side Mirrors are aluminum rearview mirrors designed to fit 1.5″-2″ round roll bars on various UTV models, including Can Am Maverick X3, Polaris RZR, Talon, Pioneer, and Kawasaki Teryx. These mirrors feature LED lights that provide enhanced visibility at night and reduce blind spots for added safety. They are made of durable and corrosion-resistant aluminum alloy, designed to withstand off-road conditions. The installation is easy, and the mirrors have a breakaway feature that protects them when hitting obstacles and allows for multiple rearview angles through horizontal and vertical rotation. The UTV mirrors are compatible with different roll bar sizes and come with all the necessary components for installation.
The product has received an average rating of 4.5 out of 5 stars from 53 customer reviews. Customers have praised the brightness of the LED lights and the ease of installation, with one reviewer mentioning that the entire process, including electrical wiring, took about 30 minutes. The mirrors are also appreciated for their durability and resistance to off-road conditions. However, there was one complaint about the lights malfunctioning after less than 24 hours of use. The product has been well-received, with customers mentioning that it provides better visibility and adds a safety feature to their UTVs.
The Importance of UTV Mirrors
Mirrors are a crucial part of any vehicle, including UTVs. They provide a clear view of the surroundings, helping drivers navigate safely. UTV mirrors come in various types, including side mirrors, rearview mirrors, and UTV side view mirrors. Each serves a unique purpose and contributes to a safer and more comfortable ride.
Side Mirrors: Enhancing Peripheral Vision
UTV side mirrors are designed to offer a broad field of view, allowing drivers to see what’s happening on either side of the vehicle. They are particularly useful when navigating tight paths or when cornering and drifting. The best UTV side mirrors are adjustable, offering versatility in viewing angles and ensuring optimal visibility regardless of the terrain or weather conditions.
Light Up Your Path with UTV Mirrors with Lights
One of the latest advancements in UTV mirror technology is the integration of lights. UTV mirrors with lights, particularly LEDs, provide additional illumination, enhancing visibility during night rides or in low-light conditions. These mirrors feature built-in LED lights that serve as auxiliary running lights, spotlights, or even turn signals.
LED Lights: Better Visibility After Dark
LED lights in UTV mirrors serve multiple purposes. They can be used as turn signals, enhancing the vehicle’s visibility to other riders, especially in low-light conditions. Some UTV mirrors also feature high-intensity COB (Chip On Board) LEDs, providing a wide beam of light that illuminates the path ahead, making night rides safer and more enjoyable.
Green Cree LED Chips: Preserving Night Vision
Some advanced UTV mirrors come equipped with white and green Cree LED chips. The green light is used for preserving night vision, providing more visual acuity and better differentiation between colors at low-light levels. This feature greatly enhances night vision and night driving ability, making these mirrors valuable to any UTV.
Mounting Your UTV Mirrors: A Secure Fit
Mounting your UTV mirrors securely is crucial for optimal performance. Most mirrors come with mounting clamps that ensure a secure fit on the roll bar of your UTV. Whether you’re driving a Polaris RZR, a Honda Pioneer, or a Can-Am Maverick, there’s a UTV mirror with a mount that fits your vehicle’s roll bar perfectly.
Best UTV Mirrors for Every Vehicle
Whether you’re driving a Polaris Ranger, a Kawasaki Teryx, or a John Deere Gator, there’s a UTV mirror designed to fit your vehicle. Manufacturers like Seizmik, Kolpin, and Rigid Reflect offer a wide range of UTV mirrors designed to fit different models, ensuring that every rider can find the perfect mirror for their vehicle.
A Commitment to Quality: The Unlimited Lifetime Warranty
When choosing UTV mirrors, it’s essential to consider the warranty offered by the manufacturer. Some companies, like Seizmik, sometimes offer an unlimited lifetime warranty on their aluminum mirrors, covering any defects or damages. This commitment to quality ensures that you’re investing in a durable, high-quality product that will stand the test of time.
UTV Mirrors with LED Turn Signals: Safety Meets Style
UTV mirrors with LED turn signals are a fantastic innovation in the world of UTV accessories. These mirrors not only increase visibility but also add a stylish element to your vehicle. The built-in amber LEDs can be used as turn signals, enhancing safety by making your vehicle more visible to other riders.
The RZR Experience: UTV Mirrors for Polaris RZR
Polaris RZR is one of the most popular UTV models, and there’s a wide range of UTV mirrors designed specifically for this model. Whether you’re looking for side mirrors, rear view mirrors, or mirrors with lights, you’ll find a variety of options that are compatible with the Polaris RZR.
The Right Mirror Makes a Difference
Choosing the right UTV mirror can significantly enhance your off-road experience. Whether it’s a side view mirror with a wide field of view, a rear view mirror that keeps you aware of what’s behind, or a mirror with built-in LEDs for better visibility, the right mirror can make a world of difference. So, take your time, explore the options, and choose a mirror that best fits your needs and your vehicle. Remember, safety should always be your top priority, and the right UTV mirror can go a long way in ensuring that. Happy riding!
Don’t forget to check our recommended guides of great gear.
As an Amazon Associate we earn from qualifying purchases. This post contains affiliate links, and we may earn a commission at no extra cost to you.
Before we get started, let’s gather the tools and materials you’ll need for a smooth installation. Make sure you have your UTV winch and mounting hardware, power cables, and connectors, a winch control switch, a socket wrench set, a wire stripper and crimper, cable ties or clamps, protective conduit or wire loom, and optionally, a voltmeter or multimeter and electrical tape.
Choosing the right winch for your UTV is a critical first step. Consider factors like load capacity, motor type (permanent magnet or series wound), and mounting options that suit your ATV. Remember, you want a winch that can handle the tasks you’ll encounter during your adventures.
Now, let’s prepare your UTV for the winch installation. Find a suitable mounting location on your UTV’s frame that can support the winch’s weight and torque. Ensure there’s enough space to accommodate the winch, its cables, and other components. Clean the mounting surface thoroughly and apply corrosion-resistant paint or primer if needed.
Next up is the exciting part: the step-by-step wiring guide. Start by mounting the winch to your ATV, aligning the mounting holes, and securing the bolts with a socket wrench. Be careful not to overtighten and risk damaging the winch or your UTV.
Now, let’s route and connect the power cables to the winch motor. Strip the ends of the power cables, crimp or solder the appropriate connectors, and attach the positive and negative cables to the corresponding terminals on the winch motor. Tighten the connections and ensure they’re secure.
Time to route the cables to your ATV battery. Plan a route that avoids sharp edges, moving parts, or hot surfaces, and secure the cables along the way with cable ties or clamps. Once you’ve reached the battery, connect the positive cable from the winch to the positive battery terminal, and the negative cable to the negative terminal. Don’t forget to reconnect the battery after all connections are secure.
Now, let’s install the winch control switch. Choose a convenient location within reach while operating your ATV, ensuring there’s enough space behind it for the switch and its wiring. Route the control wires from the winch to the switch location, strip the ends, attach the appropriate connectors, and connect them to the corresponding terminals on the switch as per the manufacturer’s instructions.
To keep things organized and protected, secure any loose wires with cable ties or clamps. Consider using wire loom or protective conduit for added protection against abrasion, heat, or moisture.
Before we conclude, it’s essential to test and troubleshoot your setup. Check all connections to ensure they’re tight and secure, and verify that the winch operates smoothly in both directions using the control switch. If you encounter any issues, consult the manufacturer’s troubleshooting guide or seek professional assistance.
Remember, regular winch maintenance is crucial for optimal performance. Inspect your winch, cables, and connections regularly for wear or damage. Clean and lubricate the winch components as recommended by the manufacturer, and promptly replace any damaged or worn parts to prevent accidents.
Congratulations! You’ve successfully wired your ATV winch and are all set for thrilling off-road adventures. Keep practicing safe winching techniques and conduct regular maintenance to extend the lifespan and enhance the performance of your winch. And remember, if you ever need assistance or have concerns about your installation, don’t hesitate to seek professional help. For the full mounting process before you wire everything up, see how to install a winch on your UTV, and once it’s wired, how to use a snatch block for extra recovery options.
Looking to add a winch instead of just learning how one works? This is a solid 4500 lb option built for UTVs.
OUR PICK
Kolpin 4500# Winch – Synthetic Rope – 25-9455
Includes heavy-duty wiring, quick connect harness, battery leads, premium handlebar mount controls and mountin
Ergonomic dial for free spooling-to-clutch engagement; Includes Remote
Ergonomic dial for free spooling-to-clutch engagement
Side-by-sides are becoming increasingly sought after – who can resist the thrill of driving an offroad beast? Not to mention, it’s a great way to show your friends how unstoppable you really are. Plus, side by sides make running errands so much more exciting and enjoyable! But if that’s not enough motivation for you yet, remember this: The best reason why everyone should get behind the wheel of a Side by Side is because nothing says ‘I’m living my life’ louder than them.
As an Amazon Associate we earn from qualifying purchases. This post contains affiliate links, and we may earn a commission at no extra cost to you.
Top Items to Bring with you on your Side by Side
Spare Tire and Tire Repair Kit
It is critical to carry a spare and tire plug kit with you whenever you take your UTV for a spin. Not only does this ensure that the vehicle’s performance and safety remain intact, but it also becomes incredibly useful when stuck in remote areas far from repair or replacement services. By having such tools at hand, one can rapidly fix any flat tires or damage that may have occurred during their trip, ensuring they are able to continue on safely afterwards. Keep safe on your next road trip with a spare tire and repair kit. Not only do they provide you the necessary tools to handle any flat tires, but they can also help save time and money.
Thirdly, to ensure your UTV trip is free from worry, having a spare tire and repair kit in the vehicle should be part of every outing. With these items on hand, you can rest easy knowing that if an unexpected problem arises with one of the wheels, you have what it takes to get back up and running quickly. Packing a spare tire and repair tools will not only enhance performance levels as well as safety but also offer much-needed peace of mind!
OUR PICK
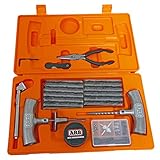
ARB 10000011 Speedy Seal 2 – Universal Heavy Duty Tire Repair Kit For Car, Truck, RV, Jeep, ATV, Motorcycle, Tractor, Trailer. Flat Tire Puncture Repair Kit Fix Punctures and Plug Flats 50 String Plug
the ARB Speedy Seal II includes a premium spring steel insertion needle with cast handle, hardened steel reame
Includes a quality pencil type tire gauge, insertion and reamer tools, needle nose plyers, lubricant, addition
Spare repair cords are also available in packs of 50 from ARB, so before you head out on your next 4×4 trip, m
A first aid kit is a necessity when out on your side-by-side; it will provide you with the necessary tools and supplies to treat common minor injuries, such as cuts, bruises, sprains, or burns. Staying prepared for medical emergencies can help prevent more serious injury from occurring in an emergency situation. Plus, many of these kits are lightweight and easy to carry around!
OUR PICK
First Aid Kit, Professional Trauma First Aid Kit with Labelled Compartments Molle System for Car, Hiking, Backpacking, Camping, Traveling, and Cycling
【Well Organized and Labelled】The first aid supplies labeling system enables you to quickly identify first aid
【Molle First Aid Kit for Car】 The car first aid kit is sturdy, featuring 600D polyester.You will particularly
【Compact Frst Aid Kit 】The overall dimension of the first aid kit is 7.9'' x 5.9'' x 3.6'' and weight only 1.3
When out on a ride with your side-by-side, it is important to always be equipped for the unexpected. That’s why you should bring along a multi-tool – it offers versatility in such an incredibly compact form! Whether you need to make adjustments or repairs to your ATV/UTV, tighten and loosen bolts, cut wire, or open bottles – whatever tasks come up can easily be handled by this one handy tool. With its flexibility and portability combined together in one package, having a multi-tool at hand is essential when exploring off roads!
Secondly, having a multi-tool can be a real time and money saver. All the tools you require are neatly condensed into one compact package as opposed to carrying many different tools separately. This allows for more space in your bag or pocket, reduces weight and saves you from needing to lug around an overly bulky toolbox.
Finally, a multi-tool can provide you with serenity and assurance that you are outfitted for any predicament life throws at you. Possessing the means to undertake different activities will instill self-assurance in your venture, so all of your energy may be spent on enjoying every moment of your offroad expedition!
OUR PICK
LEATHERMAN, Wave+, 18-in-1 Full-Size, Multi-tool for DIY, Home, Garden, Outdoors or Everyday Carry (EDC), Black
A Leatherman for Everyone: For the last 40 years, Leatherman has been helping millions to conquer the expec
Engineered to Withstand: From our Portland, Oregon factory and backed by our 25-year warranty, our multi-tools
Our Best-Selling All-Rounder: From household fixes & DIY pursuits to gardening and exploring the outdoors, Wav
Along with being an essential tool to keep in a UTV, flashlights are incredibly beneficial for many reasons. If you ever find yourself stranded or lost without any light, these can provide the necessary illumination and help guide your way across remote areas. If you come across mechanical issues during your trip that need urgent attention, having a flashlight may be useful when trying to make repairs.
A flashlight can help you make your way through dark or hard-to-reach places. Suppose you need to traverse a trail after sunset and run into an obstacle like a fallen tree – having the beam of light in front of you will let you see exactly where to go so that no hazard goes unnoticed.
Finally, if ever stranded and in need for assistance, your flashlight is also handy as it can be used as distress signal: point its glow towards rescue teams or passing cars and draw their attention from afar!
Holding a flashlight in your UTV is nothing short of essential for safety and preparedness. In the event of an emergency, it can be used as a source of light to assist you with navigating strange or difficult terrain, as well as serving its purpose by signaling others for help if needed.
Head lamp
Having a headlamp available when you take your UTV out on the trails can be an asset for numerous reasons. Headlamps are lightweight, wearable illuminators that offer hands-free illumination where and when it’s needed most – such as in dark or confined areas. This type of lighting is especially helpful while driving around with your UTV at night, allowing you to navigate even the darkest corners of unexplored terrain! Even if you’re not expecting it, bringing a headlamp with you on your UTV adventure can prove to be an incredibly helpful addition to your gear. It allows for improved visibility of the trails and can also come in handy when assisting other riders or trail users who may need additional help. So make sure that this is one item that’s always part of your trip!
Tow strap
A tow strap is a fundamental tool that should always be considered when taking your side-by-side out on the trails. Not only can it help another vehicle in need by providing assistance if they are stuck, but you can also use it to recover your own side-by-side if necessary – especially advantageous for those driving through remote areas or difficult terrain such as ditches and mud pits. Investing in a tow strap may just be what saves the day! As you traverse the steep terrain of a hill, your side-by-side could unexpectedly begin to roll backwards. To control this situation and ensure safety for both yourself and other drivers, it is strongly recommended that you always have a tow strap at hand in your utv. A tow strap can be fastened securely around any solid object such as trees or stones to stop further backward motion, making it an essential tool for rescues or preventing incidents from occurring in the first place. Having one on board allows you to lend assistance when another driver needs help getting out of tight spots!
OUR PICK
Rhino USA Recovery Combo Kit – 20ft Tow Strap & Hitch Receiver
AMERICAN OWNED, FAMILY OPERATED – Join the Rhino Family & Support a USA based Father/Son Business!c
True adventurers know the importance of carrying a winch on their side-by-side. With its exceptional pulling power, you can free your vehicle from sticky situations with ease. If you and your friends venture off into remote areas or come across another stuck vehicle in need, having a winch is essential for getting them back up and running quickly. Not to mention that it provides an extra layer of security when traversing tough terrain – just like insurance for your four wheeler! So don’t forget about this helpful tool as you are planning out all the fun adventures ahead; because with a well-equipped side-by-side, anything’s possible! What you may not know is that a lot of UTV snow plows require a winch to operate.
UTV Winches on Amazon (affiliate link)
Ratchet straps
Ratchet straps make it easy to tow a side by side with precision and assurance. These incredibly strong and resilient tie-downs are typically crafted from durable items such as polyester or nylon, making them the ideal choice for towing applications. With these straps, you can fasten your vehicle at various degrees of tension – something that is impossible when using cables or chains! In this way, you don’t have to worry about destroying any part of your car during the process.
Ratchet straps are not only easily stored and lightweight, but they make for a reliable option when it comes to hauling your side by side. Plus, using ratchet straps can be an uncomplicated way to guarantee the secure transportation of your vehicle.
Whether you’re taking your side by side out on the trails or just need to secure something in a jiffy, ratchet straps can be an asset. Ratchets offer maximum adjustability, allowing you to customize the tension as needed and make sure all of your cargo is safe and sound while remaining snug even over rough terrain. What’s more, they are constructed from materials that provide superior strength when compared to bungee cords – perfect for those heavier items or anything valuable that needs extra protection!
Ultimately, carrying ratchet straps with you while operating a side-by-side can be an asset in your gear arsenal and will help you stay prepared for any unexpected circumstances that may arise.
OUR PICK
Rhino USA Ratchet Straps Tie Downs (4-Pack) – 1in x 15ft with S Hooks
STANDARD RATCHET STRAPS – Locking tie down straps with a precision manual crank-and-release mechanism, anodize
EASY TO USE MANUAL RATCHET TIE DOWNS – Traditional non-retractable ratchet straps with ergonomic padded handle
MOTORCYCLE, ATV, KAYAK AND TRUCK BED TIE DOWNS — Built for securing motorcycles, ATVs, kayaks, roof racks, tru
Whenever you hit the trails with your side by side, it’s wise to bring a few extra bungee cords. Not only can these help secure any necessary items such as bags or coolers, but also come in handy should one of your existing cords be damaged or break. Being prepared with extras is always beneficial!
Additional bungee cords can be a great way to secure any items you may come across on your off-roading trip. They are an essential item for anyone who takes their side by side out and about! Not only will they help keep you organized during the ride, but being able to tie down objects like branches or debris in case of unexpected scenarios is incredibly beneficial too. Make sure that having extra bungee cords with you while riding remains at the top of your list when it comes time to pack up!
Extra fuel
There are plenty of good reasons to bring extra fuel along on your UTV excursion. Not only will it provide a helpful backup in case you run out or encounter mechanical problems, but having that extra tank can also help extend your trip and explore more trails without the need for frequent stops at gas stations. Ultimately, bringing additional fuel with you is always a smart idea when heading out into the wilderness!
When you take your UTV out on the trails, bringing extra fuel is an essential part of your gear. This additional fuel can be shared with other trail users or offered to riders who may need assistance. You never know what unexpected situations might arise while off-roading, so it’s best to come prepared by having a backup supply of gas at all times!
UTV Gas Can on Amazon (affiliate link)
High-lift jack
Taking along a jack when you’re riding on the trails with your UTV will come in handy. A jack can be used to lift your vehicle off the ground, which allows for easy and quick access to perform tire changes, maintenance or unload from a trailer without breaking into a sweat. If needed, this tool also enables swift repairs so that you don’t have to waste valuable time and energy! Because a jack is lightweight and compact it’s simple to transport with you into the wilderness. Packing your UTV with an extra jack can grant peace of mind when unexpected predicaments arise in nature. It’s certainly worth considering for any outdoor enthusiast!
Snatch block
Looking for a way to simplify your winching or towing applications? A snatch block is the perfect solution! This type of pulley can easily be attached to any winch line or rope, helping you redirect it and enhance its mechanical advantage. Make sure you use a snatch block in all future projects – it’s guaranteed to make things easier!
Snatch blocks are essential tools for off-road recovery due to their hinged design, allowing the easy insertion and removal of lines or ropes. Whether you’re traversing mud, snow or other dangerous terrain while riding your UTV; having a snatch block around can be truly beneficial in preparation for any unexpected situation that might arise. Incorporating this tool into your arsenal is sure to add to your trail rides!
OUR PICK
TICONN 10 Ton Winch Snatch Block Towing Pulley Blocks 22,000 LBS Capacity, Heavy Duty Offroad Recovery Accessory for Truck, Tractor, ATV & UTV
Sturdiness: Made of heavy-duty steel, MAX. load at 10 Ton (22,000 LBS), suitable for most off-road recovery si
Heavy Duty: This professional-grade snatch block effectively doubles the winch pulling power to easily drag a
Offroad Saver: The winch pulley features two rotatable rings for multi‑angle pulls and anti‑corrosion coatings
A tree saver strap is a tool for winching or towing, crafted with and long-lasting materials such as nylon or polyester. It easily attaches to the winch line or rope, looped around a strong anchor point like a tree – thus providing the utmost stability and security during any type of application. The tree saver strap is strategically designed to distribute the load equitably across the tree, while also preventing harm or wear and tear of either your winch line or rope. Whether you require a Tree Saver Strap will depend on where you’re driving your UTV off-road, as well as what type of environment that may entail. Although they can be useful in anticipating potential difficulties encountered along trails, overall a Tree Saver Strap is an essential tool for any off road trip!
Recovery damper
When in use with a winch or tow system, the recovery damper is an essential safety device. This cushion – usually fabricated from heat-resistant materials such as canvas or synthetic fabrics – connects to the rope or line and rapidly slows down any load when it experiences a sudden release of that line. With this precautionary measure in place, you can rest assured your valuable cargo will not be subject to drastic changes in speed during movement.
In off-road contexts, recovery dampers are essential for avoiding unexpected injuries or damages caused by the sudden release of a winch line. It is your choice to decide whether you need one based on what kind of terrain and UTV trips you will be partaking in. Ultimately, possessing a recovery damper can be incredibly advantageous when exploring trails as it allows you to prepare for any potential possibilities that may unexpectedly occur.
Recovery Dampers on Amazon (affiliate link)
Snatch strap bag
If you’re an off-roading enthusiast, then a snatch strap bag is essential for safely and conveniently storing your recovery equipment. Constructed from strong canvas or synthetic fabrics, this pouch will protectively fit all of your essentials while remaining light in weight so that it can be easily carried along with you on trips. Securely store not only the snatch strap but also other items such as shackles, D-rings, and gloves — everything has its place! When out on the trails with your UTV, being prepared for any potential emergency is key. The snatch strap bag provides an efficient and organized approach to storing recovery equipment in one easy-to-access location. It can be attached to your vehicle or carried by hand, allowing you maximum flexibility when it comes to its placement and use. Ultimately, if you are going off roading in unknown terrain, having a snatch strap bag as part of your gear will help ensure that no matter what unexpected situations may arise during the ride – you have just what you need right at hand!
Rope
Taking rope with you on your off-road adventures in your side by side is an excellent idea. It has a variety of uses that can come in handy, whether it’s for tying down equipment to the vehicle, creating a makeshift shelter or as simply launching point if you get stuck! Taking a few pieces of rope along your side by side trip is an essential addition to any outdoor excursion. Not only will it come in handy if you need to make quick repairs or tie something down, but it’s also lightweight and simple to transport — so there’s no excuse not to have some on hand! Being prepared with rope can provide peace of mind knowing that whatever unexpected situation arises during your travels, you’ll be able to handle them without a problem.
Rope for your UTV on Amazon (affiliate link)Zip Ties
Jumper cables
Jumpers have a multitude of benefits, one being the ability to aid another vehicle whose battery has entirely run out or is on its last legs. This feature can be especially critical if you’re traversing in isolated regions and come across someone else who needs help.
Don’t let a dead battery put an end to your side-by-side adventures! With jumper cables, you can swiftly jump-start your ride if its battery becomes discharged or just won’t turn on. Be it caused by leaving lights on too long, running a bunch of electrical components at once, age and wear – having jumper cables in hand show help you get going again pronto. Picture this: You’re set for the trail and then the moment arrives when you have to take off the trailer but alas – oh no! It’s an empty battery instead. Don’t worry though; with those trusty cable in store all is not lost – they’ll save your day (and more) so don’t leave home without them anytime soon!
UTV Jump Starter Box
If you want to upgrade your roadside assistance, a jump box for UTVs is the perfect solution. Not only will it start your side by side even when no one else is around to help, these mini power boxes come with built-in flashlights and can charge up other small electronics such as phones! Get yourself a jump box today and never worry about being stranded again.
UTV Jump Box on Amazon (affiliate link)
Shovel
using a shovel has many benefits when driving your side-by-side in remote areas or challenging terrain – and even if you become stuck. On top of the fact that it can dig out an immobilized vehicle, you can also use a shovel to construct improvised ramps or paths across ditches and other obstructions, so your ride is able to safely traverse them.
Having a shovel in your side-by-side is critical for both safety and preparedness. It can come in handy to help clear roadways, construct a makeshift ramp or path, all while providing added protection during an array of scenarios.
GPS device
Deciding whether or not to carry a GPS device on your UTV can be determined by the specific needs and context of your situation. If you plan to explore unfamiliar terrain, such as hunting or off-roading activities in remote areas, then having a GPS device is highly advantageous for navigation purposes and will help ensure that you make it back home safely. Not only does a GPS provide essential information about routes, but also important details like nearby trails with various points of interest along them – making this a tool for any outdoor enthusiast!
A GPS device is useful if you’re trying to chart a course in unfamiliar terrain – with it, you can monitor your coordinates and the direction of travel. You can even use it to record your route; that way, if ever lost or confused, you know exactly how to backtrack safely. Even if you are familiar with an area and only following well-marked trails via UTVs, a GPS always comes in handy for emergency preparedness! It’s essential to be ready for anything on any trip: having these tools makes sure success follows suit!
UTV GPS on Amazon (affiliate link)
Top Tools to bring on your side by side
No matter what activities you plan to use your side-by-side or utility terrain vehicle for, and whatever type of terrain you’ll be crossing, it’s always beneficial to keep certain tools on hand. Invest in an all-inclusive tool package that provides everything needed so that nothing gets left behind when the adventure begins! Get ready for any kind of offroad trip with a set of useful items such as:
Get all your tools in one convenient package
UTV Tools Essentials on Amazon (affiliate link)
Socket Kit
Whether it’s off-roading, hunting, or farming – UTVs are highly useful vehicles and a socket kit is the perfect tool to bring along for any trip. With its array of tools such as wrenches and screws, you can easily make quick repairs – from tightening bolts to replacing worn parts. No matter what type of terrain your vehicle encounters on its travels, a socket kit will be sure to provide all the necessary solutions!
Having a socket kit on hand can assist you in making modifications to your vehicle, such as modifying the suspension or swapping out tires. By keeping one nearby at all times, you’ll always be ready for any potential repair and maintenance necessities that may come up while using your UTV. All in all, it’s crucial to have a reliable socket kit close by!
Pliers
Having a pair of pliers at your disposal is an absolute necessity for taking on the trails with a side by side. Pliers are useful and can be used to tighten or loosen bolts, remove nails, cut wire – you name it! Having them stowed away in your vehicle will ensure that you’re always prepared should any problem arise while out exploring.
Aside from their usual use, pliers can also prove to be quite helpful in unexpected scenarios; for example, they can be used to remove any dirt or rocks lodged into your tires, or even a hook that has become stuck onto a fish. All-in-all, carrying a pair of pliers with you on your side by side excursions is an ideal way of ensuring that you are always prepared when sudden situations arise.
Wrench Set
A wrench set should always be part of your trailside kit when you’re exploring with a side by side. Wrenches are great for tightening or loosening bolts and other fasteners, which can come in handy if something needs to be repaired quickly while out on the trails. Not only that but wrenches also prove useful in various situations such as removing a stuck lug nut from a tire or clamping down an errant hose – just about any situation where you need quick access to tools for actionable repair work. Having this dependable set along will help ensure that no mechanical mishaps wreak havoc on your off-roading adventures!
OUR PICK
Ryker PRO Heavy Duty Motorcycle Tool Roll Up Bag w/Socket Wrench Organizer
Portability & Organization: Compact roll-up design keeps tools organized with multiple compartments, detachabl
Built for Tough Jobs: Made from 1680D ballistic fabric with water- and rip-resistant material, reinforced stit
Tool Storage: Use this tool roll as a wrench organizer, tool bag, or storage solution for drill bits
To perfectly round off your tool selection, you must include a screwdriver set. While out on the road, anything can happen and having the ideal instrument available to solve any problem is indispensable! Therefore, don’t forget to pack both flathead and phillips screwdrivers before starting your trip.
Head lamp
If you travel in a UTV, it is wise to bring along a headlamp for many reasons. This portable lighting device conveniently attaches to your head and provides illumination without the need of using your hands. It can be particularly useful when out on trails at night or in enclosed areas as it will allow you to navigate through them with ease and clarity. A headlamp isn’t only a beneficial asset to have in the back of your UTV, but it can also be a tool when you encounter other trail users who may need help. Not to mention, having this piece of gear with you on your trip will make sure that you are prepared for any unexpected situations which could arise. Ultimately, bringing along a headlamp is always recommended if going off-roading in your UTV!
Tire Pressure Gauge
Absolutely, it’s wise to carry a tire pressure gauge in your off-road vehicle. To keep your machine running safely and performing optimally, you must maintain the correct levels of inflation in its tires. Underinflated wheels lead to decreased stability and traction as well as premature wear on the treads, while overinflation causes accelerated degradation of the central portion of each tire – not to mention an uncomfortable ride. Regularly monitoring air pressure with this tool helps ensure that your vehicles’ tires are properly filled so you don’t experience any unexpected problems! A tire pressure gauge is an inexpensive and convenient tool to keep on hand when exploring off-road; there’s no excuse not to have one. All in all, carrying a tire pressure gauge with you as part of your side by side kit is always recommended. If you tires get out of balance be sure to check out our article on Do you balance UTV tires
OUR PICK
Tire Pressure Gauge – (0-60 PSI) Heavy Duty, Certified ANSI Accurate with Large 2 Inch Easy to Read Glow Dial, Low – High Air Pressure Gauge. Tire Gauge for Car and Trucks Tires by Vondior
HIGH PERFORMANCE LOW MAINTENANCE – Your car is one of your partners in life. Making sure it performs at its be
SAFETY FIRST – Driving your family, friends or simply carpooling is a big responsibility. Protecting your pass
SAVE YOUR GAS MONEY AND THE ENVIRONMENT – A beneficial situation for all mankind. When tires are not properly
Going off-roading with your UTV? Be sure to bring the right spare parts! Depending on the type of terrain you’ll be traversing and your vehicle’s make/model, different components may require extra support. For instance, if you’re driving a RZR or other side by side with a drive belt – carry an additional one for emergencies.
Below are some common spares to have handy:
Spare spark plugs
Extra oil
Extra air filter
Extra fuses
Spare belt
Extra hoses
Extra bolts and nuts
It is also a good idea to consult your UTV’s owner’s manual to see if there are any specific spare parts that you should bring with you based on your UTV’s unique requirements.
Things you probably didn’t think you needed
Zip Ties
You should always carry zip ties on your trail rides with your UTV for multiple reasons. Zip ties are a lightweight and compact tool that is helpful in countless scenarios – from keeping items together to making temporary repairs or assisting fellow riders. Plus, you’ll never know when someone else may need them – so be sure to have some handy! With all their potential uses, there’s no question why carrying zip ties could greatly enhance any off-road experience. Without a doubt, having zip ties in your UTV while you start the trails can be an incredibly advantageous addition to your equipment and assist you with any sudden issues that may appear.
Duct tape
When you go off-roading in your UTV, duct tape is a must-have tool to have around. What makes this adhesive so valuable? Well it’s lightweight and can be used for virtually any task – from patching up holes and securing loose parts to fixing mechanical issues. Plus, if an emergency arises while you’re on the trails, duct tape will come in handy as a temporary solution until help arrives! By investing a meager sum in duct tape, you are supplied with a resource that can fit conveniently into your UTV trip gear. Carrying it on your trip will help to be ready for any surprise circumstances that could arise and is highly recommended if you’re looking to increase the safety of both yourself and others.
Trash bags
Whether you’re out on the trails with your UTV or camping, bringing along a trash bag is an exceptional idea for multiple reasons. Primarily, it offers an easy way to keep your campsite and trail area clean – simply throw away any rubbish in the bags! These same bags can be used to store wet or muddy gear such as boots and rain jackets; ensuring that you maintain a neat environment inside of your vehicle. Having trash bags with you on your UTV trip can be a sensible decision. Not only will they come in handy for carrying out any garbage or debris that may present itself along the way, but also it shows respect to nature and helps keep our trails clean by preventing littering. All in all, bringing some extra trash bags is an addition to your gear list.
Sunscreen
Protect your skin from the sun’s damaging UV rays by applying sunscreen before you hit the trails with your UTV. Not only can this help prevent a painful sunburn, but regular use of sunscreen may also reduce your chances of developing skin cancer and other health issues. This is especially true when it comes to riding in an open-air vehicle like a UTV as opposed to enclosed ones since they are more exposed to sunlight. If you plan on spending an extended period of time on the trails with your UTV, it is a smart idea to wear sunscreen. Selecting a sunscreen that has an adequate SPF rating and applying it generously yet regularly will ensure optimal protection from sun damage while keeping your skin safe and healthy. So don’t forget to lather up before heading out – using the right kind of sunscreen when driving your UTV can make all the difference in terms of both health and wellness!
Insect repellent
Safeguard yourself from mosquitoes, ticks and other pests when you venture onto the trails with your UTV by using insect repellant – not only to ward off irritation and stings but also for potentially exposing you to serious illnesses. Since prolonged stays in heavily vegetated regions or those that contain stagnant water can increase your chances of running into bugs, it’s wise to take defensive measures beforehand. Make your outdoor adventure an enjoyable one by applying insect repellant containing DEET before heading out. Donning long-sleeved attire and forgoing fragrance products will also help to reduce the probability of being bothered by bugs. Ultimately, taking these simple steps can enhance the quality of your UTV trip and provide you with some much needed protection against pesky bites and stings!
Water and snacks
If you plan to spend a long time out on the trails with your side by side, it’s wise to bring some extra food and snacks along. Not only will they help provide you with energy and nutrition during your ride, but they can also be useful in getting prepared for any unforeseen delays or issues like losing your way or having mechanical problems. Beyond being essential for your own sustenance while out on the trails, carrying excess food and snacks can also be beneficial to share with other trail users. Whether it’s a kind gesture or an act of compassion in times of need, having extra provisions might just save someone else’s day – if not their life! Being mindful of this when bringing along your side by side is highly recommended as unexpected emergency situations may arise unexpectedly.
What to wear riding ATV trails?
Gloves
When you’re cruising down the trail at 30 miles per hour in a side by side, perhaps it doesn’t feel too cold- until your hands hit the wheel. That’s why having gloves on hand is so important in UTVs! The weather can be unpredictable; protective wear such as gloves will ensure that your hands remain insulated from temperatures – hot or cold – while also guarding against potential hazards like dust and mud. Not only do they provide comfort but they also shield them from wind, sun, and other external factors. So when hitting those trails, make sure to equip yourself with some reliable pairs of quality mitts!
Gloves provide added protection while driving a UTV by shielding your hands from any potential harm you may encounter. Whether it be urgent repairs to the vehicle or accidental contact with sharp objects or rugged terrain, wearing gloves reduces the risk of cuts, abrasions, bruises and other injuries.
Gloves in your UTV is essential for comfort, safety, and protection. Gloves can not only protect you from the elements, but they also create a barrier between your hands and any potential hazards or injuries.
UTV Driving gloves on Amazon (affiliate link)
Rain gear
Rain gear is an absolute must when taking your UTV on the trails. Not only will it help keep you dry and comfortable during unexpected showers, but it can also safeguard your clothing and precious belongings from getting drenched. Plus, with its insulation properties, rain gear ensures that you stay warm even if a downpour catches you off guard– particularly important in colder temperatures or when out for long hours! When venturing off-road with your UTV, having the right rain gear on hand can prove to be an asset. It’s always best to come prepared for any unexpected changes in weather conditions that you may encounter along the way.
OUR PICK
PTEROMY 3-in-1 Hooded Rain Poncho for Adult with Pocket, Waterproof Lightweight Unisex Raincoat for Hiking Camping Emergency (Black)
[PREMIUM MATERIAL] This rain poncho is made from lightweight yet durable and rip-resistant polyester material.
[REUSABLE AND EASY TO CARRY] This rain poncho is easy to fold and weighs only 10.5 oz after being packed in th
[3 IN 1 FUNCTIONAL] Unlike traditional rain coat or rain suit, the rain ponchos for adults are made practical.
Don’t forget to cover up when you’re out on the trails with your UTV. Pack a hat or visor and sunglasses for optimal protection from the sun’s UV rays. The wide brim of a cap can guard your head, face, and eyes from potential long-term damage caused by these powerful beams of light. Sunglasses will not only protect against eye strain but also reduce dangerous glare that could otherwise diminish visibility while driving in unknown terrain. A hat and shades are essential components for achieving an enjoyable outdoor outing! When it comes to UTV adventures, packing a hat and sunglasses should be mandatory for the ultimate off-road experience. Not only will these items provide added protection from sun damage, but they’ll also support a more comfortable trip overall!
Extra clothes
If you plan to start a side by side excursion, bring an additional set of clothes! It could prove life-saving in emergencies such as sudden wetness or dirtiness. Plus, extra garments can help keep you cozy since weather changes are unpredictable when you’re miles from civilization. With the proper attire, your off-roading experience will be more pleasant and safe for extended periods of time. Having extra clothes can be a lifesaver in the face of an emergency or other situation you couldn’t anticipate. Bringing additional apparel with you on your side-by-side explorations is not only but also allows for preparedness when confronting unforeseen predicaments.
Safety Equipment to bring UTV Trail Riding
Fire extinguisher
If you plan on taking your UTV out into the trails, it is wise to come prepared with a fire extinguisher. A fire can be an immense hazard and having a way of quickly responding could make all the difference in an emergency situation; whether caused by mechanical issues, excessive heat or even accidents. Therefore, packing this safety equipment should not go overlooked as its value matters a lot. By having a fire extinguisher with you when traveling outdoors, not only will it provide much-needed relief of mind and security but also the capability to take care of any unexpected scenarios. More so, carrying one while on your UTV trip can serve as an essential addition to your supplies and help ensure that you are fully prepared for what lies ahead.
OUR PICK
Badass Moto for Jeep Fire Extinguisher Mount for Jeep Wrangler or Bronco
SECURE YOUR FIRE EXTINGUISHER: No more fire extinguisher rolling around under seats! Our Badass Moto fire exti
ENHANCEMENT FOR YOUR JEEP'S LOOK AND SAFETY: This fire extinguisher mount helps ensure your fire extinguisher
PEACE OF MIND ON THE ROAD: Knowing you have a fire extinguisher securely mounted and quickly accessible gives
Bringing a cellphone and charger with you on your UTV ride is the wisest decision for numerous reasons. Primarily, having access to a phone in an emergency can be critical—if something goes awry during your venture or if you face any unforeseen issues, being able to contact help could save the day! Not only can a phone and charger be used to use your device as a GPS for those unfamiliar trails, but also it will ensure that you have the power to capture photos or videos while out on the adventure. Bringing a phone charger when riding with your UTV is an essential part of having all the right gear!
Conclusion
Ultimately, being ready on the trails with your UTV is crucial to guarantee a secure and pleasing trip. By stocking up on essential riding equipment and supplies, you can be prepared for any conceivable issues that may arise – from mechanical trouble to unexpected delays or tough climatic conditions. With these essentials by your side, you will feel more self-assured in handling whatever comes your way! Being adequately prepared for your UTV trips is essential to ensuring a comfortable and safe trip. The more one plans ahead, the better their chances of having an enjoyable experience out on the trails. From safety checklists to packing all those necessary items, being prepared can ensure that you have a successful and unforgettable trip! For more on keeping all this gear organized between rides, check out our storage ideas for your Polaris RZR, and if you’re trailering or truck-bedding it to the trailhead, our guide on how to haul your UTV in a truck bed covers what to check first.

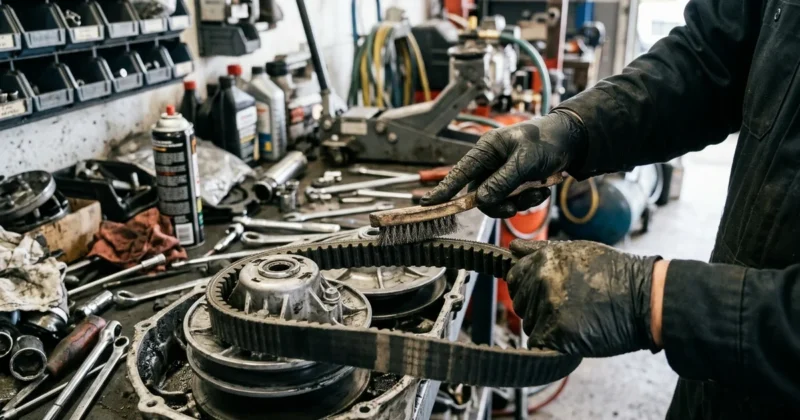


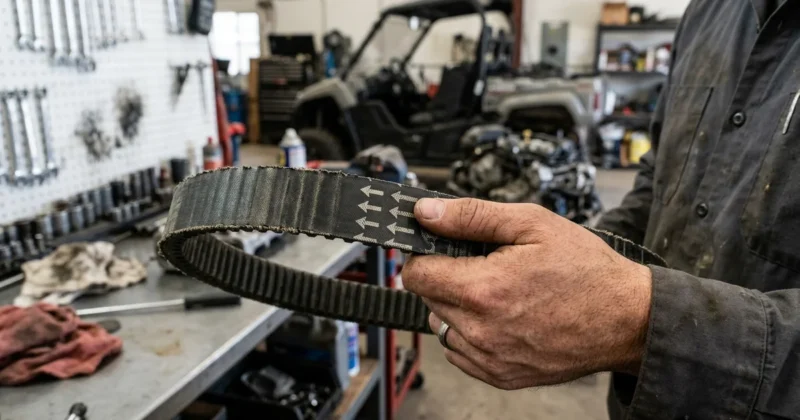


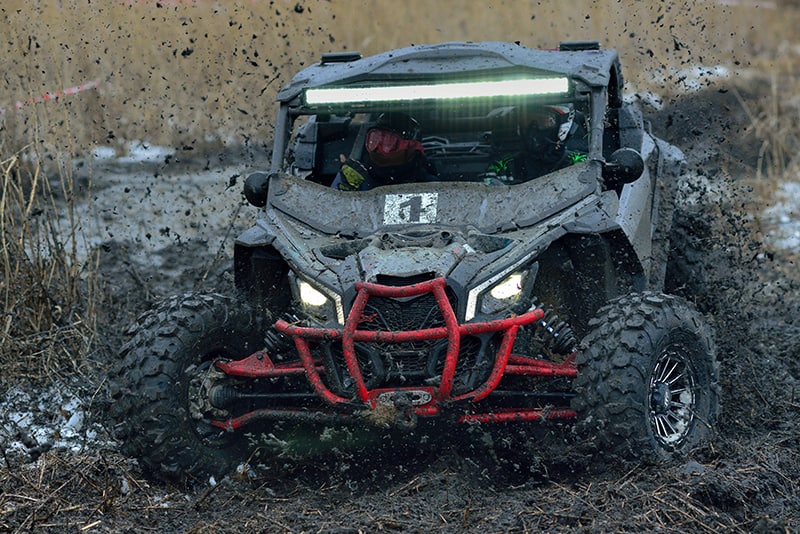
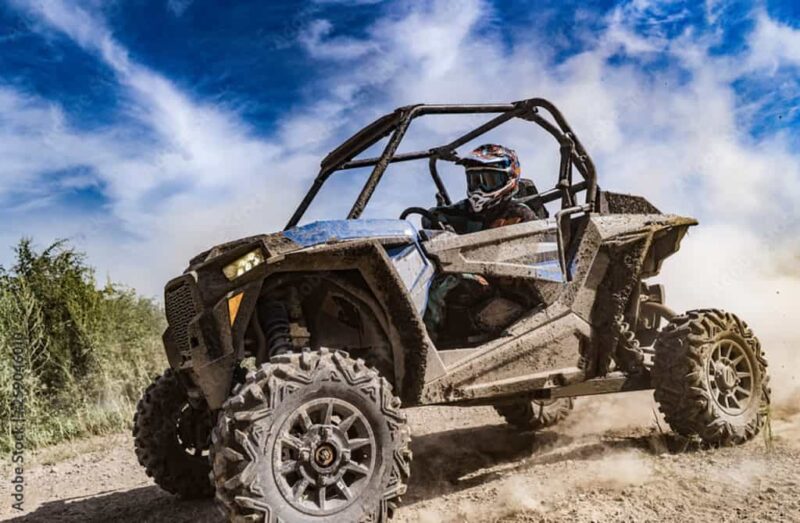
 Check the current price on Amazon and you can take care of your UTV tire balancing without breaking the bank.