Author: Roger Lanken

  • How do you break in a new Can-Am belt?

    How do you break in a new Can-Am belt?

    As an Amazon Associate we earn from qualifying purchases. This post contains affiliate links, and we may earn a commission at no extra cost to you.

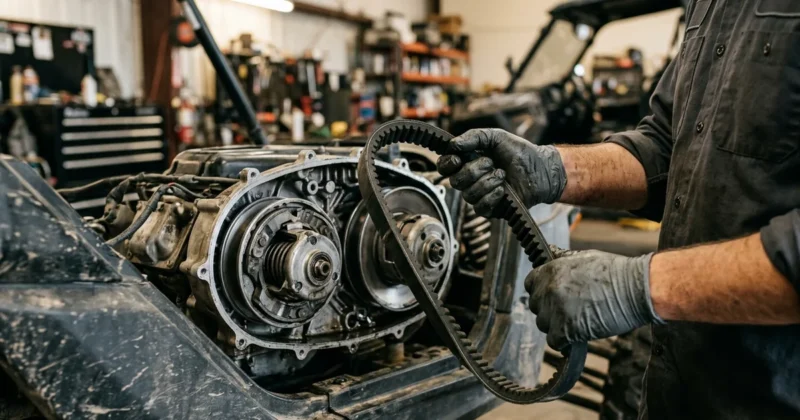
    Breaking in a new drive belt for your Can-Am X3 side by side utv is crucial if you want to get the best performance and longest life out of it. You can also break in any spare belts you have lying around. Trust me, you don’t want to skip this step or you’ll be sorry later.
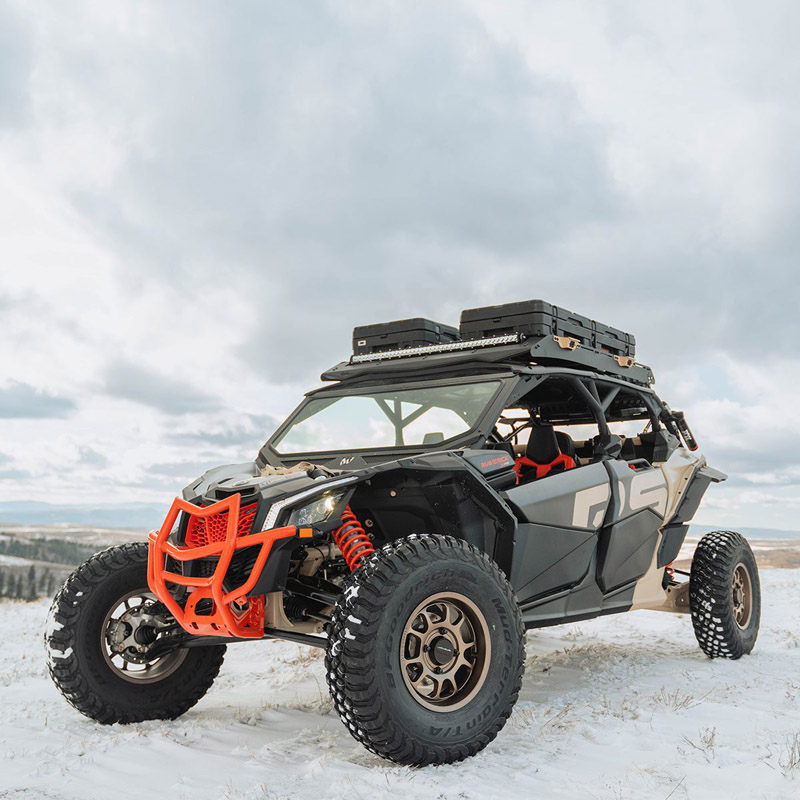
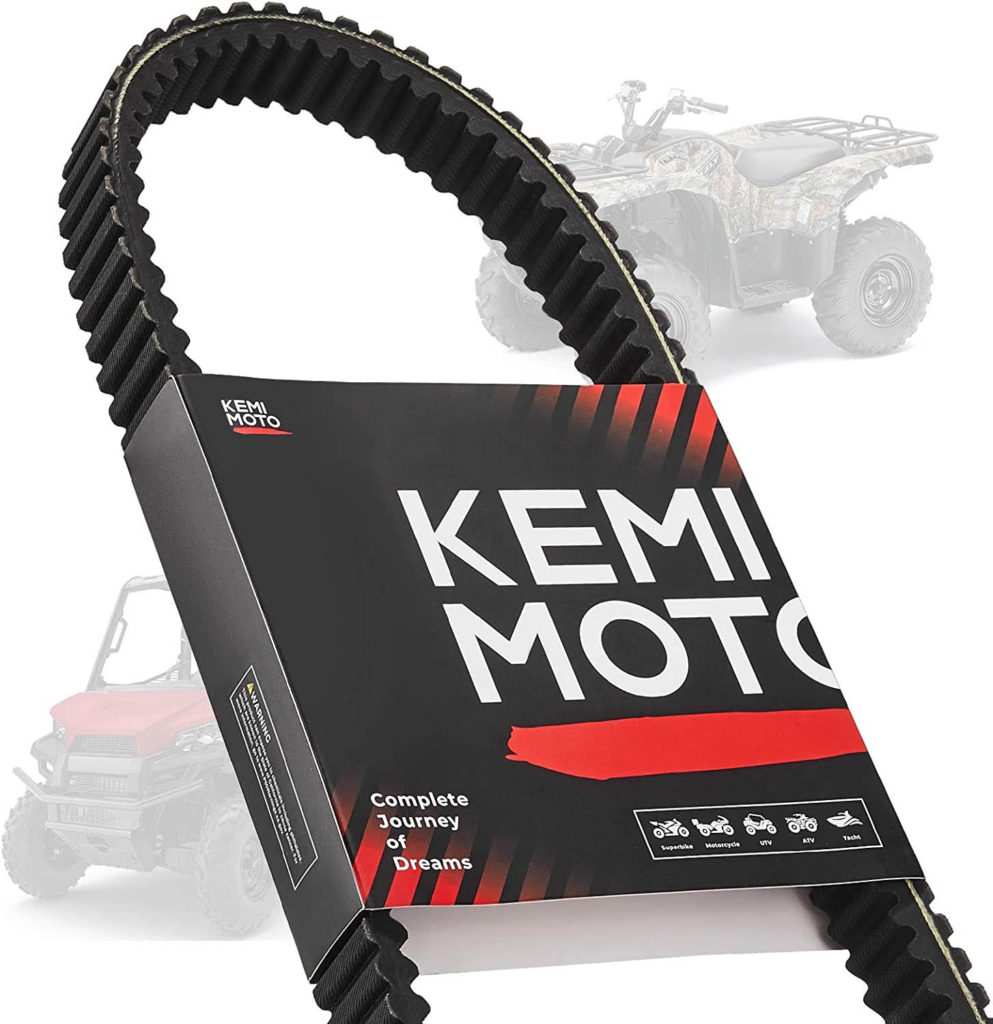
    Can-Am-Maverick-X3-CVT-Belt

    Buy the right belt with our Can-Am UTV drive belt buying guide

    Now, breaking in a belt isn’t just about putting in a set number of miles and avoiding high engine RPMs. It’s about flexing the belt in the correct direction so that it wears and mates to the proper angle of the sheaves and friction. This wear needs to happen under low load and temperature because belts run hotter when first installed and are more sensitive to high loads until they break in.

    So, to break in a belt properly, you need to use low gear (if available) while varying speeds and avoiding wide open throttle for 5 to 10 miles. If no low gear is available, vary at moderate speeds while avoiding wide open throttle for 50 miles. The goal of break-in is to achieve a high number of flex cycles under low load while maintaining low temperatures.

    Now, even with a proper break-in, it’s still possible to damage a belt with excessive heat or spin-burn. Spin-burn or hourglassing is a result of not using low gear when tires are stuck in mud or sand or when loading or unloading your vehicle. An engine misfire often indicates belt slippage because of spin-burn. So, inspect your belt for hourglassing, jerky or hesitant drive-away or acceleration, loose cords, missing cogs, cracks, abrasions, thin spots or excessive wear. Compare belt measurements with a new drive belt, and replace if necessary.
    Whats-the-best-cvt-belt

    Buy the right belt with our buying guide on finding your Can-Am X3 belt

    If you do need to replace your belt, We recommend the Can-Am OEM UTV drive belts, which are designed and tested specifically for their off-road vehicles. Always clean any debris from the PVT intake and outlet ducts and from the clutch, clutch covers, and engine compartments if a belt fails. Verify the clutch rollers are tight and rolling smoothly and the weights are not notched or loose. Ensure the seal on the clutch cover is in good shape, not twisted or torn, and installed correctly.

    And finally, if you accidentally ingest water into the PVT system, use the following instructions to dry it out before operating:

    1. Position the vehicle on a level surface. Place the transmission in PARK.
    2. Remove the drain plug from the outer clutch cover. Allow the water to drain completely. Reinstall the drain plug.
    3. Start the engine.
    4. Apply varying throttle for 10 to 15 seconds (we suggest 5-6,000 RPM) to expel the moisture and air-dry the belt and clutches. Do not hold the throttle wide open for more than 5 seconds.
    5. Allow the engine RPM to settle to idle speed and then shift the transmission to low range.
    6. Test for belt slippage. If the belt slips, repeat the process. Your vehicle requires service as soon as possible. See your authorized Can-Am Dealer.

    So, there you have it. Take care of your belt and it’ll take care of you. Don’t be a fool and skip the break-in or you’ll be singing the blues later on.

    Related Questions About Can-Am X3 Drive Belts

    Can I Replace a Can-Am Drive Belt Myself?

    Yes, you can it ain’t rocket surgery. You can swap out a Can-Am drive belt yourself. No need to fork over your hard-earned cash to a mechanic. Just grab your tools and get to work.

    How Do I Know My Can-Am X3 CVT Belt Is Worn?

    One of the most common injuries that X3 and riders face is a worn-out drive belt. You check for glassy sides of the belts. Also, sluggish acceleration or jumping suddenly can be a sign of a worn belt

    How Long do Can-Am X3 drive belts last?

    When it comes to the Can-Am X3, one question that always seems to be on people’s minds is just how long that drive belt can hold out. Will it last you for hundreds of miles of trail riding, or is it more likely to give out on you just when you’re starting to hit your stride?

    Why do X3 belts break?

    X3 belt breakage can be attributed to several reasons, including overloading, harsh riding conditions, poor maintenance, or manufacturing defects. Overloading the vehicle or carrying excessive weight can strain the belt, causing it to fail. Similarly, riding in harsh conditions like extreme heat or dust can accelerate belt wear and reduce its lifespan. Lack of maintenance, such as not keeping the belt clean or ignoring signs of wear, can also lead to belt breakage. In rare cases, manufacturing defects may cause premature belt failure.

    What does a failing drive belt sound like?

    X3 belt breakage is a problem that can have several culprits. It could be due to overloading the vehicle with too much weight or putting it through the wringer in harsh riding conditions. Riding in extreme heat or thick clouds of dust can speed up the wear and tear on the belt, causing it to fail sooner. Neglecting to keep the belt clean or ignoring warning signs of wear and tear can also lead to breakage. And, in some rare instances, defects in the manufacturing process may cause the belt to fail before its time.

    How do you break in a new X3 belt?

    If you want to keep that X3 of yours runnin’ smooth and strong, you gotta give that belt the break-in it deserves. Don’t go slammin’ down the pedal and expect everything to work like a charm. No, sir. Take it easy for the first 5 to 10 miles, keep it in low gear if you got it, and vary them speeds. If you ain’t got low gear, take it moderate for 50 miles. And don’t forget, it ain’t just about the miles. Keep them engine RPMs low and steady, and you’ll be good to go.

    Why do my belts keep ripping?

    Why do my Can-Am drive belts keep ripping? Well, it could be due to overloading the vehicle or carrying too much weight, harsh riding conditions such as extreme heat or dust, poor maintenance, or even manufacturing defects. Take good care of your belt and avoid straining it, and you’ll have fewer problems.

    How much does it cost to get a drive belt replaced?

    If you’re handy enough, you can replace your X3 drive belt for less than two hundred bucks. Just grab a new belt for around 150 and some tools, if you don’t already have some, for 30 bucks, and you’re good to go.

    Should you wash a Can-Am CVT belt?

    Washing a new drive belt before installation is a hotly debated topic. But if you insist on giving it a bath, use warm, soapy water and let it air dry before you slap it on.

    Are Can-Am Maverick belts directional?

    New belts don’t give a damn about direction, but used ones sure do. Directional arrows on some belts are just a reminder to put it back on the same way if you ever take it off. To prolong your belt’s life, it’s wise to always run it in the same direction.

    Can you drive with a worn Can-Am drive belt?

    Can you drive with a worn Can-Am drive belt? Well, you can, but it’s like walking around with a ticking time bomb in your pocket. You never know when it’s going to go off and leave you stranded in the middle of nowhere. So, if you value your time and sanity, it’s best to replace that worn belt before it’s too late.

    What happens if you don’t change your Can-Am drive belt?

    Well, friend, if you don’t change your Can-Am drive belt, you’ll eventually find yourself stranded in the middle of nowhere with a busted belt and a sour mood. A worn-out belt can break unexpectedly, leaving you high and dry on the trail or in the field. Not to mention, a damaged belt can cause other issues with your vehicle’s performance, leading to costly repairs down the road. So, don’t be a fool – keep that drive belt fresh and enjoy your ride without any unnecessary headaches.

    Will a broken Can-Am drive belt destroy my engine?

    No, it won’t destroy your engine. The rev limiter will kick in and you may get a light on your dash. Just shut her down and clean out the old drive belt and replace it with a new belt. Disconnect the battery to clear the dash light then reconnect it and get on with your day.

    Can you spray wd40 on X3 belt?

    Don’t do that WD40 is a lubricant and your UTVs drive belt works with friction applied to the belt. A lubricant reduces friction and would defeat the purpose of the belt.

    If you’re shopping for a replacement, this is the belt we point people to for the X3’s CVT.

    Our Pick

    GBoost Worlds Best Belt - CanAm X3, Defender

    GBoost Worlds Best Belt – CanAm X3, Defender

    • Highest shock load rating to date being able to withstand the power of the 400hp machines
    • Latest bottom cog design for greater rotational efficiency at full shift
    • Aramid Fiber cord, versus polyester, wraps over bottom cogs for increased bottom cog strength

    Check current price on Amazon

  • The Ultimate Guide to UTV Side Mirrors With Lights Find The Best UTV Side Mirrors

    The Ultimate Guide to UTV Side Mirrors With Lights Find The Best UTV Side Mirrors

    As an Amazon Associate we earn from qualifying purchases. This post contains affiliate links, and we may earn a commission at no extra cost to you.


    Seizmik Pursuit Night Vision Series UTV Mirrors with lights

    Our Pick

    Seizmik Pursuit Night Vision

    Seizmik Pursuit Night Vision

    • VISION & ILLUMINATION
    • DUAL COLOR MODE
    • BREAKAWAY DURABILITY

    Check current price on Amazon

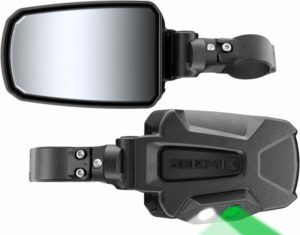
    The Pursuit Series Side View Mirrors with Dual Mode LED Night Vision are designed for various size UTVs, specifically Polaris Pro-Fit and Can-Am Profiled models. These mirrors feature a cast aluminum construction and are equipped with dual-color LEDs for night vision. The green LED mode provides better visual acuity in low light conditions, while the white LED mode offers bright illumination when needed. The mirrors have a convex surface, providing a wide viewing range and image stability. They are made with heavy-duty steel and aluminum and have a low-profile design to minimize interference with other attachments. The mirrors also have shatter-resistant safety glass for maximum safety. These mirrors are compatible with Polaris Pro-Fit and Can-Am Profiled ROPS (rollover protection system).

    The Pursuit Series Side View Mirrors with Dual Mode LED Night Vision has received positive reviews from customers on Amazon. The product has an average rating of 4.8 out of 5 stars. Overall, customers are pleased with the Pursuit Series Side View Mirrors with Dual Mode LED Night Vision. They appreciate the product’s quality, functionality, and ease of installation. Some minor issues, such as missing parts or cosmetic imperfections, were mentioned in a few reviews, but they did not significantly affect the overall positive feedback for the product.


    Lupar UTV Side Mirror w/LED Puddle Lights

    Runner up

    Lupar UTV Side Mirror w/LED Puddle Lights

    Lupar UTV Side Mirror w/LED Puddle Lights

    • LIGHTING COMBINATIONS
    • HIGH POWER LED LIGHTING
    • EXCELLENT VISUAL EFFECTS

    Check current price on Amazon

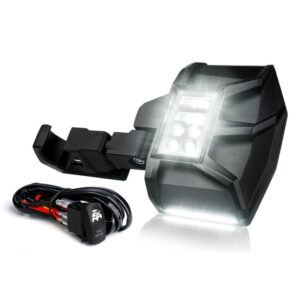
    The Lupar UTV LED Side Mirror with Puddle Light is a high-quality side mirror designed specifically for side-by-side vehicles such as Polaris RZR, Pioneer, Can-Am, Kawasaki Teryx, Yamaha Rhino, and Wolverine and others. It is made of durable aluminum alloy material and features a clear lens with a built-in puddle light. The mirror has a unique appearance and adjustable bracket support, allowing for personalized off-road style.

    One of the standout features of this mirror is its powerful lighting combination. It integrates LED spotlights and puddle lights to provide effective lighting and enhance safety during off-road adventures. The spotlights consist of 64 LED chips, while the puddle lights use COB LED lamp beads. These high-intensity LED chips offer clear visibility and help improve road conditions.

    The mirror is designed with an explosion-proof mirror and a blue anti-dazzle color tone, providing a clear vision effect and effective UV protection. The mirror’s design allows for easy rear visibility and enhances off-road safety.

    The adjustable clamp supports a 1.55″-2″ round roll cage, and the mirror’s bracket design is compatible with most windshields, making it convenient to use.

    The Lupar UTV LED Side Mirror with Puddle Light has received positive reviews from customers. It currently holds a rating of 4.9 out of 5 stars based on 17 global ratings.

    Customers appreciate the mirror’s high-quality construction, with the aluminum alloy material ensuring durability and stability. They find the powerful lighting combination of spotlights and puddle lights to be effective and enhance visibility during nighttime or off-road rides.

    The clear lens and anti-dazzle color tone of the mirror receive positive feedback for providing a clear rear view and protecting against glare. Customers also find the mirror’s unique design appealing and mention that it adds a personalized touch to their side-by-side vehicles.

    The mirror’s easy installation process and compatibility with different vehicle models are praised by customers. They appreciate the included wiring harness and rocker switch, which make the installation convenient.


    Xprite UTV side mirrors with lights

    Also Great

    Xprite UTV side mirrors with lights

    Xprite UTV side mirrors with lights

    • HIGH-QUALITY UTV MIRRORS
    • WATERPROOF & ANTI-GLARE
    • LONG LIGHTING TIME.

    Check current price on Amazon

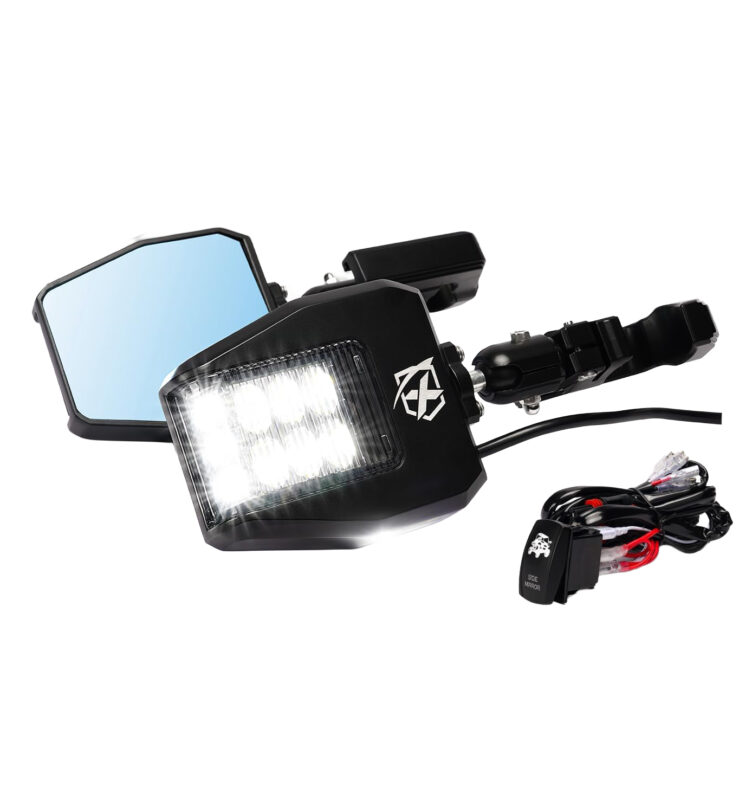
    The Xprite UTV Side View Mirrors are made of aluminium and come with integrated LED spot lights and smoke lenses. They are designed to be compatible with 1.75″-2″ roll cage bars and can be used on various UTV models including Pioneer, Polaris RZR, Can Am X3, Kawasaki Teryx Mule, Yamaha Rhino, and Wolverine and others.

    The mirrors are made with a heavy-duty aluminium alloy housing that can withstand extreme punishment. They feature blue tinted anti-glare lenses that provide a clear high-definition view day and night without distortion. Each side mirror has 9 high-powered LEDs that provide high-intensity illumination to boost visibility on the trail, without blinding other drivers. The package includes a wiring harness and rocker switch for easy installation.

    These side view mirrors are designed to be sturdy and durable, with adjustable C-clamp mounting brackets that are corrosion-resistant. They offer a larger and wider viewing range to improve safety and awareness during off-roading adventures. The mirrors also come with rubber vibration isolators to keep the image clear and prevent sliding. They have position tension adjustment bolts to keep the mirror in place at the desired angle. The adjustable aluminum brackets can fit roll bars with a diameter of 1.75″ to 2″. The design of the mirrors is compatible with most windshields.

    The product has received positive customer reviews, with an average rating of 4.6 out of 5 stars from 1,155 ratings. Customers have praised the quality, brightness of the LED lights, and improved visibility provided by these mirrors. Some customers have also mentioned that the mirrors are easy to install.


    Kemimoto UTV side mirror with lights

    Also Great

    HAMPTON PROD Keeper – 2″ x 16′ Heavy Duty

    HAMPTON PROD Keeper – 2″ x 16′ Heavy Duty

    • Unique Three Lights
    • Breakaway Feature
    • Compatible with Windshield

    Check current price on Amazon

    The Kemimoto UTV Side Mirrors are aluminum rearview mirrors designed to fit 1.5″-2″ round roll bars on various UTV models, including Can Am Maverick X3, Polaris RZR, Talon, Pioneer, and Kawasaki Teryx. These mirrors feature LED lights that provide enhanced visibility at night and reduce blind spots for added safety. They are made of durable and corrosion-resistant aluminum alloy, designed to withstand off-road conditions. The installation is easy, and the mirrors have a breakaway feature that protects them when hitting obstacles and allows for multiple rearview angles through horizontal and vertical rotation. The UTV mirrors are compatible with different roll bar sizes and come with all the necessary components for installation.

    The product has received an average rating of 4.5 out of 5 stars from 53 customer reviews. Customers have praised the brightness of the LED lights and the ease of installation, with one reviewer mentioning that the entire process, including electrical wiring, took about 30 minutes. The mirrors are also appreciated for their durability and resistance to off-road conditions. However, there was one complaint about the lights malfunctioning after less than 24 hours of use. The product has been well-received, with customers mentioning that it provides better visibility and adds a safety feature to their UTVs.


    The Importance of UTV Mirrors

    Mirrors are a crucial part of any vehicle, including UTVs. They provide a clear view of the surroundings, helping drivers navigate safely. UTV mirrors come in various types, including side mirrors, rearview mirrors, and UTV side view mirrors. Each serves a unique purpose and contributes to a safer and more comfortable ride.

    Side Mirrors: Enhancing Peripheral Vision

    UTV side mirrors are designed to offer a broad field of view, allowing drivers to see what’s happening on either side of the vehicle. They are particularly useful when navigating tight paths or when cornering and drifting. The best UTV side mirrors are adjustable, offering versatility in viewing angles and ensuring optimal visibility regardless of the terrain or weather conditions.

    Light Up Your Path with UTV Mirrors with Lights

    One of the latest advancements in UTV mirror technology is the integration of lights. UTV mirrors with lights, particularly LEDs, provide additional illumination, enhancing visibility during night rides or in low-light conditions. These mirrors feature built-in LED lights that serve as auxiliary running lights, spotlights, or even turn signals.

    LED Lights: Better Visibility After Dark

    LED lights in UTV mirrors serve multiple purposes. They can be used as turn signals, enhancing the vehicle’s visibility to other riders, especially in low-light conditions. Some UTV mirrors also feature high-intensity COB (Chip On Board) LEDs, providing a wide beam of light that illuminates the path ahead, making night rides safer and more enjoyable.

    Green Cree LED Chips: Preserving Night Vision

    Some advanced UTV mirrors come equipped with white and green Cree LED chips. The green light is used for preserving night vision, providing more visual acuity and better differentiation between colors at low-light levels. This feature greatly enhances night vision and night driving ability, making these mirrors valuable to any UTV.

    Mounting Your UTV Mirrors: A Secure Fit

    Mounting your UTV mirrors securely is crucial for optimal performance. Most mirrors come with mounting clamps that ensure a secure fit on the roll bar of your UTV. Whether you’re driving a Polaris RZR, a Honda Pioneer, or a Can-Am Maverick, there’s a UTV mirror with a mount that fits your vehicle’s roll bar perfectly.

    Best UTV Mirrors for Every Vehicle

    Whether you’re driving a Polaris Ranger, a Kawasaki Teryx, or a John Deere Gator, there’s a UTV mirror designed to fit your vehicle. Manufacturers like Seizmik, Kolpin, and Rigid Reflect offer a wide range of UTV mirrors designed to fit different models, ensuring that every rider can find the perfect mirror for their vehicle.

    A Commitment to Quality: The Unlimited Lifetime Warranty

    When choosing UTV mirrors, it’s essential to consider the warranty offered by the manufacturer. Some companies, like Seizmik, sometimes offer an unlimited lifetime warranty on their aluminum mirrors, covering any defects or damages. This commitment to quality ensures that you’re investing in a durable, high-quality product that will stand the test of time.

    UTV Mirrors with LED Turn Signals: Safety Meets Style

    UTV mirrors with LED turn signals are a fantastic innovation in the world of UTV accessories. These mirrors not only increase visibility but also add a stylish element to your vehicle. The built-in amber LEDs can be used as turn signals, enhancing safety by making your vehicle more visible to other riders.

    The RZR Experience: UTV Mirrors for Polaris RZR

    Polaris RZR is one of the most popular UTV models, and there’s a wide range of UTV mirrors designed specifically for this model. Whether you’re looking for side mirrors, rear view mirrors, or mirrors with lights, you’ll find a variety of options that are compatible with the Polaris RZR.

    The Right Mirror Makes a Difference

    Choosing the right UTV mirror can significantly enhance your off-road experience. Whether it’s a side view mirror with a wide field of view, a rear view mirror that keeps you aware of what’s behind, or a mirror with built-in LEDs for better visibility, the right mirror can make a world of difference. So, take your time, explore the options, and choose a mirror that best fits your needs and your vehicle. Remember, safety should always be your top priority, and the right UTV mirror can go a long way in ensuring that. Happy riding!

    Don’t forget to check our recommended guides of great gear.

    What is the Best UTV Gun Rack?

    What are the Best UTV Rock Crawling tires?

    What are the best UTV cleaning products?

    What’s the best UTV tie-down strap?

    What are the best UTV Rock Lights?

    What are the best off-road air compressors?

  • How Crucial is the Seat Belt in a UTV?

    How Crucial is the Seat Belt in a UTV?

    Critical. Not optional, not a nice-to-have, critical. A UTV has no doors, no airbags, and a much higher rollover risk than a car, so the harness is doing more work than a seat belt ever has to do in a sedan. It’s the difference between staying inside the vehicle during a rollover or getting thrown from it, and getting thrown is where the serious injuries happen.

    Why a UTV harness works differently than a car seat belt

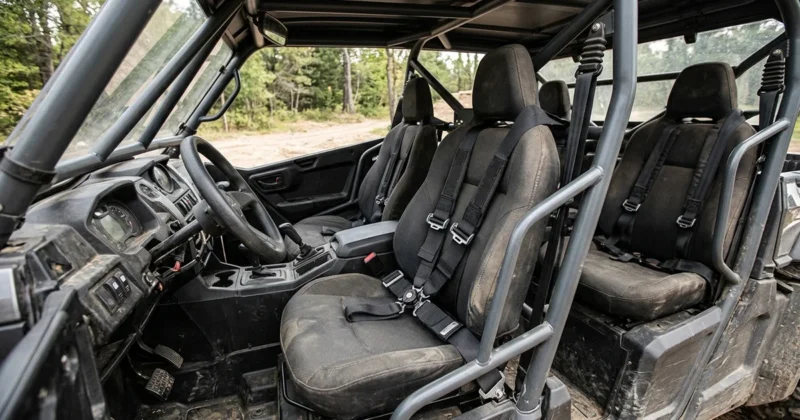
    Most UTVs come stock with a 3-point belt similar to a car’s, and a lot of owners upgrade to a 4-point harness. A 4-point harness holds the rider at both shoulders and both hips, so the load of a sudden stop or a rollover gets spread across four anchor points instead of the two a standard car belt uses. That matters because a UTV’s open frame means there’s nothing else keeping an occupant inside the vehicle if it tips. The harness is the entire restraint system, not a backup to a door and a roof.

    Fit matters as much as the harness itself

    A harness that’s loose or worn wrong does almost nothing. Straps should sit flat against the body, not twisted. The lap portion needs to sit low, across the hips, not up over the stomach. Shoulder straps should sit at or just below shoulder height. If you’re running a child in a car seat or booster inside the UTV, that seat has its own harness requirements on top of the vehicle’s, see our guide on installing a car seat in a UTV for that setup specifically.

    The rollover scenario is the real reason this matters

    UTVs roll. It’s not a rare edge case, it’s a known risk of the vehicle type given the higher center of gravity and the terrain they’re built for. When it happens, an occupant who’s properly harnessed in stays inside the roll cage, which is built to protect the space around them. An occupant who isn’t harnessed, or is harnessed loosely, can end up with a hand or arm outside that protected space, which is how a lot of UTV rollover injuries actually happen. We cover exactly what to do if it happens to you in what to do in a UTV rollover.

    The rule

    Everyone harnessed, every ride, no exceptions for a short trip around the property. The harness only works if it’s on and it’s on correctly before you start moving.

  • How to Securely Install a Car Seat in a UTV?

    How to Securely Install a Car Seat in a UTV?

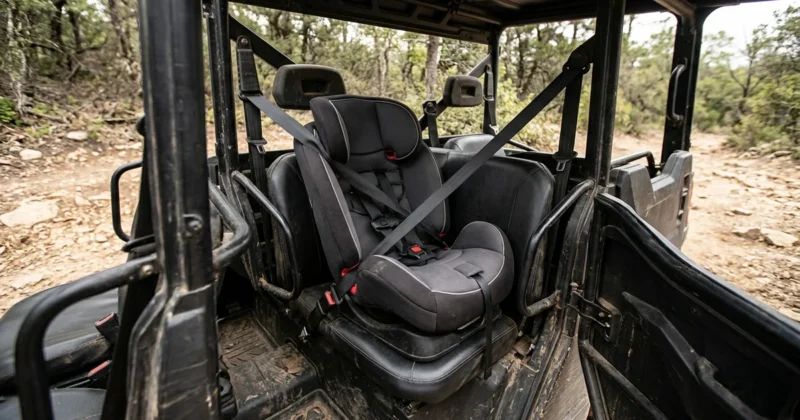
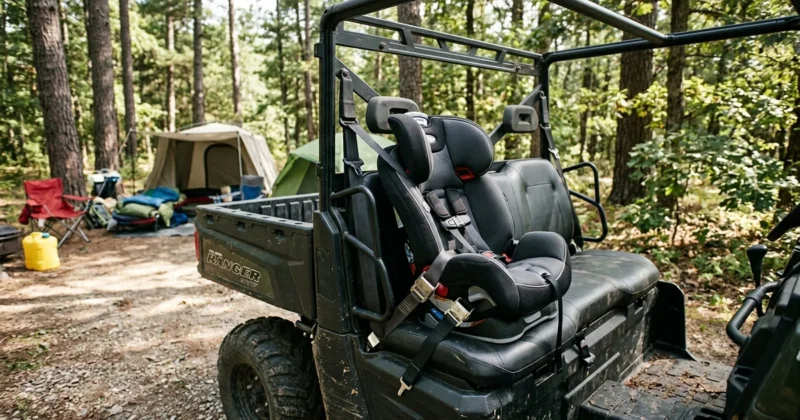
    Installing a car seat in a UTV takes more care than a standard vehicle, mainly because UTVs weren’t originally built with child seats in mind. The seats, anchor points, and harness geometry are all different from a car. Here’s how to do it right.

    1. Check both manuals first

    Read your UTV owner’s manual and the car seat manufacturer’s manual before you install anything. Some car seat makers explicitly list which vehicle types they’re rated for, and some UTV models have factory guidance on child seat use. Don’t assume compatibility just because the seat physically fits.

    2. Pick the right seat for the child’s age and size

    Rear-facing seats for infants and forward-facing seats for older children have different installation requirements. Choose based on the child’s actual weight and height, not just their age, since that’s what the seat’s own safety rating is based on.

    3. Find a stable, secure spot

    The car seat needs to sit somewhere in the UTV that won’t shift during rough terrain. Avoid spots near loose cargo or anything that could shift into the seat on a hard bump.

    4. Secure it using the harness or seat belt, and test it

    Route the UTV’s harness or seat belt through the car seat exactly as its manual instructs. Once it’s in, grab the base and try to move it side to side and front to back. It shouldn’t shift more than an inch in any direction at the belt path. If it moves more than that, redo the install, it’s not tight enough yet.

    5. Check the harness fit on the child

    Shoulder straps should sit at or just below the child’s shoulders. The chest clip should sit at armpit level, not lower on the stomach. Both matter for keeping the child properly positioned if the ride gets rough.

    Once the seat’s installed, it’s worth understanding how the UTV’s harness fits into the whole picture, and if you’re still deciding whether this is a good idea at all, see our broader guide on putting a car seat in a UTV.

  • Keep the Kids Safe with a Car Seat in Your UTV

    Keep the Kids Safe with a Car Seat in Your UTV

    It is indeed possible and crucial to place a car seat in a side-by-side UTV when young ones are joining in on off-road adventures. It’s essential to ensure that the little ones are securely restrained and safe while enjoying the ride.

    As an Amazon Associate we earn from qualifying purchases. This post contains affiliate links, and we may earn a commission at no extra cost to you.

    I’ve learned that it’s not just about installing a car seat; it’s about considering the unique aspects of UTVs and adapting safety measures to ensure the utmost safety.

    A Unique Perspective

    While many articles focus on the hardware aspects of UTV safety, let’s not forget the emotional comfort of our kids. A familiar toy or blanket can make a world of difference in making them feel safe and sound in a new environment like a UTV.

    UTV Bump Seats

    [affiliatable id=’185811′]

    [affiliatable id=’185809′]

    UTV Mini Bucket Seats

    [affiliatable id=’185815′]

    [affiliatable id=’185817′]

    UTV bench seats

    Now for the more expensive option but it is the nicest look for your UTV, the bench seat. Now this is going to require a lot more work to install than a typical car seat. But if you are like me you like modding your UTV and getting your hands dirty.

    [affiliatable id=’185939′]

    Many states require UTV youth helmets for children under the age of 18

    [affiliatable id=’185819′]

    Don’t forget the grab bar

    Give those tiny hands a sense of security and steadiness with the installation of grab bars. Adding one to your vehicle is simple, convenient, and requires only minimal effort. With an aftermarket grab bar in place, toddlers can feel more relaxed as they explore trails ahead – there’s no stopping them!

    grab bar UTV Gear, Tips & Tricks

    Kemimoto Grab Bar (Check price on my Amazon affiliate link)

    Keep your kids neck safe in a side by side

    If not secured correctly, riding on uneven ground can be detrimental to the necks of young riders. Neck collars are perfect for supporting your little ones head and neck.

    Also When selecting a reliable UTV booster seat for your child, the most essential element to consider is whether or not it matches their age and size. Booster seats are specifically designed for those youngsters who are too large for an ordinary car seat but still too small to use a standard-sized safety belt without additional help. Accordingly, selecting the correct booster seat for your child’s age and size is a must. Verifying that the booster seat is compatible with your UTV’s seating system and restraint protocols as well as ensuring proper installation based on manufacturer guidelines are also essential steps to take before you go out for a drive. When selecting a booster seat for your UTV, the most critical aspect to consider is whether or not it is suitable for the age and size of the child who will be using it. Designing with these two characteristics in mind can ensure that you make the best decision possible when purchasing a seat.

    What Kind of Booster Seat is Suitable for a UTV?

    Booster seats are essential for children under 8 years old. In most states, it’s illegal for a child to ride in a UTV without a booster seat. I’ve found that seats designed specifically for UTVs, like the ones available for Polaris or Can-Am UTVs, offer a better experience than trying to adapt a regular seat.

    Is a Helmet Necessary?

    Absolutely, helmets are non-negotiable. In fact, in many states in the US, it’s required by law for riders under the age of 18 to wear helmets. I always make sure my kids wear full-face off-road helmets that are strong enough to support their head from bouncing and straining their neck.

    What About Harnesses?

    A 4-point harness is far more secure than a regular seat belt and is one of the best ways to keep your kids safe in their seat. Aftermarket harnesses are available that are specially designed for young ones, and they’re well worth the upgrade.

    Why is a Seat Belt Not Enough?

    A seat belt might seem sufficient, but it’s not designed to keep a small child safe in an off-road vehicle like a UTV. A harness is much more secure and prevents your child’s head from bobbling around, especially when you’re navigating through rough terrains in your Polaris Ranger or Can-Am UTV.

    What About Other Safety Gear?

    Safety gear like goggles and handholds are also crucial. The saying goes, “It’s better to have it and not need it than to need it and not have it.” So, make sure your UTV child is equipped with all the necessary safety accessories like air pumper systems.

    Using a Booster Seat: Is it Different in a UTV?

    Yes, using a booster seat in a UTV is different than in a car or truck. UTVs are off-road vehicles, and the seats and booster seats need to be compatible with the UTV’s roll cage and other structural elements to ensure child safety.

    What are the Legal Requirements?

    Always check your local laws before heading out. Legal requirements can vary from state to state, and you don’t want to find yourself on the wrong side of the law. For instance, some states require all riders under the age of 18 to wear helmets.

    Conclusion

    Keeping your little ones safe while enjoying a ride in a UTV involves more than just strapping them into a car seat. From booster seats and helmets to harnesses and other safety gear, proper preparation is key. And remember, safety starts with you—so lead by example and make sure you’re also equipped with the proper safety gear. Before you buckle in, make sure you understand how crucial the seat belt is in a UTV and how to securely install a car seat in a UTV. Happy trails!


    Driving or riding in a UTV is risky by nature, and we cannot be held responsible for any injuries or accidents caused as a result of our writing. Please note that this information should only be used for entertainment purposes.

  • How Often Should I Service My UTV?

    How Often Should I Service My UTV?

    You should service your UTV at the beginning of each riding season. Be sure to check your fluids, air filter, lubrication, and brakes regularly

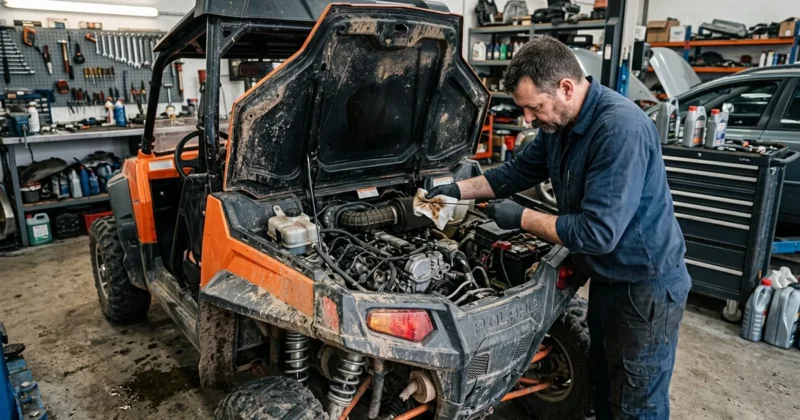
    Maintenance is often overlooked on a UTV, which can lead to some bigger problems in the future and put a pretty big dent in the old wallet. So preventative maintenance is key, especially when it comes to keeping your vehicle in good shape and helping you to avoid costly repairs down the road.

    As an Amazon Associate we earn from qualifying purchases. This post contains affiliate links, and we may earn a commission at no extra cost to you.

    Check out Rocky Mountain ATV

    paraphrased transcript below

    I’ll be covering with you my top five UTV maintenance tips to help you protect your investment and keep your vehicle ready to rock for the trails to come. Now, a lot of these same serviceable items that are found on this machine can be found on a lot of the other UTVs that are out there. So here are my top five UTV maintenance tips.

    Should I Grease my UTV Joints?

    My first tip is greasing your zerks. Yes, you heard me right. I said zerks. And you’re probably wondering what the heck that is. Well, it’s a grease fitting that’s attached to a pivot point on your vehicle that usually experiences a lot of movement and friction. So you want to locate the grease zerks on joints and fittings and lubricate them with your manufacturer’s recommended lubricating grease.

    Should I grease my UTV joints UTV Gear, Tips & Tricks
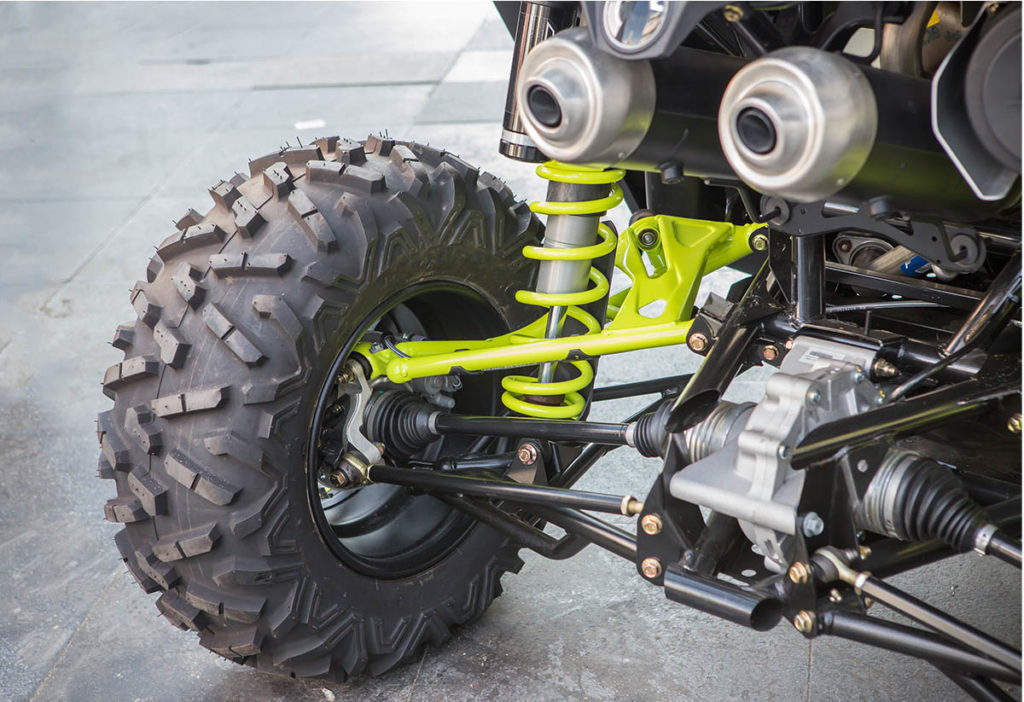
    Selective focus wheel and shock absorber of Buggy car

    Should I grease my UTV joints? Yes you should grease your UTV joints.  Keeping these joints and fittings lubricated will help you to eliminate friction and excessive wear on these items. The grease works are usually located at the front of the vehicle, around the A-arms, and at the sway bar, if you have one.  At the rear of the vehicle they are located around the rear sway bar and the drive line connections.

    They can be found in various other locations. And if you need help locating those, be sure to reference your service manual for that specific information. So while you’re going through hitting all of your grease fitting locations, there are some other high-wear items that you want to inspect, which would include your ball joints, bushings and bearings.  Once these parts wear out, they’re definitely going to affect your machine.  So while you’re giving it a good once over, be sure to give these parts an inspection and add proper lubrication to each area as needed.

    How often do I change my UTV air filter UTV Gear, Tips & Tricks

    How often do I change my UTV Air Filter?

    Change your UTV air filter after about 50 hours of use, but if you ride in especially sandy or muddy conditions, then you should check it more often. 

    This tip seems like a no-brainer, but it’s something that I see get overlooked way too often, and that’s the air filter. So if you’ve got a serviceable one, that’s a fabric like a K&N you’ll want to clean it. Or if you have a paper type that’s an OEM or aftermarket, you’ll want to change it out regularly.

    UTV Air FIlter UTV Gear, Tips & Tricks

    Shop UTV Air Filters (affiliate link)

    The air filter is what cleans the air that is fed to your engine. So you want to keep that air clean. So keeping up on your vehicle’s air filter maintenance is key, especially if you want to keep it in good shape

    There are many aftermarket products that will help to extend the life of your air filter, and one of those products that I like to use are the outerwears pre-filter. The outerwear pre-filter makes a great addition to an aftermarket or stock filter that really helps to filter out the fine particles and dirt, especially if you like to ride at the sand dunes.  There are plenty of options for pre-filters or for replacement filters and intake accessories, so be sure to check those out. 

    Outerwears pre filter UTV Gear, Tips & Tricks

    Our Pick

    Outerwears Prefilter

    Outerwears Prefilter

    • Horsepower levels are maintained longer due to cleaner primary filter
    • Protects engine and air filters against dirt and debris
    • Outerwears pre-filters are washable and reusable

    Check current price on Amazon

    How often should I change my UTV Oil?

    You should change the oil in your UTV every 100 hours or 1000-1500 miles.  This will kep your side by side in top condition.  The engine oil is like the lifeblood of your engine. So before each major ride, you definitely want to give the final engine oil level a check. Making sure there is not too much engine oil or too little engine?

    All can definitely cause some problems for you. Changing how the engine oil and the engine oil filter is a good thing to do that will help you to keep your engine in good shape and so that you can get the most out of it.  If you’re out there racing your machine or subjecting it to some really extreme riding conditions, you may want to change out that engine oil a little more often than the manufacturers recommend.  UTV oil change kits are an easy option for the DIY guy they’ll come with all the oil that you’ll need. The oil filter, crush washers and O-rings. 

    UTV Oil Change Kit UTV Gear, Tips & Tricks

    Shop UTV Oil Change Kits (affiliate link)

    It’s good to keep an eye on the level and condition of Other fluids like engine coolant, because it keeps your machine running cool. Now, when it comes to servicing it, most manufacturers recommend that you change out the coolant once every five years.  Now, depending on how hard you run your vehicle, you may want to change out the coolant more often. Some people change it up once every year, once every 2 to 3 years, or they just follow the vehicle manufacturers recommendation and change it out once every five. 

    When it comes to transmission and gear case oils, they’re not changed out nearly as often as the engine oil, but they are just as important to service.  Now, it’s always good to follow the vehicle manufacturer recommendations as to how often you should be changing them. But again, if you’re subjecting your vehicle to some really harsh conditions, it’s always good to keep up on the maintenance of these fluids. And remember, it’s a lot cheaper to replace the engine, oil transmission, oil, coolant and other fluids than it is to replace the engine transmission or gear case.

    How often do I change my UTV drive belt 1 UTV Gear, Tips & Tricks

    How often do I change my UTV drive belt?

    So the next item on my list is the drive belt. Now, the drive belt is what transfers the power that’s made from your engine through your clutches to your transmission. Now, keeping up on the inspection and condition of your drive belt, along with knowing how to properly operate your vehicle, will help you to get many enjoyable miles out of your machine.

    UTV Drive belts UTV Gear, Tips & Tricks

    Shop UTV Drive Belts (affiliate link)

    When it comes to inspecting your drive belt, you want to be looking for excessive signs of wear, which would include glazing cracks or brakes, missing car, flat spots or any signs of abrasion. Along with the inspection of the belt, you’ll want to check and inspect your inlet and outlet ducts to make sure that they’re clean and clear of any obstructions.

    How often service UTV

    While you’re in there, take some compressed air, clean off the pre-filter that provides that cool air, as well as blow off the clutch sheaves to remove any fine dust, dirt and particles. The drive belt and the CVT clutches experience a lot of wear, so it’s good to keep an eye on them and give them a good inspection.  The wear items that are inside of the clutch as well as the belt you’ll definitely want to keep an eye on because if they go bad, they can really cause you some problems down the road. Now, if you need help with inspecting your clutch, be sure to see our video on how to do just that.

    How Often Do I Change UTV Brakes?

    You should replace your brakes when you’re down to about an eighth of an inch of pad left, you’re going to want to replace your UTV brakes.  When inspecting your brake pads, once you’re down to about an eight inch of pad left, you’re going to want to look into replacing those sooner rather than later. It’s really fun to be able to go fast, but it’s even more terrifying if you can’t stop now when it comes to inspecting them. There’s a few things that you want to check. You want to check your brake pad thickness, the routing of your lines, as well as the quality and level of your brake fluid.  You’ll also want to double check the rotor. If your rotors start to get grooved, you might want to be replacing that along with the brake pads.  

    UTV Brakes UTV Gear, Tips & Tricks

    The Best UTV Brake Deals (affiliate link)

    When it comes to the routing of the brake hose, you want to inspect its routing and make sure that the hose itself isn’t experiencing any excessive wear or getting any holes in it. That would be really bad. Now, if you have any loose brake lines, you’ll want to make sure to get those nice tight and secured to the frame or inappropriate location and keep them away from any sharp edges or objects. 

    Now for your brake fluid, most manufacturers recommend that you replace it every two years, but when it comes to your vehicle, you want to make sure and double check with the manufacturer’s recommendations.

    Conclusion

    Every manufacturer recommends services specific to their vehicles. You should always follow the manufacturer’s recommendations, but a good general rule of thumb is to service your vehicle once a year or every 500 hours. If you’re the type who likes to do everything on your own, or you don’t have access to a technician and want to save some money, then you can service your UTV yourself.

  • The Ultimate Guide to Buying a Used UTV for Beginners

    The Ultimate Guide to Buying a Used UTV for Beginners

    As an Amazon Associate we earn from qualifying purchases. This post contains affiliate links, and we may earn a commission at no extra cost to you.

    The Ultimate Guide to Buying a Used UTV for Beginners

    Have you ever considered purchasing a pre-owned UTV, but didn’t know where to begin? If so, this guide is for you! We will discuss everything from what factors to consider when buying used Side by Sides and how to get the best deal. By the conclusion of this brief yet guide, preparing yourself for your next off-roading vehicle purchase has never been easier – you’ll be an authority in buying used UTVs!

    Decide what you need a UTV for

    Before purchasing a secondhand UTV, take the time to evaluate what you plan on using it for. If your purpose is simply recreational riding and touring, there’s no need to invest in a vehicle that has advanced characteristics. On the other hand, if you’re intending to use it while on hunting or fishing trips then make sure that your chosen model comprises all the components needed during such expeditions.

    UTV Light Kit

    Our Pick

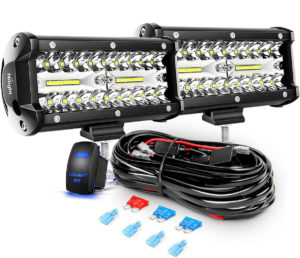
    Nilight 6.5Inch 2PCS 120W Spot & Flood Combo Bar Driving Waterproof Led Work Light Triple Rows with 5 Pin Rocker Switch Power 16AWG Wiring Harness Kit-2 Leads for Off-Road Truck , 2 Years Warranty

    Nilight 6.5Inch 2PCS 120W Spot & Flood Combo Bar Driving Waterproof Led Work Light Triple Rows with 5 Pin Rocker Switch Power 16AWG Wiring Harness Kit-2 Leads for Off-Road Truck , 2 Years Warranty

    • Brightness: Powerful 120 watts LED light bar, high-quality Led chips and clear PC lens, this LED pod emits 600
    • Combo beam: Appropriate combination of spot beam and flood beam for wide spread and further distance illuminat
    • Waterproof rate: IP67 rate, smooth protective housing with waterproof glue, great performance of waterproof,

    Check current price on Amazon

    Do your research

    Prior to hitting the “buy now” button on a pre-owned UTV, ensure that you have completed your due diligence. Prioritize the following criteria when making this important decision:

    • Take a close look at the previously used UTV to make sure it is in top condition. Ensure that there are no visible signs of deterioration, and verify that its frame isn’t rusted or punctured.
    • Before you purchase, it is important to be mindful of which manufacturers offer warranties for their machines. As some do not provide this coverage, ensure that your desired item does come with a warranty before placing any bids!
    • If you plan on riding with your family, investing in a larger UTV is essential. Although it may cost more than the smaller machines that have fewer riders, making this purchase will ultimately prove worthwhile for those times when all of you ride together!

    Upgraded Features: When searching for the perfect UTV, ensure it comes with all of your desired accessories or ask about their cost to add on. Many models come ready with lights and other desirable features, but if not included you can easily buy them from the seller at an extra fee.

    Consider your budget

    As you search for a used side by side, budgeting is key! Not every model suits your wallet, so look over reviews and compare prices. Afterwards, when you know exactly what type of UTV you want to purchase, visit Craigslist or eBay for an outstanding bargain on a quality pre-owned vehicle.

    UTV Buying Guide

    Pay attention to the condition of the vehicle

    Check for engine issues

    Before you make the purchase of a pre-owned UTV, it is essential that you take the time to investigate and consider various factors which could affect its worth. Here are some important points to remember:

    • If you are considering acquiring a pre-owned UTV, the status of its individual parts should be one of your primary considerations. A damaged engine or faulty components can drastically reduce its value, so it’s important to inspect every aspect before making a purchase.
    • Engine issues can be a major red flag, and it pays to inspect your engine thoroughly. While some signs of an issue may appear immediately (think smoke billowing out the exhaust or subpar performance), many don’t show up until later down the line. Taking time to look over any possible problems before you invest will help ensure that you are getting your money’s worth in the long run.

    Check the suspension and steering components

    When searching for a pre-owned UTV, it’s essential to inspect the vehicle thoroughly. Make sure to identify any potential dings and scratches on the exterior, check if there is stiffness in tires or bearings, and take note of any rust around screws or bolts. Pay attention to sounds originating from within the vehicle as well as strange smells; if you find indications of damage regarding suspension or steering components – without fail locate another option!

    UTV Buyers Guide

    Take it for a test drive

    What to Look for When Test Driving a Used UTV

    When investing in a pre-owned UTV, it is essential to be mindful of the following considerations:

    1. Roll cage and frame
    2. Suspension and steering components
    3. Engine and transmission functions
    4. Braking systems
    5. Storage capacity. 

    Make sure to carefully assess factors like seating space, weather-proofing features, and entertainment choices. If you can’t find the details you need on the UTV itself or in its documentation, reach out to your relatives or friends who have recently rented or purchased a similar vehicle for their own use.

    Buying a side by side

    Tips for Test Driving a Used UTV

    Before committing to a purchase of your used UTV, make sure you take it on a test drive. To ensure the ride is as effortless and comfortable as possible, here are some tips:

    1. Make sure the tires are properly inflated. A tired suspension will show in poor handling and could lead to a dangerous crash.
    2. Check for loose or damaged components before taking the vehicle out on the open road. A ripped seat might not seem like a big deal, but if it causes instability during turns or higher speeds, it can be downright dangerous.
    3. Be familiar with the controls before hitting the trails or open roads – even veteran drivers should review basic operations in advance! Knowing exactly where your levers and buttons are can make for a more pleasurable ride.

    If you’re a beginner at operating a UTV, ensure that an experienced individual accompanies you while taking the vehicle out for a spin. Knowledgeable drivers are aware of how to adjust their driving on trails and roads to stay in control – plus they won’t panic if they can no longer spot you! An extra pair of eyes will be beneficial as you become accustomed to driving your new ride.

    Making the Most of Your Test Drive

    Before making an offer on a pre-owned UTV, be sure to take it for a spin first. This is the only way you can guarantee that the vehicle meets your requirements and is free from any potential repair costs. Also, if you chiefly have eyes for a particular make or model year of UTVs, taking one out for testing will give you greater insight into what to expect in terms of price point and overall condition when shopping around.

    One more thing beginners forget: once you’ve bought it, you still have to get it home. Unless the seller delivers, you’ll want real tie-downs on hand before you tow it off on a trailer.

    Our Pick

    Pro Taper 1.5" Tie Downs (Black)

    Pro Taper 1.5" Tie Downs (Black)

    • One pair of Pro Taper Tie Downs: Patent-pending swivel carabineer base hook.

    Check current price on Amazon

    Have a mechanic check it out

    Looking to purchase a pre-owned UTV? Before you commit, make sure it’s been inspected by an experienced mechanic. While buying used can be an economical solution, you should always research the vehicle and ensure that it is in optimal condition. After all, your safety comes first! If possible, securing a warranty as well would provide extra security for any unforeseen issues down the road – making your investment even more worthwhile. Once you’ve settled on a model, our breakdowns of whether side-by-sides are worth it and how much a Polaris side-by-side weighs can help you compare options.

  • The Best RZR 1000 Drive Belt For Durability and Performance

    The Best RZR 1000 Drive Belt For Durability and Performance

    As an Amazon Associate we earn from qualifying purchases. This post contains affiliate links, and we may earn a commission at no extra cost to you.

    As an avid off-roader, I’ve faced my fair share of mechanical challenges, but none as persistent as finding the right belt for my Polaris RZR 1000. I always want the strongest longest lasting belt.  After numerous rides and a few disappointing breaks, I start a quest to find the best belt that could withstand the rigors of the trail and the fury of the turbo.

    OEM Polaris: The Original Standard

    Initially, I stuck with OEM Polaris belts, believing that sticking to the original equipment manufacturer was the safest bet. However, I soon realized that while OEM belts are reliable, they might not always offer the best performance for specific conditions like heavy-duty trails or turbo-charged adventures.

    Trail Riding: Putting Belts to the Ultimate Test

    Trail riding is where I put these belts to the test. The varied terrain, from rocky paths to sandy stretches, means the belt must be useful. It’s here that I found the Hunterworks belts to be the strongest belts, with their quality rubber compound and better heat resistance.

    Turbo: When the Heat is On

    Our Pick

    Hunterworks CVT Drive Belt for 2014-2023 Polaris RZR XP 1000 (All Models) XP4, HL, Trail, Sport, Ultimate, Premium

    Hunterworks CVT Drive Belt for 2014-2023 Polaris RZR XP 1000 (All Models) XP4, HL, Trail, Sport, Ultimate, Premium

    • Fits: 2014-2023 Polaris RZR XP 1000 (All Models) Does NOT Fit 2024. 2024 has new clutch set up (Part Number HW
    • Engineered for Toughness and Strength: Hunterworks drive belts are meticulously engineered for improved belt g
    • Proprietary construction: With the latest and greatest manufacturing process out there, we ensure Hunterworks
    Check current price on Amazon

    Heavy Duty: The Name of the Game

    Over the years, I’ve learned that the right belt for your RZR isn’t just about the brand or the price; it’s about the materials, the design, the manufacturing quality, and flexibility. The belt available for your RZR 1000 needs to be a perfect match for your riding style and your machine’s demands and that is more important than just asking what you can afford.

    Whether you’re gliding over dunes in your RZR 900 or tackling tough terrain in your General XP 1000, the belt you choose is crucial. It’s not just a part of your vehicle; it’s a part of your adventure, a silent promise that your ride will be smooth, your power transfer maximum, and your experiences unforgettable.

    So, when you’re ready to purchase the belt available for your RZR or any other model, remember to consider not just the cost, but the quality, the technology, and the reputation. Choose a belt that’s been through the toughest tests and come out on top, a belt that’s not just a replacement but an upgrade.

    Polaris RZR 1000 Clutching

    The Polaris RZR 1000 isn’t just any off-road vehicle; it’s a powerhouse that demands high-quality components to match its performance. Hunterworks has been testing and developing RZR clutches for decades.  Working to increase grip and maximum power transfer, these belts are designed and manufactured, and built to outlast and outperform.  Hunterworks manufactures both secondary and primary clutch kits with proper break in and maintenance their belts are built to outlast.

    Best Belt: Not Just About Lasting Longer

    In my search for the best belt, I discovered that longevity is just one piece of the puzzle. The ideal belt for the RZR 1000 needs to handle high horsepower tensile load requirements without a hitch. It’s not just about lasting longer; it’s about delivering consistent performance ride after ride.

    Hunterworks Rzr Belt UTV Gear, Tips & Tricks

    Hunterworks RZR 1000 Belt

    • Made in the USA
    • Engineered for toughness and strength
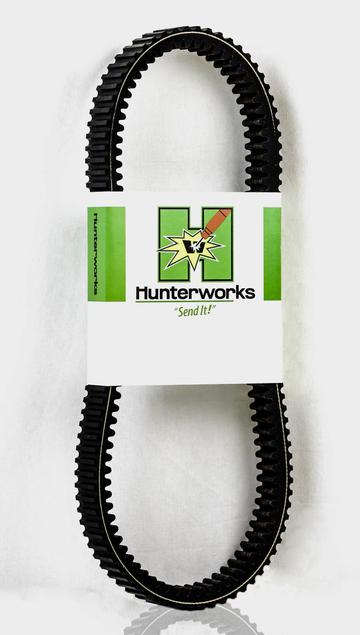
    • Proprietary construction
    • Fits: 2014-2023 Polaris RZR XP 1000 & XP 4 (Highlifter too)
    • 20 Years of Clutching Experience
  • Determining the Direction of a RZR Drive Belt

    Determining the Direction of a RZR Drive Belt

    As an Amazon Associate we earn from qualifying purchases. This post contains affiliate links, and we may earn a commission at no extra cost to you.

    Polaris RZR belts aren’t directional in the sense that they’ll only work installed one way. But once a belt has been running in your CVT for a while, it’s developed a wear pattern that matches the direction it’s been spinning. Flip it around during a reinstall and you’re running the belt backward against its own wear, which shortens its life. Here’s how to actually check.

    Check the label first

    Most RZR belts have lettering or a part number printed on one face. Note which way that text faces before you pull the belt. When you reinstall it (same belt, not a new one), put it back with the label facing the same direction it was in originally. That’s the simplest way to guarantee you’re not reversing a belt that’s already broken in.

    Look at the wear pattern

    If you’ve lost track of orientation, check the edges of the belt. A belt that’s been running a while develops slightly angled wear on the cogs from the direction of rotation. Run your thumb along the edge. If one side feels more rounded or polished than the other, that’s your worn face, and it should sit the same way it was sitting before.

    When it actually matters

    This only matters for a belt you’re reinstalling, not a brand new one. A fresh belt has no wear pattern yet, so orientation is a non-issue, install it either way. It’s specifically the removed-and-reinstalled case (pulling a belt to inspect the clutch, then putting the same one back in) where flipping it can introduce uneven wear faster than if you’d left it alone.

    If you’re not sure, replace it

    If you’ve already lost track of which way a used belt was running, don’t guess. A belt that’s due for inspection is usually close to due for replacement anyway. Check our Best Polaris RZR Belt guide for a fresh one, and see our notes on driving on a worn belt if you’re trying to decide whether yours still has life left.

    If you’re shopping for a replacement, this is the belt we point people to for RZR CVTs.

    Our Pick

    Hunterworks CVT Drive Belt for 2014-2023 Polaris RZR XP 1000 (All Models) XP4, HL, Trail, Sport, Ultimate, Premium

    Hunterworks CVT Drive Belt for 2014-2023 Polaris RZR XP 1000 (All Models) XP4, HL, Trail, Sport, Ultimate, Premium

    • Fits: 2014-2023 Polaris RZR XP 1000 (All Models) Does NOT Fit 2024. 2024 has new clutch set up (Part Number HW
    • Engineered for Toughness and Strength: Hunterworks drive belts are meticulously engineered for improved belt g
    • Proprietary construction: With the latest and greatest manufacturing process out there, we ensure Hunterworks

    Check current price on Amazon

  • Driving on a Worn RZR Belt

    Driving on a Worn RZR Belt

    As an Amazon Associate we earn from qualifying purchases. This post contains affiliate links, and we may earn a commission at no extra cost to you.

    You can drive on a worn Polaris RZR belt right up until you can’t. The belt doesn’t fail gradually and give you a warning window. It runs fine, runs fine, runs fine, then lets go, usually at the worst possible spot on the trail. Whether it’s smart to keep driving on one depends on how worn it actually is, so here’s what to check.

    Signs your belt is past due

    A few things show up before a full failure. Squealing or chirping on acceleration, especially from a cold start. A burning rubber smell after hard use. Visible glazing (a shiny, hardened look on the belt’s sides) or cracking across the ribs. Noticeably less power getting to the wheels, like the engine’s revving higher than it should for the speed you’re going. Any one of these on its own is worth a look. Two or more together means don’t wait.

    What actually happens if it snaps

    You lose drive entirely. Not reduced power, no power. If it happens at speed on a trail, you’re coasting to a stop wherever momentum takes you, which is fine on flat ground and a real problem on a hill climb or side-slope. It’s not usually dangerous, but it is a walk back to the truck or a call for a tow, and a snapped belt can occasionally take some clutch hardware with it on the way out, turning a cheap fix into an expensive one.

    Our take

    If you’re already asking whether you can keep driving on it, you’ve probably already noticed one of the warning signs above. Trust that instinct. A belt costs a lot less than a tow truck, and a lot less than the clutch damage a belt failure can sometimes cause. Replace it before your next real ride, not after it strands you on one.

    Ready to swap it out? Check our Best Polaris RZR Belt guide for a solid replacement, and see replacing your RZR drive belt for the actual swap. If you already know your belt isn’t directional and you’re just reinstalling one, we’ve got that covered too in are Polaris RZR belts directional.

    If you’re shopping for a replacement, this is the belt we point people to for RZR CVTs.

    Our Pick

    Hunterworks CVT Drive Belt for 2014-2023 Polaris RZR XP 1000 (All Models) XP4, HL, Trail, Sport, Ultimate, Premium

    Hunterworks CVT Drive Belt for 2014-2023 Polaris RZR XP 1000 (All Models) XP4, HL, Trail, Sport, Ultimate, Premium

    • Fits: 2014-2023 Polaris RZR XP 1000 (All Models) Does NOT Fit 2024. 2024 has new clutch set up (Part Number HW
    • Engineered for Toughness and Strength: Hunterworks drive belts are meticulously engineered for improved belt g
    • Proprietary construction: With the latest and greatest manufacturing process out there, we ensure Hunterworks

    Check current price on Amazon